REAR AXLE SHAFT > INSTALLATION |
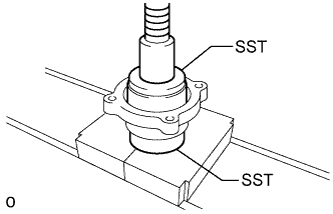
| 1. INSTALL REAR AXLE SHAFT BEARING LH |
|
Using SST and a press, press in a new bearing.
| 2. INSTALL REAR AXLE SHAFT OUTER OIL SEAL |
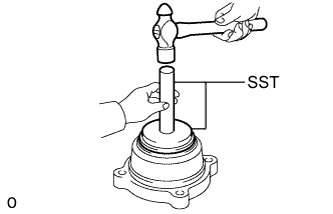 |
Using SST and a hammer, tap in a new oil seal.
| 3. INSTALL REAR AXLE HUB BOLT LH |
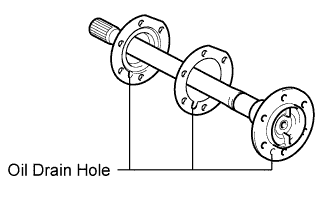 |
Install a new gasket and the deflector to the axle shaft.
Pass 6 new hub bolts through the axle hub.
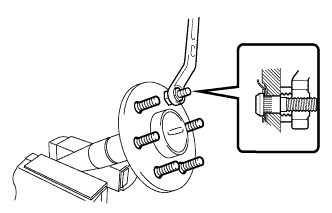 |
Secure the axle shaft between aluminum plates in a vise.
Temporarily install a washer and nut to each of the 6 hub bolts as shown in the illustration.
Install the hub bolts by tightening each nut.
Remove the washer and nut from each hub bolt.
| 4. INSTALL BACKING PLATE TO REAR AXLE HOUSING SETTING BOLT |
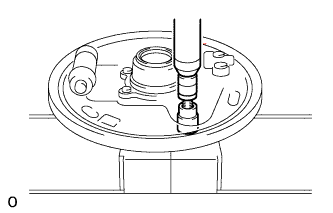 |
Position the backing plate on the bearing case.
Using 2 socket wrenches and a press, press in 4 new setting bolts.
| 5. INSTALL REAR AXLE BEARING INNER RETAINER LH |
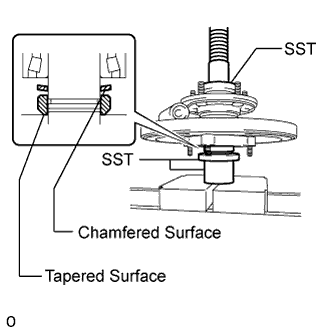 |
Heat a new retainer to approximately 70 to 130°C (158 to 266°F).
Install a new shaft washer and the retainer to the axle shaft as shown in the illustration.
Using SST and a press, press in the axle shaft.
Using a snap ring expander, install a new snap ring.
| 6. INSTALL REAR AXLE BEARING INNER RETAINER LH AND REAR SKID CONTROL ROTOR (w/ ABS) |
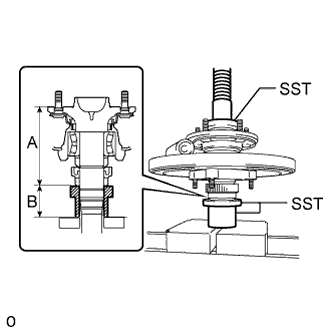 |
Using SST and a press, press in a new skid control rotor and retainer to the axle shaft until the lengths are within the standard range.
| Length A | Length B |
| 133.2 +/-0.6 mm (5.244 +/-0.0263 in.) | 56 mm (2.205 in.) |
| 7. INSTALL REAR AXLE SHAFT OIL SEAL LH |
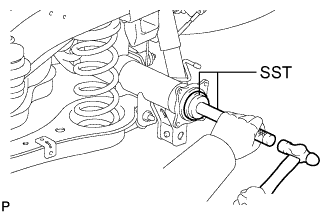 |
Using SST and a hammer, tap in a new oil seal.
| 8. INSTALL O-RING |
Install a new O-ring to the axle housing.
| 9. INSTALL REAR AXLE SHAFT WITH BACKING PLATE |
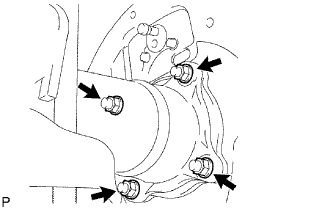 |
Install the axle shaft with backing plate with the 4 nuts.
| 10. CONNECT PARKING BRAKE CABLE |
Connect the parking brake cable with the 2 bolts.
| 11. INSTALL BRAKE SHOES |
for TASA Made:
Install the brake shoes .
for TMT Made:
Install the brake shoes .
| 12. INSTALL REAR SPEED SENSOR LH (w/ ABS) |
Install the speed sensor with the bolt.
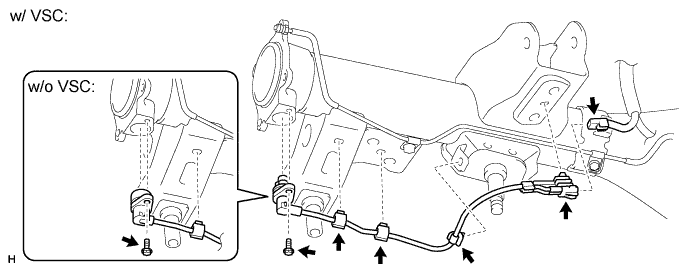
Attach the 3 clamps.
Connect the connector.
Attach the connector.
| 13. CONNECT BRAKE LINE |
for TASA Made:
for TMT Made:
| 14. INSTALL REAR BRAKE DRUM SUB-ASSEMBLY |
for TASA Made:
for TMT Made:
| 15. BLEED BRAKE LINE |
w/ VSC:
(Click here)
w/o VSC:
(Click here)
| 16. INSTALL REAR WHEEL |
| 17. CHECK PARKING BRAKE LEVER TRAVEL |
Pull the parking brake lever to fully engage the parking brake.
Release the lever to disengage the parking brake.
Slowly pull the parking brake lever all the way, and count the number of clicks.
| 18. ADJUST PARKING BRAKE LEVER TRAVEL |
Completely release the parking brake lever.
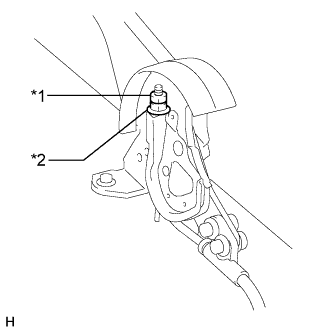 |
Loosen the lock nut.
| *1 | Lock Nut |
| *2 | No. 1 Parking Brake Cable Adjusting Nut |
Turn the No. 1 parking brake cable adjusting nut until the lever travel is correct.
Tighten the lock nut.
| 19. CONNECT CABLE TO NEGATIVE BATTERY TERMINAL |
| 20. PERFORM INITIALIZATION |
Perform initialization (Click here).
| 21. CHECK SPEED SENSOR SIGNAL |
w/ VSC:
(Click here)
w/o VSC:
(Click here)