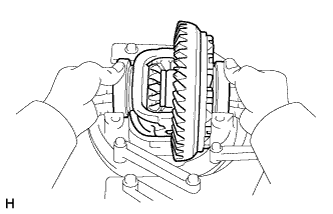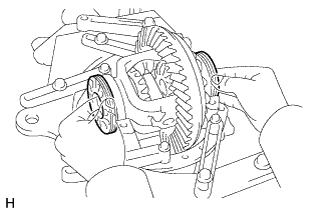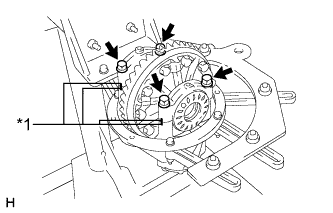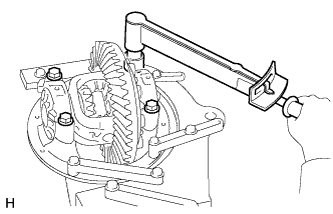
DIFFERENTIAL CARRIER ASSEMBLY > REASSEMBLY |
| 1. ASSEMBLE DIFFERENTIAL CASE (for 2 Pinion Gear Type) |
![]() |
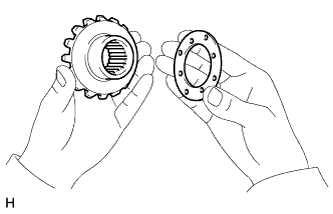
Install the side gear thrust washer to the side gear.
| Thickness mm (in.) | Thickness mm (in.) |
| 1.48 to 1.52 (0.0583 to 0.0598) | 1.73 to 1.77 (0.0682 to 0.0696) |
| 1.53 to 1.57 (0.0603 to 0.0618) | 1.78 to 1.82 (0.0701 to 0.0716) |
| 1.58 to 1.62 (0.0622 to 0.0637) | 1.83 to 1.87 (0.0721 to 0.0736) |
| 1.63 to 1.67 (0.0642 to 0.0657) | 1.88 to 1.92 (0.0741 to 0.0755) |
| 1.68 to 1.72 (0.0662 to 0.0677) | - |
![]() |
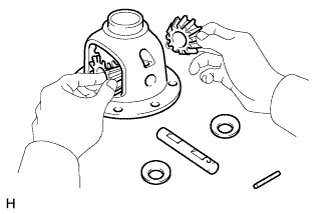
Install 2 side gears, 2 pinion gears, 2 side gear thrust washers, 2 pinion gear thrust washers and the pinion shaft in the differential case.
![]() |
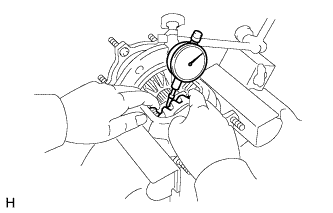
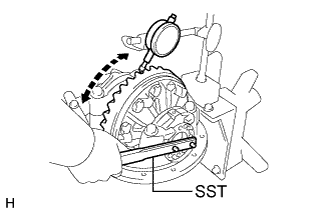
Measure the side gear backlash.
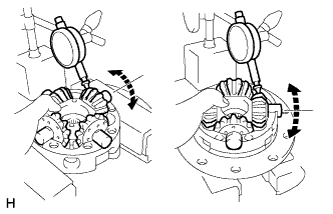
Using a dial indicator, measure the side gear backlash while holding one pinion gear toward the differential case.
![]() |
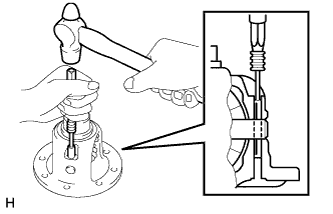
Using a pin punch and hammer, tap in the straight pin through the differential case and hole of the pinion shaft.
Stake the differential case.
| 2. ASSEMBLE DIFFERENTIAL CASE (for LSD) |
![]() |
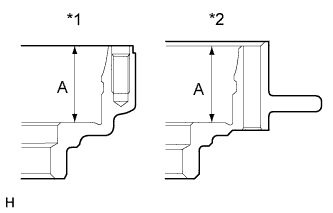
Measure the differential case dimension labeled A.
| *1 | Case RH |
| *2 | Case LH |
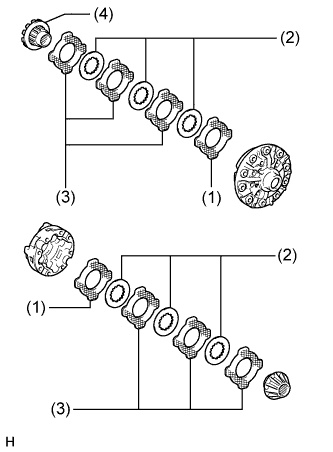
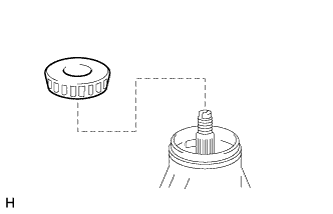
Install the thrust washers and clutch plates on the side gear.
![]() |
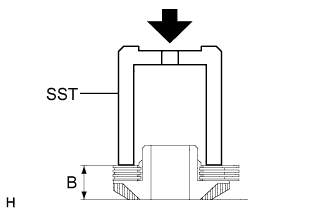
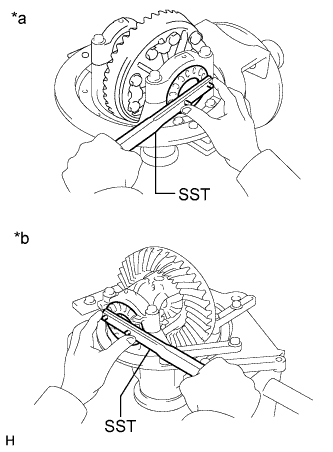
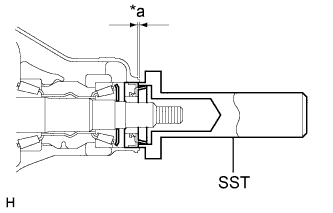
Using SST to press down the thrust washers and clutch plates with a force of approximately 98 N*m (1000 kgf*cm, 72 ft.*lbf), measure dimension "B" shown in the illustration.
Referring to the following table, select the proper adjusting shim.
| Thickness mm (in.) | Thickness mm (in.) |
| 1.83 to 1.89 (0.0721 to 0.0744) | 2.19 to 2.25 (0.0863 to 0.0885) |
| 1.89 to 1.95 (0.0745 to 0.0767) | 2.25 to 2.31 (0.0886 to 0.0909) |
| 1.95 to 2.01 (0.0768 to 0.0791) | 2.31 to 2.37 (0.0910 to 0.0933) |
| 2.01 to 2.07 (0.0792 to 0.0814) | 2.37 to 2.43 (0.0934 to 0.0956) |
| 2.07 to 2.13 (0.0815 to 0.0838) | 2.43 to 2.49 (0.0957 to 0.0980) |
| 2.13 to 2.19 (0.0839 to 0.0862) | - |
![]() |
Install the following parts to the differential cases.
![]() |
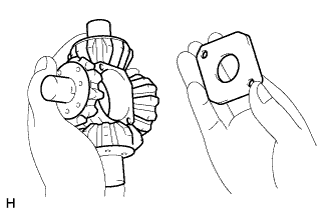
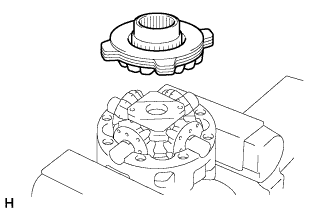
Install the 4 pinion gears and thrust washers to the spider.
Align the spring RH retainer holes with the spider knock pins and install the RH retainer.
Install the pinion gears and spider to the differential RH case.
![]() |
Using a dial indicator, measure the side gear backlash while holding the side gear spider.
Reinstall the spider to the RH case tightly and do not move the spring retainer.
Install the compression spring and spring LH retainer.
![]() |
Install the side gear, thrust washers and clutch plates.
Align the matchmarks and assemble the RH and LH cases.
![]() |
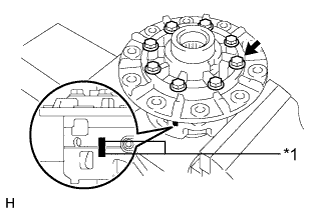
Align the matchmarks on the differential case RH and differential case LH.
| *1 | Matchmark |
Install the 8 bolts by diametrically tightening the bolts uniformly in several passes.
| 3. INSTALL DIFFERENTIAL RING GEAR |
Clean the contact surfaces of the differential case and ring gear.
Heat the ring gear in boiling water that is approximately 100°C (212°F).
Carefully remove the ring gear from the boiling water.
![]() |
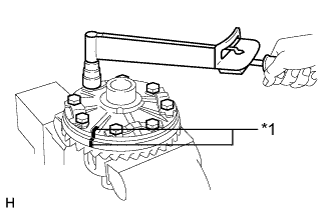
After the moisture on the ring gear has completely evaporated, quickly align the matchmarks on the ring gear and differential case and install the ring gear to the differential case.
| *1 | Matchmark |
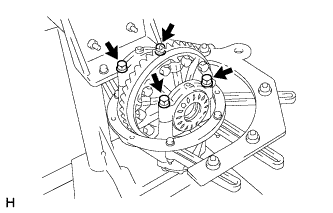
Temporarily install 5 new lock plates and the 10 bolts.
After the ring gear cools down, install the 10 bolts by diametrically tightening the bolts uniformly in several passes.
![]() |
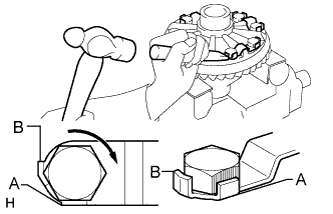
Using a chisel and hammer, stake the 5 lock plates.
| 4. INSTALL REAR DIFFERENTIAL CASE BEARING |
![]() |
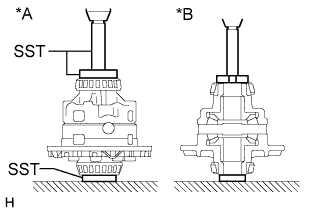
Using SST and a press, press the bearing onto the differential case.
| *A | for LSD |
| *B | 2 Pinion Type |
| 5. INSPECT DIFFERENTIAL RING GEAR RUNOUT |
Install the differential case on the carrier, and install the 2 adjusting nuts so that there is no play in the bearing.
Install the 2 bearing caps with the 4 bolts.
![]() |
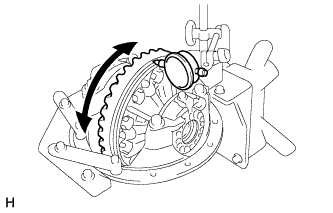
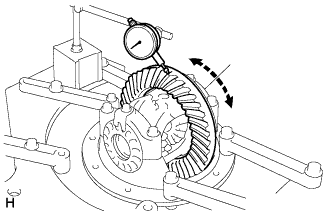
Using a dial indicator, measure the runout of the ring gear.
Remove the 2 bearing caps, 2 adjusting nuts and differential case.
| 6. INSTALL REAR DRIVE PINION FRONT TAPERED ROLLER BEARING |
![]() |
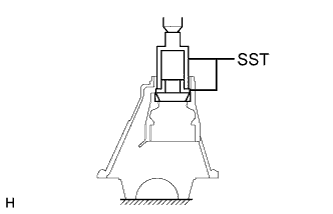
Using SST and a press, press the roller bearing (outer) to the carrier.
| 7. INSTALL REAR DRIVE PINION REAR TAPERED ROLLER BEARING |
![]() |
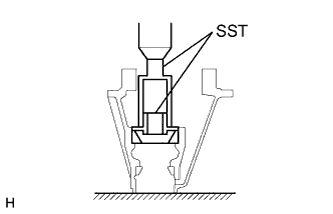
Using SST and a press, press the roller bearing (outer) into the carrier.
| 8. INSTALL REAR DRIVE PINION REAR TAPERED ROLLER BEARING |
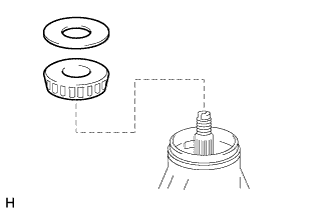
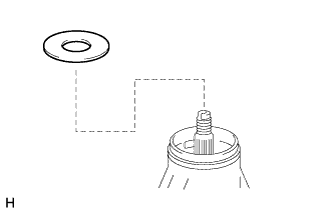
Install the plate washer to the drive pinion.
![]() |
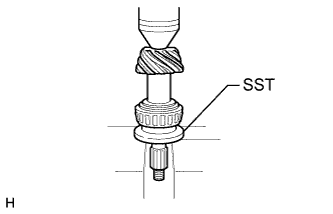
Using SST and a press, press the roller bearing (inner) onto the drive pinion.
| 9. ADJUST DIFFERENTIAL DRIVE PINION PRELOAD |
![]() |
Install the drive pinion, rear drive pinion tapered roller bearing and rear differential drive pinion oil slinger.
![]() |
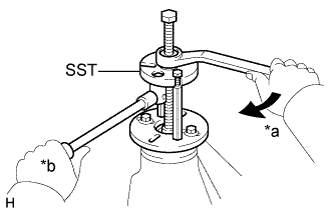
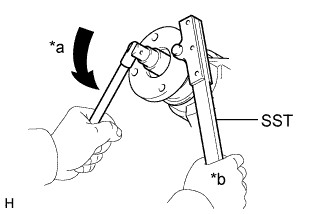
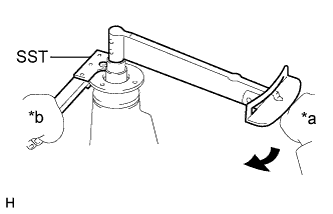
Using SST, install the companion flange.
| *a | Turn |
| *b | Hold |
![]() |
Adjust the drive pinion preload by tightening the companion flange nut.
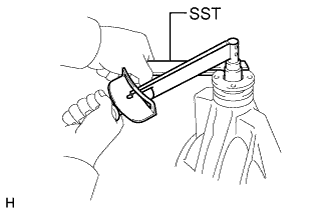
Using SST to hold the companion flange in place, tighten the nut.
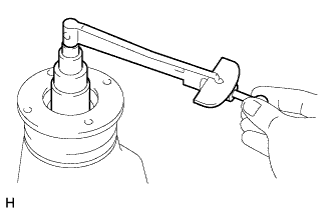
Using a torque wrench, measure the preload.
| Bearing | Preload |
| New bearing | 1.0 to 1.5 N*m (11 to 15 kgf*cm, 9 to 13 in.*lbf) |
| Reused bearing | 0.5 to 0.7 N*m (6 to 7 kgf*cm, 5 to 6 in.*lbf) |
| 10. INSTALL DIFFERENTIAL CASE ASSEMBLY |
![]() |
Place the 2 bearing outer races to their respective bearings.
| 11. INSTALL REAR DIFFERENTIAL BEARING ADJUSTING NUT |
![]() |
Install the 2 adjusting nuts to the carrier, making sure the nuts are threaded properly.
| 12. INSPECT AND ADJUST DIFFERENTIAL RING GEAR AND DIFFERENTIAL DRIVE PINION BACKLASH |
![]() |
Align the matchmarks on the cap and carrier.
| *1 | Matchmark |
![]() |
Install the right and left bearing caps with the 4 bolts.
![]() |
Loosen the 4 bearing cap bolts to the point where the adjusting nuts can be turned by SST.
| *a | for LH Side |
| *b | for RH Side |
Using SST, torque the adjusting nut on the ring gear side until the ring gear has a backlash of about 0.2 mm (0.00787 in.).
While turning the ring gear, use SST to tighten the adjusting nut on the drive pinion side. After the bearings have settled, loosen the adjusting nut on the drive pinion side.
Using SST, tighten the adjusting nut 1 to 1.5 notches from the 0 preload position.
![]() |
Using a dial indicator, adjust the ring gear backlash until it is within the specification.
![]() |
Tighten the bearing cap bolts.
| 13. INSPECT TOTAL PRELOAD |
![]() |
Using a torque wrench, measure the preload with the teeth of the drive pinion and ring gear in contact.
Using a torque wrench, measure the total preload.
| Item | Specified Condition |
| New bearing | 0.4 to 0.5 N*m (4 to 6 kgf*cm, 4 to 5 in.*lbf) + drive pinion preload |
| Reused bearing | 0.4 to 0.5 N*m (4 to 6 kgf*cm, 4 to 5 in.*lbf) + drive pinion preload |
| 14. INSPECT TOOTH CONTACT BETWEEN RING GEAR AND DRIVE PINION |
![]() |
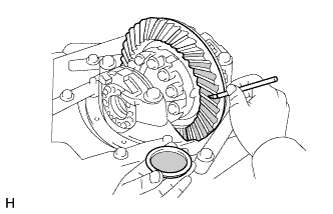
Coat 3 or 4 teeth at 3 different positions on the ring gear with Prussian blue.
Hold the companion flange firmly in place and rotate the ring gear in both directions.
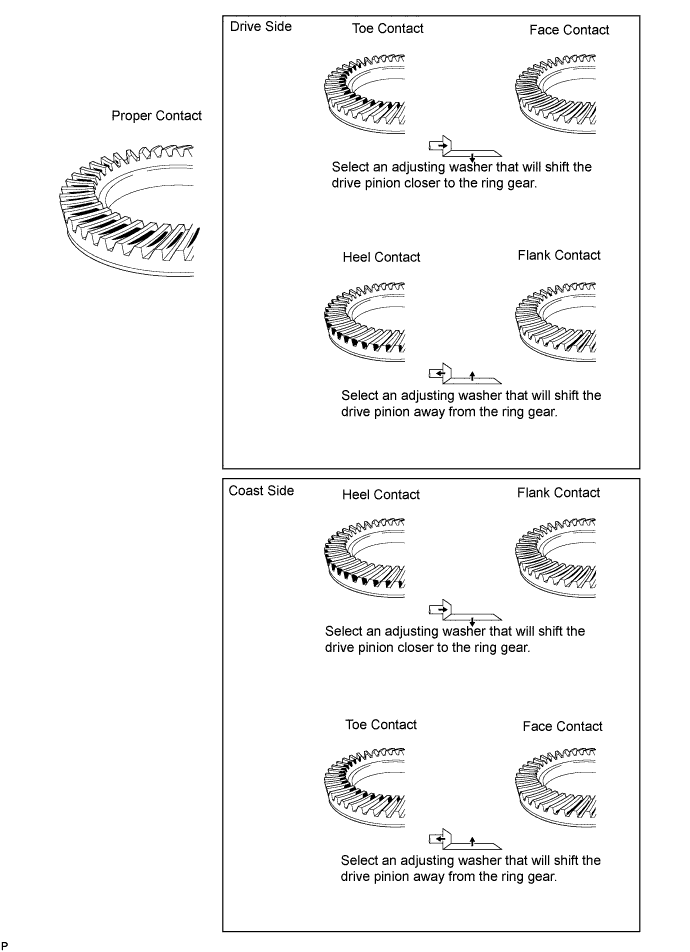
Inspect the tooth contact pattern.

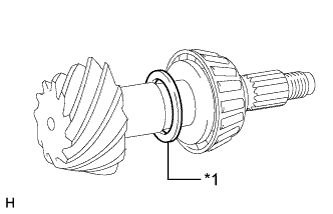
![]() |
| *1 | Plate Washer |
| Thickness mm (in.) | Thickness mm (in.) |
| 1.69 to 1.71 (0.0666 to 0.0673) | 2.02 to 2.04 (0.0796 to 0.0803) |
| 1.72 to 1.74 (0.0678 to 0.0685) | 2.05 to 2.07 (0.0807 to 0.0814) |
| 1.75 to 1.77 (0.0689 to 0.0696) | 2.08 to 2.10 (0.0819 to 0.0826) |
| 1.78 to 1.80 (0.0701 to 0.0708) | 2.11 to 2.13 (0.0831 to 0.0838) |
| 1.81 to 1.83 (0.0713 to 0.0720) | 2.14 to 2.16 (0.0843 to 0.0850) |
| 1.84 to 1.86 (0.0725 to 0.0732) | 2.17 to 2.19 (0.0855 to 0.0862) |
| 1.87 to 1.89 (0.0737 to 0.0744) | 2.20 to 2.22 (0.0867 to 0.0874) |
| 1.90 to 1.92 (0.0748 to 0.0755) | 2.23 to 2.25 (0.0878 to 0.0885) |
| 1.93 to 1.95 (0.0760 to 0.0767) | 2.26 to 2.28 (0.0890 to 0.0897) |
| 1.96 to 1.98 (0.0772 to 0.0779) | 2.29 to 2.31 (0.0902 to 0.0909) |
| 1.99 to 2.01 (0.0784 to 0.0791) | 2.32 to 2.34 (0.0914 to 0.0921) |
| 15. REMOVE REAR DRIVE PINION NUT |
![]() |
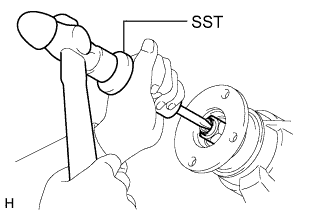
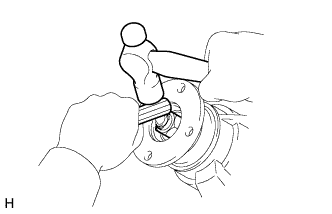
Using SST and a hammer, loosen the staked part of the nut.
![]() |
Using SST to hold the companion flange in place, remove the nut.
| *a | Turn |
| *b | Hold |
| 16. REMOVE REAR DRIVE PINION COMPANION FLANGE SUB-ASSEMBLY WITH DUST DEFLECTOR |
![]() |
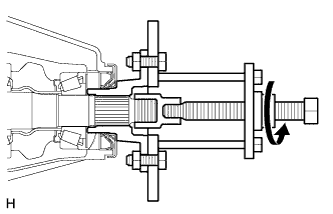
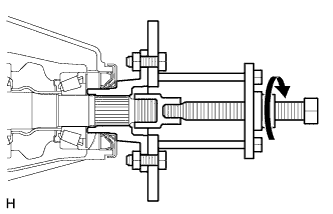
Using SST, remove the companion flange with dust deflector.
| 17. REMOVE REAR DIFFERENTIAL DRIVE PINION OIL SLINGER |
![]() |
Remove the oil slinger from the drive pinion.
| 18. REMOVE REAR DRIVE PINION FRONT TAPERED ROLLER BEARING |
![]() |
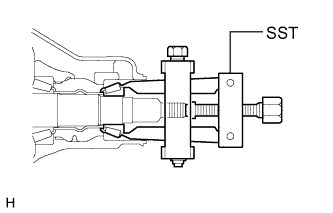
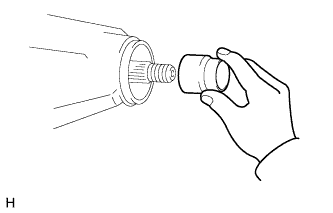
Using SST, remove the roller bearing (inner) from the drive pinion.
| 19. INSTALL REAR DIFFERENTIAL DRIVE PINION BEARING SPACER |
![]() |
Install a new bearing spacer.
| 20. INSTALL DIFFERENTIAL OIL STORAGE RING |
Using a brass bar and hammer, tap in a new oil storage ring.
| 21. INSTALL REAR DRIVE PINION FRONT TAPERED ROLLER BEARING |
![]() |
Install the bearing (inner) to the drive pinion.
| 22. INSTALL REAR DIFFERENTIAL DRIVE PINION OIL SLINGER |
![]() |
Install the oil slinger to the drive pinion.
| 23. INSTALL REAR DIFFERENTIAL CARRIER OIL SEAL |
Apply MP grease to the lip of the oil seal.
![]() |
Using SST and a hammer, tap in a new seal.
| *a | Oil Seal Depth |
| 24. INSTALL REAR DRIVE PINION COMPANION FLANGE SUB-ASSEMBLY WITH DUST DEFLECTOR |
![]() |
Using SST, install the companion flange with dust deflector.
Apply hypoid gear oil LSD to drive pinion thread and nut seat face.
![]() |
Using SST to hold the companion flange in place, install a new nut.
| *1 | Turn |
| *1 | Hold |
| 25. INSPECT TOTAL PRELOAD |
![]() |
Using a torque wrench, measure the preload with the teeth of the drive pinion and ring gear in contact.
Using a torque wrench, measure the total preload.
| Bearing | Preload |
| New bearing | 1.1 to 1.6 N*m (12 to 16 kgf*cm, 10 to 14 in.*lbf) + ring gear preload |
| Reused bearing | 0.6 to 0.8 N*m (7 to 8 kgf*cm, 6 to 7 in.*lbf) + ring gear preload |
| 26. INSPECT DIFFERENTIAL RING GEAR BACKLASH |
![]() |
Using a dial indicator, check the backlash of the ring gear.
| 27. INSPECT RUNOUT OF REAR DRIVE PINION COMPANION FLANGE SUB-ASSEMBLY |
![]() |
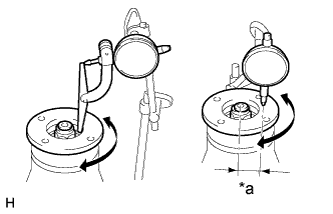
Using a dial indicator, measure the runout of the companion flange vertically and laterally.
| *a | 30 mm (1.18 in.) |
| Runout | Maximum |
| Vertical runout | 0.10 mm (0.00394 in.) |
| Lateral runout | 0.10 mm (0.00394 in.) |
| 28. STAKE DRIVE PINION NUT |
![]() |
Using a chisel and hammer, stake the nut.
| 29. INSTALL REAR DIFFERENTIAL BEARING ADJUSTING NUT LOCK |
![]() |
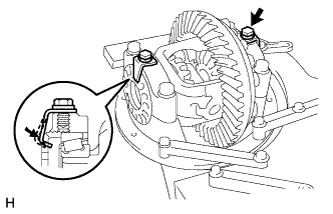
Install 2 new adjusting nut locks to the bearing caps with the 2 bolts.
Bend the nut locks.