FRONT SEAT OUTER BELT ASSEMBLY > INSTALLATION |
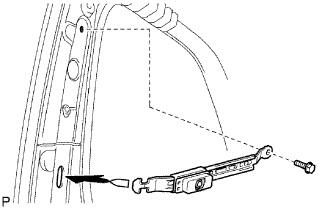
| 1. INSTALL FRONT SHOULDER BELT ANCHOR ADJUSTER ASSEMBLY |
|
Insert the tip of the adjuster to the pillar, and align the adjuster's bolt hole to the pillar's bolt hole.
Install the bolt as shown in the illustration.
| 2. INSTALL SHOULDER BELT ANCHORAGE PLATE COVER |
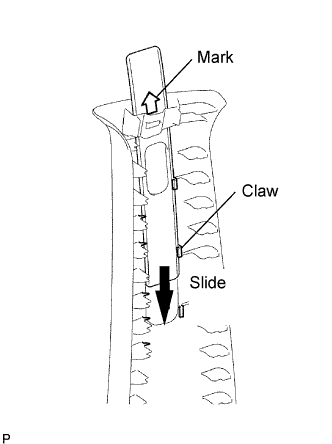 |
Install the plate cover as shown in the illustration.
| 3. INSTALL CENTER PILLAR GARNISH LH |
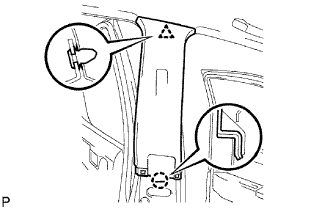 |
Attach the claw and clip to install the garnish.
| 4. INSTALL FRONT SEAT OUTER BELT ASSEMBLY LH |
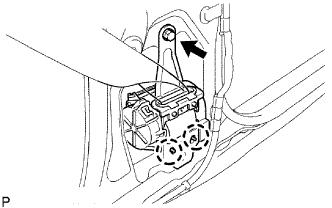 |
w/o Pretensioner:
Align the claws with the seat belt positioning holes and install the retractor of the outer belt with the bolt as shown in the illustration.
w/ Pretensioner:
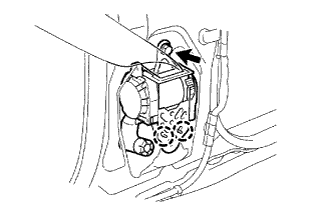 |
Align the claws with the seat belt positioning holes and install the retractor of the outer belt with the bolt as shown in the illustration.
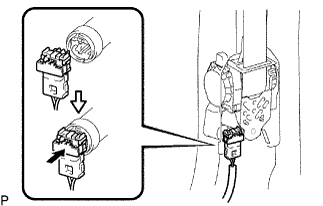 |
Connect the pretensioner connector as shown in the illustration.
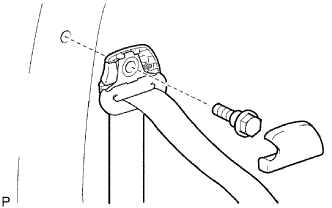 |
Connect the outer belt with the shoulder anchor's bolt.
Attach the 4 claws to install the seat belt anchor cover cap
| 5. INSTALL CENTER PILLAR GARNISH LOWER LH |
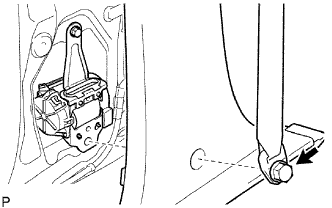 |
Connect the anchor of the outer belt with the built-in bolt after installing the center pillar garnish lower.
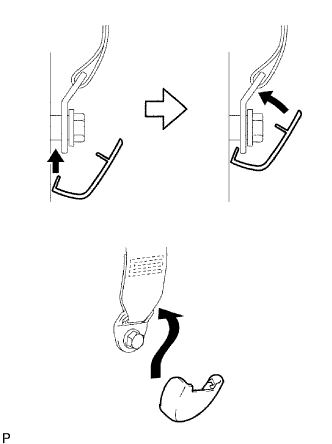 |
Attach the 2 claws to install the lap belt outer anchor cover.
| 6. INSTALL REAR DOOR OPENING TRIM WEATHERSTRIP LH |
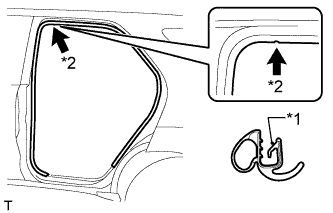 |
Align the paint mark on the rear door opening trim weatherstrip with the mark position on the vehicle and install the rear door opening trim weatherstrip as shown in the illustration.
| *1 | Paint Mark |
| *2 | Mark Position |
| 7. INSTALL REAR DOOR SCUFF PLATE LH |
Attach the 2 clips and 7 claws to install the rear door scuff plate.
| 8. INSTALL FRONT DOOR OPENING TRIM WEATHERSTRIP LH |
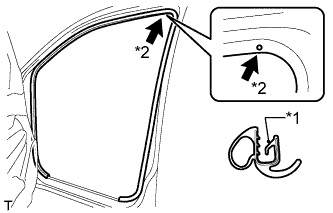 |
Align the paint mark on the front door opening trim with the mark position on the vehicle and install the front door opening trim as shown in the illustration.
| *1 | Paint Mark |
| *2 | Mark Position |
| 9. INSTALL FRONT DOOR SCUFF PLATE LH |
Attach the 3 clips and 7 claws to install the front door scuff plate.
| 10. INSTALL FRONT SEAT ASSEMBLY LH |
for Manual Seat:
(Click here)
for Power Seat:
(Click here)
| 11. CONNECT CABLE TO NEGATIVE BATTERY TERMINAL |