FRONT SEAT OUTER BELT ASSEMBLY > REMOVAL |
| 1. PRECAUTION |
| 2. DISCONNECT CABLE FROM NEGATIVE BATTERY TERMINAL |
| 3. REMOVE FRONT SEAT ASSEMBLY LH |
for Manual Seat:
(Click here)
for Power Seat:
(Click here)
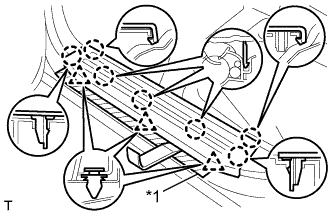
| 4. REMOVE FRONT DOOR SCUFF PLATE LH |
|
Put protective tape around the front door scuff plate.
| *1 | Protective Tape |
Using a moulding remover, detach the 7 claws and 3 clips and remove the front door scuff plate.
| 5. REMOVE FRONT DOOR OPENING TRIM WEATHERSTRIP LH |
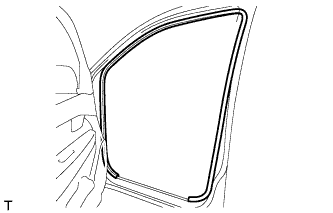 |
Remove the front door opening trim.
| 6. REMOVE REAR DOOR SCUFF PLATE LH |
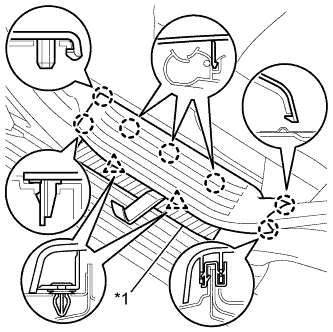 |
Put protective tape around the rear door scuff plate.
| *1 | Protective Tape |
Using a moulding remover, detach the 7 claws and 2 clips and remove the rear door scuff plate.
| 7. REMOVE REAR DOOR OPENING TRIM WEATHERSTRIP LH |
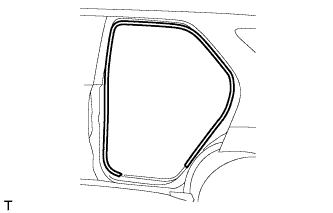 |
Remove the rear door opening trim weatherstrip.
| 8. REMOVE CENTER PILLAR GARNISH LOWER LH |
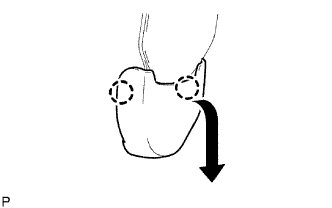 |
Detach the 2 claws and remove the lap belt outer anchor cover.
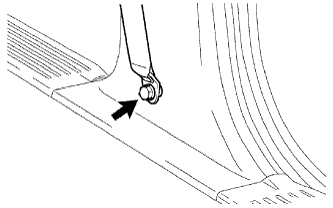 |
Remove the anchor's built-in bolt from the pillar and disconnect the outer belt.
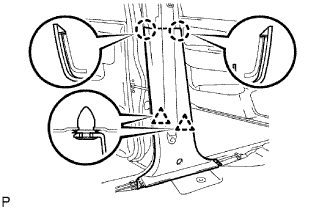 |
Using a screwdriver, detach the 2 claws.
Using a clip remover, detach the 2 clips and remove the garnish.
| 9. REMOVE FRONT SEAT OUTER BELT ASSEMBLY LH |
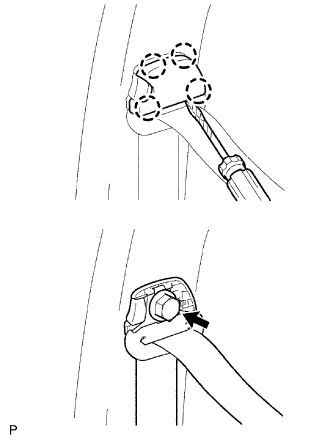 |
Using a screwdriver, detach the 4 claws and remove the seat belt anchor cover cap.
Remove the shoulder anchor's bolt and disconnect the outer belt.
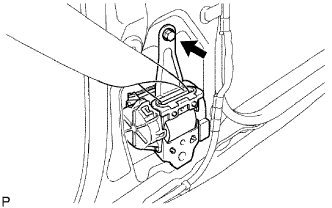 |
w/o Pretensioner:
Remove the bolt and outer belt.
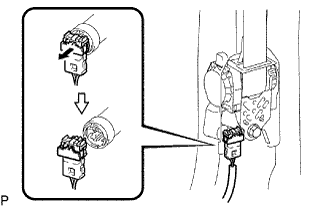 |
w/ Pretensioner:
Disconnect the pretensioner connector as shown in the illustration.
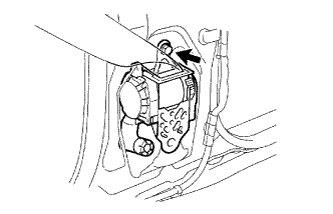 |
w/ Pretensioner:
Remove the bolt and outer belt.
| 10. REMOVE CENTER PILLAR GARNISH LH |
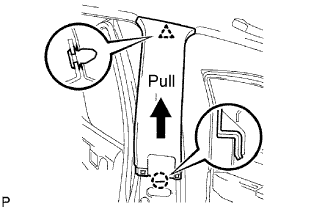 |
Using a clip remover, detach the clip.
Pull the garnish in the direction indicated by the arrow in the illustration to detach the claw. Then remove the garnish.
| 11. REMOVE SHOULDER BELT ANCHORAGE PLATE COVER |
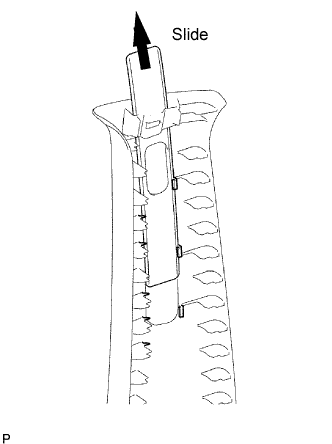 |
Slide the plate cover upward and remove it from the garnish.
| 12. REMOVE FRONT SHOULDER BELT ANCHOR ADJUSTER ASSEMBLY |
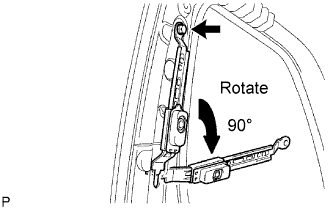 |
Remove the bolt.
Rotate the adjuster approximately 90° , and then pull and remove it.