REAR COOLING UNIT > REMOVAL |
| 1. RECOVER REFRIGERANT FROM REFRIGERATION SYSTEM |
Start the engine.
Operate the cooler compressor under the conditions shown below:
| Item | Condition |
| Engine Speed | Idling |
| Operating Time | 3 minutes or more |
| A/C Switch Status | On |
| Blower Switch Status | HI |
| Set Temperature | MAX COOL |
Stop the engine.
Recover the refrigerant from the A/C system using a refrigerant recovery unit.
| 2. PRECAUTION |
| 3. DISCONNECT CABLE FROM NEGATIVE BATTERY TERMINAL |
| 4. REMOVE ROOF HEADLINING ASSEMBLY |
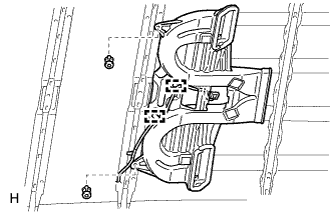
| 5. REMOVE REAR NO. 5 ROOF AIR DUCT |
|
Detach the 2 clamps.
Remove the 2 clips and rear No. 5 roof air duct.
| 6. REMOVE REAR NO. 4 ROOF AIR DUCT |
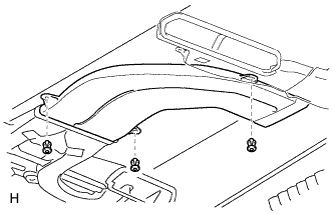 |
Remove the 3 clips and rear No. 4 roof air duct.
| 7. REMOVE REAR NO. 3 ROOF AIR DUCT |
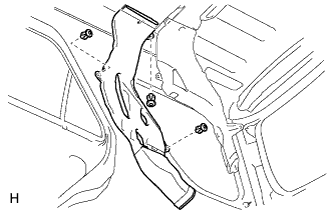 |
Remove the 3 clips and rear No. 3 roof air duct.
| 8. REMOVE REAR NO. 2 ROOF AIR DUCT |
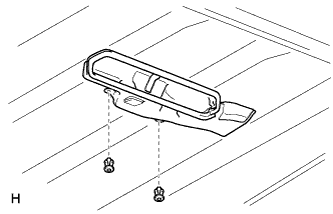 |
Remove the 2 clips and rear No. 2 roof air duct.
| 9. REMOVE REAR NO. 1 ROOF AIR DUCT |
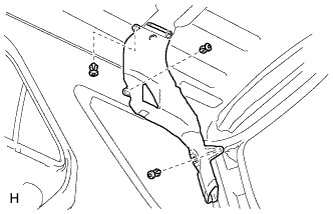 |
Remove the 3 clips and rear No. 1 roof air duct.
| 10. REMOVE REAR NO. 1 SIDE AIR DUCT |
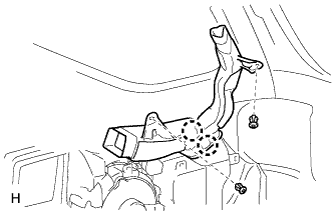 |
Remove the 2 clips.
Detach the 2 claws and remove the rear No. 1 side air duct.
| 11. REMOVE REAR BUMPER COVER |
| 12. REMOVE QUARTER VENT DUCT ASSEMBLY RH |
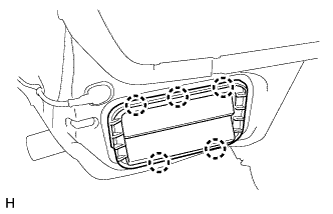 |
Detach the 5 claws and remove the quarter vent duct assembly RH.
| 13. DISCONNECT NO. 1 COOLER COVER |
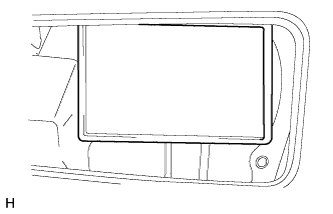 |
Remove the packing.
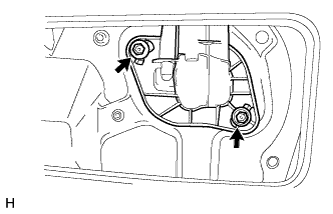 |
Remove the 2 bolts and disconnect the No. 1 cooler cover.
| 14. DISCONNECT AIR CONDITIONING TUBE AND ACCESSORY ASSEMBLY |
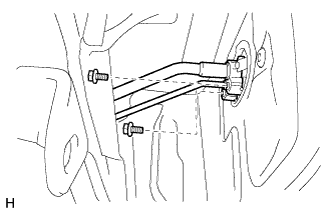 |
Remove the 2 bolts.
Disconnect the air conditioning tube and accessory assembly.
Remove the 2 O-rings from the air conditioning tube and accessory assembly.
| 15. REMOVE REAR COOLING UNIT ASSEMBLY |
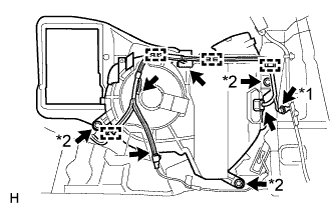 |
Remove the bolt labeled A and body ground.
Detach the 4 clamps.
Disconnect the 4 connectors.
Remove the 3 bolts labeled B and rear cooling unit assembly.
| *1 | Bolt A |
| *2 | Bolt B |