1GR-FE ENGINE CONTROL HEATED OXYGEN SENSOR REMOVAL
CAUTION / NOTICE / HINT
The necessary procedures (adjustment, calibration, initialization, or registration) that must be performed after parts are removed, installed, or replaced during the heated oxygen sensor removal/installation are shown below.
| Replacement Part or Procedure | Necessary Procedures | Effects/Inoperative when not Performed | Link |
|---|---|---|---|
| Gas leaks from exhaust system | Inspection After Repair | Poor idle, engine start, etc. | ( ) |
- CAUTION:
-
-
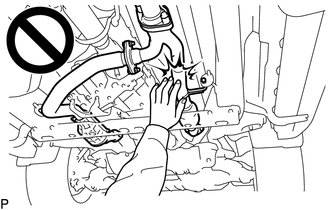
To prevent burns, do not touch the engine, exhaust pipe or other high temperature components while the engine is hot.
PROCEDURE

 37140
1.REMOVE FRONT PROPELLER SHAFT ASSEMBLY
for TASA Made:
Click hereDrivetrain>DRIVE SHAFT / PROPELLER SHAFT>FRONT PROPELLER SHAFT ASSEMBLY(for TASA Made)>REMOVAL
for TMMIN Made:
Click hereDrivetrain>DRIVE SHAFT / PROPELLER SHAFT>FRONT PROPELLER SHAFT ASSEMBLY(for TMMIN Made)>REMOVAL
89465
2.REMOVE HEATED OXYGEN SENSOR (for Bank 1 Sensor 2)
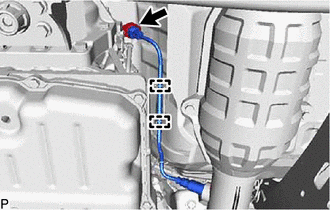
Disconnect the connector.
Detach the 2 clamps.
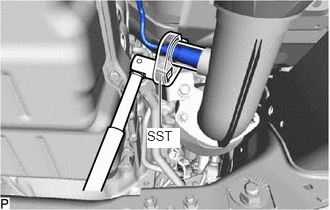
Using SST, remove the heated oxygen sensor from the front exhaust pipe.
- SST
- 09224-00011
- NOTICE:
-
Do not damage the heated oxygen sensor.
89465A
3.REMOVE HEATED OXYGEN SENSOR (for Bank 2 Sensor 2)
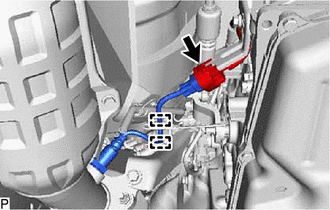
Disconnect the connector.
Detach the 2 clamps.
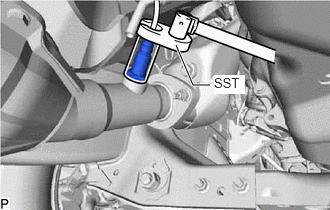
Using SST, remove the heated oxygen sensor from the front exhaust pipe.
- SST
- 09224-00011
- NOTICE:
-
Do not damage the heated oxygen sensor.