AUDIO / VIDEO RADIO RECEIVER INSTALLATION
CAUTION / NOTICE / HINT
- HINT:
- ·
Use the same procedure for RHD and LHD vehicles.
·The procedure listed below is for LHD vehicles.
PROCEDURE

 86140A
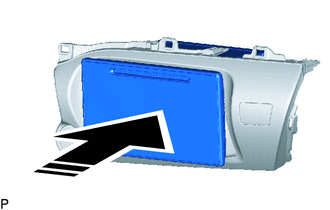
1.INSTALL RADIO AND DISPLAY RECEIVER ASSEMBLY (for Radio and Display Type)

|
Install in this Direction |
Insert the radio and display receiver assembly in the direction of the arrow shown in the illustration to install it.
86212
2.INSTALL NO. 2 RADIO BRACKET (for Radio and Display Type)
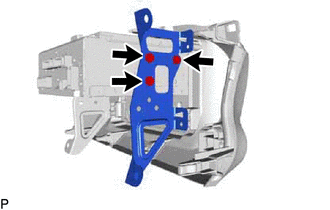
Install the No. 2 radio bracket to the radio and display receiver assembly with the 3 screws.
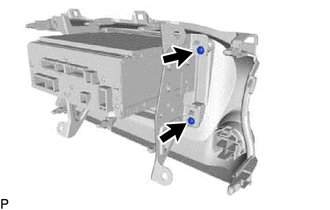
Install the 2 screws.
86211
3.INSTALL NO. 1 RADIO BRACKET (for Radio and Display Type)
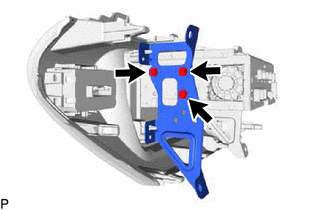
Install the No. 1 radio bracket to the radio and display receiver assembly with the 3 screws.
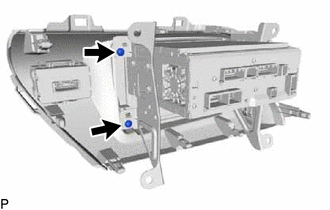
Install the 2 screws.
86140A
4.INSTALL RADIO AND DISPLAY RECEIVER ASSEMBLY WITH BRACKET (for Radio and Display Type)
Connect all the connectors.
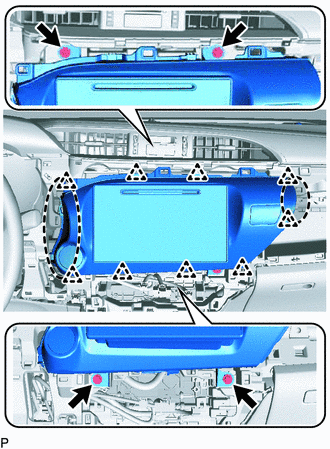

|
Place Hands Here |
Insert the radio and display receiver assembly with bracket to attach the clips on its backside.
- NOTICE:
-
When inserting the radio and display receiver assembly, do not press the knobs on it.
Install the radio and display receiver assembly with bracket with the 4 screws.
86120
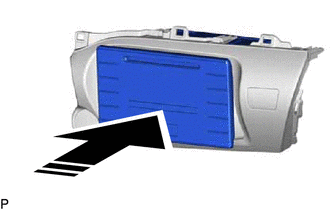
5.INSTALL RADIO RECEIVER ASSEMBLY (for Radio Receiver Type)
|
|
Install in this Direction |
Insert the radio receiver assembly in the direction of the arrow shown in the illustration to install it.
86212
6.INSTALL NO. 2 RADIO BRACKET (for Radio Receiver Type)
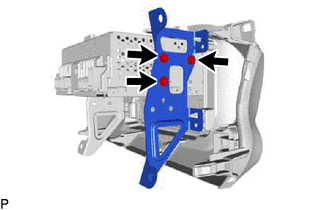
Install the No. 2 radio bracket to the radio receiver assembly with the 3 screws.
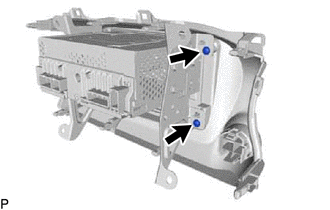
Install the 2 screws.
86211
7.INSTALL NO. 1 RADIO BRACKET (for Radio Receiver Type)
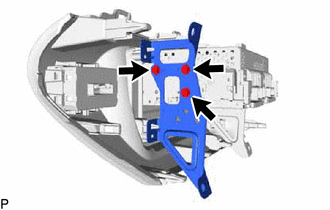
Install the No. 1 radio bracket to the radio receiver assembly with the 3 screws.
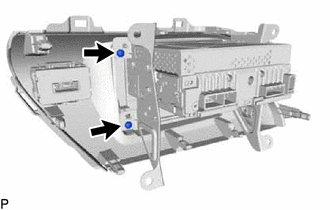
Install the 2 screws.
86120
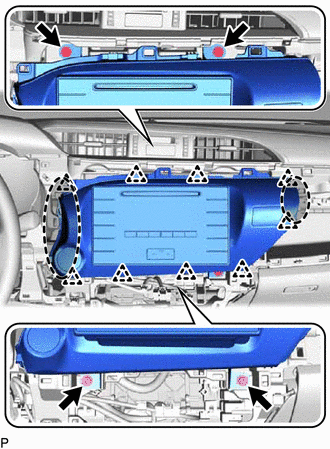
8.INSTALL RADIO RECEIVER ASSEMBLY WITH BRACKET (for Radio Receiver Type)
Connect all the connectors.
|
|
Place Hands Here |
Insert the radio receiver assembly with bracket to attach the clips on its backside.
- NOTICE:
-
When inserting the radio receiver assembly, do not press the knobs on it.
Install the radio receiver assembly with bracket with the 4 screws.
55900
9.INSTALL AIR CONDITIONING CONTROL ASSEMBLY (for Automatic Air Conditioning System)
55909A
10.CONNECT AIR MIX DAMPER CONTROL CABLE SUB-ASSEMBLY (for Manual Air Conditioning System)
55908A
11.CONNECT AIR INLET DAMPER CONTROL CABLE SUB-ASSEMBLY (for Manual Air Conditioning System)
55906A
12.CONNECT DEFROSTER DAMPER CONTROL CABLE SUB-ASSEMBLY (for Manual Air Conditioning System)
84013A
13.INSTALL INTEGRATION PANEL SUB-ASSEMBLY WITH AIR CONDITIONING CONTROL ASSEMBLY (for Manual Air Conditioning System)
55918A
14.INSTALL AIR INLET DAMPER CONTROL LEVER (for Manual Air Conditioning System)
55905J
15.INSTALL CONTROL KNOB SUB-ASSEMBLY (for Manual Air Conditioning System)
55908A
16.CONNECT AIR INLET DAMPER CONTROL CABLE SUB-ASSEMBLY (for Manual Cooler System)
55906A
17.CONNECT DEFROSTER DAMPER CONTROL CABLE SUB-ASSEMBLY (for Manual Cooler System)
84013A
18.INSTALL INTEGRATION PANEL SUB-ASSEMBLY WITH AIR CONDITIONING CONTROL ASSEMBLY (for Manual Cooler System)
55918A
19.INSTALL AIR INLET DAMPER CONTROL LEVER (for Manual Cooler System)
55905J
20.INSTALL CONTROL KNOB SUB-ASSEMBLY (for Manual Cooler System)
55410C
21.INSTALL INSTRUMENT CLUSTER FINISH PANEL ASSEMBLY
55041B
22.INSTALL NO. 1 INSTRUMENT PANEL BOX DOOR SUB-ASSEMBLY
55470
23.INSTALL INSTRUMENT CLUSTER FINISH PANEL GARNISH ASSEMBLY
45100
24.INSTALL STEERING WHEEL ASSEMBLY
25.CONNECT CABLE TO NEGATIVE BATTERY TERMINAL
- NOTICE:
-
When disconnecting the cable, some systems need to be initialized after the cable is reconnected (See page General>INTRODUCTION>REPAIR INSTRUCTION>INITIALIZATION).