EXTERIOR PANELS / TRIM BLACK OUT TAPE(for Front Door) REMOVAL
CAUTION / NOTICE / HINT
The necessary procedures (adjustment, calibration, initialization or registration) that must be performed after parts are removed, installed or replaced during the No. 1 black out tape removal/installation are shown below.
| Replacement Part or Procedure | Necessary Procedures | Effects / Inoperative when not Performed | Link |
|---|---|---|---|
| Disconnect cable from negative battery terminal | Drive the vehicle until stop and start control is permitted (approximately 5 to 60 minutes) | Stop and start system | ( ) |
| Memorize steering angle neutral point | Pre-crash safety system | ()
|
- HINT:
- ·
Use the same procedure for the RH and LH sides.
·The procedure listed below is for the LH side.
·Use the same procedure for RHD and LHD vehicles.
·The procedures listed below are for LHD vehicles.
·Fully open the front door glass sub-assembly LH before proceeding with work.
PROCEDURE

 1. PRECAUTION
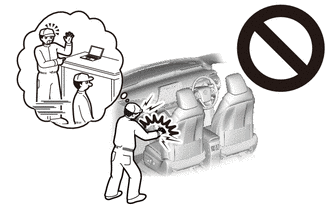
- CAUTION:
- w/ Curtain Shield Airbag:
-
-
Be sure to read Precaution thoroughly before servicing.
-
for Type B:
-
Click hereVehicle Interior>SUPPLEMENTAL RESTRAINT SYSTEMS>AIRBAG SYSTEM(for Type B)>PRECAUTION
-
for Type C:
-
Click hereVehicle Interior>SUPPLEMENTAL RESTRAINT SYSTEMS>AIRBAG SYSTEM(for Type C)>PRECAUTION
- NOTICE:
-
After turning the ignition switch off, waiting time may be required before disconnecting the cable from the negative (-) battery terminal. Therefore, make sure to read the disconnecting the cable from the negative (-) battery terminal notice before proceeding with work.
-
Click hereGeneral>INTRODUCTION>REPAIR INSTRUCTION>PRECAUTION
2.DISCONNECT CABLE FROM NEGATIVE BATTERY TERMINAL
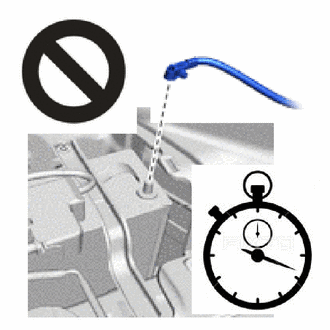
- CAUTION:
- w/ Curtain Shield Airbag:
-
- ·
Wait at least 90 seconds after disconnecting the cable from the negative (-) battery terminal to disable the SRS system.
·If the airbag deploys for any reason, it may cause a serious accident.
- NOTICE:
-
When disconnecting the cable, some systems need to be initialized after the cable is reconnected.
-
Click hereGeneral>INTRODUCTION>REPAIR INSTRUCTION>INITIALIZATION
67492A
3.REMOVE FRONT DOOR LOWER FRAME BRACKET GARNISH LH
74220
4.REMOVE FRONT ARMREST ASSEMBLY LH
5.REMOVE POWER WINDOW REGULATOR MASTER SWITCH ASSEMBLY WITH FRONT DOOR ARMREST BASE PANEL (for Driver Side, w/ Power Window)
6.REMOVE POWER WINDOW REGULATOR SWITCH ASSEMBLY WITH FRONT DOOR ARMREST BASE PANEL (for Front Passenger Side, w/ Power Window)
69260
7.REMOVE FRONT DOOR WINDOW REGULATOR HANDLE ASSEMBLY (w/o Power Window)
69284C
8.REMOVE FRONT DOOR INSIDE HANDLE BEZEL PLUG LH
67602
9.REMOVE FRONT DOOR TRIM BOARD SUB-ASSEMBLY LH
87940
10.REMOVE OUTER REAR VIEW MIRROR ASSEMBLY LH
67832
11.REMOVE FRONT DOOR SERVICE HOLE COVER LH
68151C
12.REMOVE FRONT DOOR GLASS RUN LH
68102
13.REMOVE FRONT DOOR GLASS SUB-ASSEMBLY LH
75720
14.REMOVE FRONT DOOR BELT MOULDING ASSEMBLY LH
68620
15.REMOVE FRONT DOOR CHECK ASSEMBLY LH (for Smart Cab)
67862
16.REMOVE FRONT DOOR WEATHERSTRIP LH (for Smart Cab)
67862
17.REMOVE FRONT DOOR WEATHERSTRIP LH (for Double Cab)
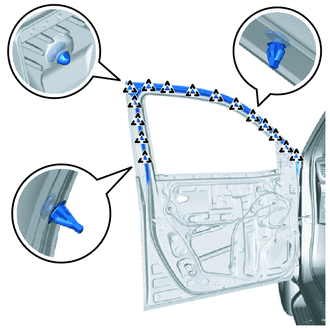
Using a clip remover, detach the clip and remove enough of the upper portion of the front door weatherstrip LH so that the No. 1 black out tape LH can be removed.
75922M
18.REMOVE NO. 1 BLACK OUT TAPE LH
- HINT:
-
When removing the No. 1 black out tape LH, heat the front door panel and No. 1 black out tape LH using a heat light.
- Standard:
Item Temperature Front Door Panel 40 to 60°C (104 to 140°F) No. 1 Black Out Tape LH 20 to 30°C (68 to 86°F)
- CAUTION:
-
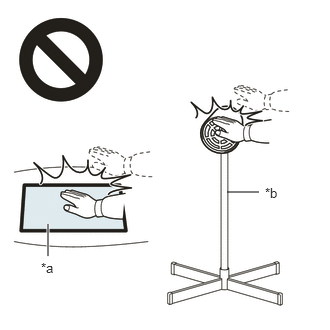 2.365,2 2.698,2 false 0.5,2.333 0.5,2.667 true 0.427,2.708 0.74,2.865 0.313,0.156 10 false *a 2.76,1.927 3.073,2.083 0.313,0.156 10 false *b
*a Heated Part *b Heat Light
- ·
Do not touch the heat light and heated parts.
·Touching the heat light may result in burns.
·Touching heated parts for a long time may result in burns.
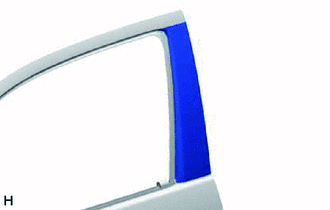
for Smart Cab:
Pull back an edge of the No. 1 black out tape LH and pull it parallel to the front door panel to remove it.
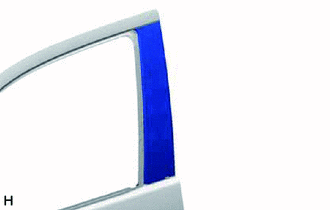
for Double Cab:
Pull back an edge of the No. 1 black out tape LH and pull it parallel to the front door panel to remove it.