SEAT BELT REAR SEAT OUTER BELT ASSEMBLY(for Smart Cab) INSTALLATION
CAUTION / NOTICE / HINT
- HINT:
- ·
Use the same procedure for the RH and LH sides.
·The procedure listed below is for the LH side.
·A bolt without a torque specification is shown in the standard bolt chart.
Click hereGeneral>SPECIFICATIONS>STANDARD BOLT>SPECIFIED TORQUE FOR STANDARD BOLTS
PROCEDURE

 73370C
1.INSTALL REAR NO. 1 SEAT OUTER BELT ASSEMBLY LH
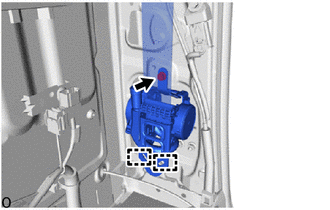
Attach the 2 guides and temporarily install the rear No. 1 seat outer belt assembly LH with the bolt.
- Torque:
- 12.5 N*m (127 kgf*cm, 9 ft.*lbf)
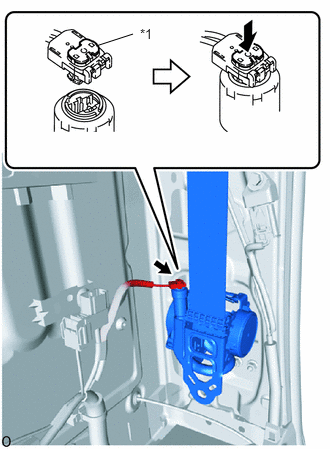
| *1 | Locking Button |
Connect the pretensioner connector and lock the locking button as shown in the illustration.
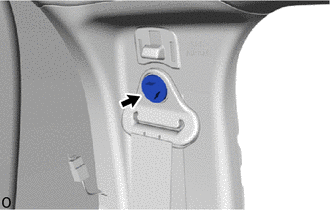
Connect the shoulder anchor of the rear No. 1 seat outer belt assembly LH with the bolt.
- Torque:
- 42 N*m (428 kgf*cm, 31 ft.*lbf)
73178C
2.INSTALL SEAT BELT ANCHOR COVER CAP
62514A
3.INSTALL LOWER QUARTER TRIM PANEL LH
73370C
4.INSTALL REAR NO. 1 SEAT OUTER BELT ASSEMBLY LH (for Floor Anchor)
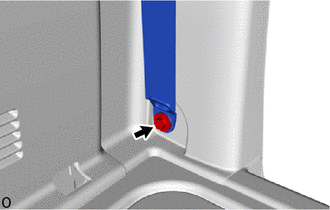
Install the bolt and connect the floor anchor of the rear No. 1 seat outer belt assembly LH.
- Torque:
- 42 N*m (428 kgf*cm, 31 ft.*lbf)
64271C
5.INSTALL BACK PANEL TRIM
6.INSTALL REAR SEAT CUSHION ASSEMBLY
7.CONNECT CABLE TO NEGATIVE BATTERY TERMINAL
- NOTICE:
-
When disconnecting the cable, some systems need to be initialized after the cable is reconnected.
-
Click hereGeneral>INTRODUCTION>REPAIR INSTRUCTION>INITIALIZATION
8.CHECK SRS WARNING LIGHT