2TR-FE ENGINE MECHANICAL REAR CRANKSHAFT OIL SEAL REMOVAL
CAUTION / NOTICE / HINT
The necessary procedures (adjustment, calibration, initialization, or registration) that must be performed after parts are removed, installed, or replaced during the rear engine oil seal removal/installation are shown below.
| Replacement Part or Procedure | Necessary Procedures | Effects/Inoperative when not Performed | Link |
|---|---|---|---|
| Gas leaks from exhaust system | Inspection after repair | Poor idle, engine start, etc. | ( ) |
PROCEDURE

 33030
1.REMOVE MANUAL TRANSMISSION UNIT ASSEMBLY
31210
2.REMOVE CLUTCH COVER ASSEMBLY
31250
3.REMOVE CLUTCH DISC ASSEMBLY
13405
4.REMOVE FLYWHEEL SUB-ASSEMBLY
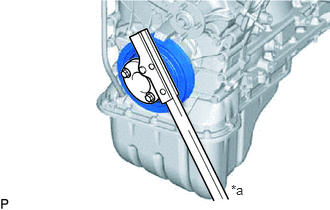
| *a | Hold |
Using SST, hold the crankshaft.
- SST
- 09213-54015 (91651-60855)
09330-00021
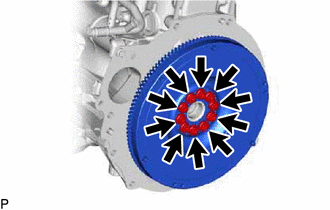
Remove the 10 bolts and flywheel sub-assembly.
11381A
5.REMOVE REAR ENGINE OIL SEAL
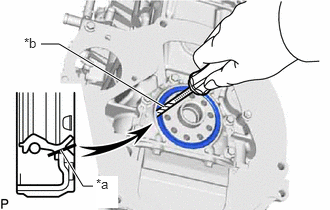
| *a | Cut Position |
| *b | Protective Tape |
Using a knife, cut off the lip of the rear engine oil seal.
Using a screwdriver, pry out the rear engine oil seal.
- NOTICE:
- ·
Do not damage the surface of the rear engine oil seal press fit hole or the crankshaft.
·After removing the rear engine oil seal, check the crankshaft for damage. If damaged, smooth the surface with 400-grit sandpaper.
- HINT:
-
Tape the screwdriver tip before use.