HEATING / AIR CONDITIONING FRONT AIR CONDITIONING UNIT REASSEMBLY
CAUTION / NOTICE / HINT
- HINT:
- ·
Use the same procedure for RHD and LHD vehicles.
·The procedure listed below is for LHD vehicles.
PROCEDURE

 88625
1.INSTALL NO. 1 COOLER THERMISTOR
88501
2.INSTALL NO. 1 COOLER EVAPORATOR SUB-ASSEMBLY
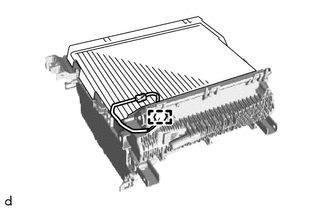
Install the No. 1 cooler evaporator sub-assembly together with the No. 1 cooler thermistor to the upper heater case.
Connect the connector clamp to the upper heater case.
Attach the claw to install the upper heater case to the lower heater case.
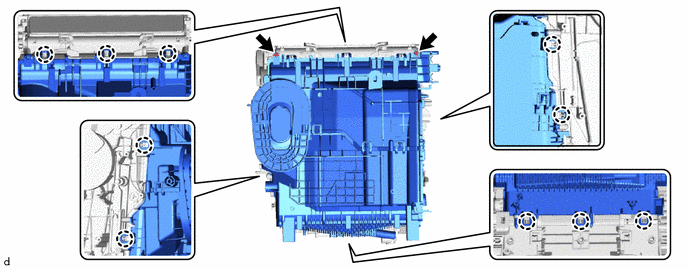
Install the 2 screws.
88515
3.INSTALL COOLER EXPANSION VALVE
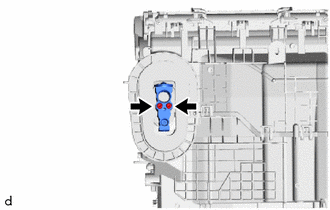
Sufficiently apply compressor oil to 2 new O-rings and the fitting surface of the No. 1 cooler evaporator sub-assembly.
- Compressor Oil:
ND-OIL 8 or equivalent
Install the 2 O-rings to the No. 1 cooler evaporator sub-assembly.
- NOTICE:
-
Keep the O-rings and O-ring fitting surfaces free of foreign matter.
Using a 4 mm hexagon socket wrench, install the cooler expansion valve with the 2 bolts.
- Torque:
- 3.5 N*m (36 kgf*cm, 31 in.*lbf)
87107A
4.INSTALL HEATER RADIATOR UNIT SUB-ASSEMBLY
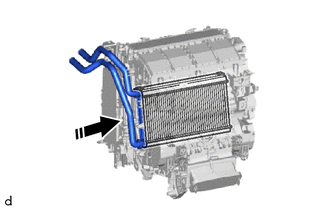

|
Install in this Direction |
Install the heater radiator unit sub-assembly as shown in the illustration.
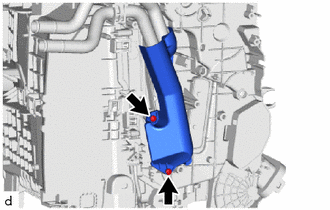
Install the heater radiator cover with the 2 screws.
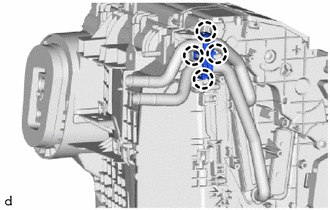
Attach the claw to install the heater clamp.
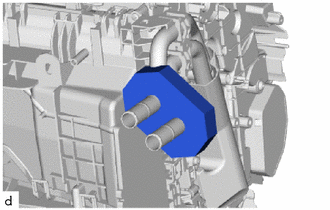
Install the packing.
87050D
5.INSTALL NO. 2 AIR CONDITIONING RADIATOR DAMPER SERVO SUB-ASSEMBLY (for Automatic Air Conditioning System, w/ Rear Duct)
Attach the arm of the No. 2 air conditioning radiator damper servo sub-assembly to the link of the air conditioner radiator assembly as shown in the illustration.
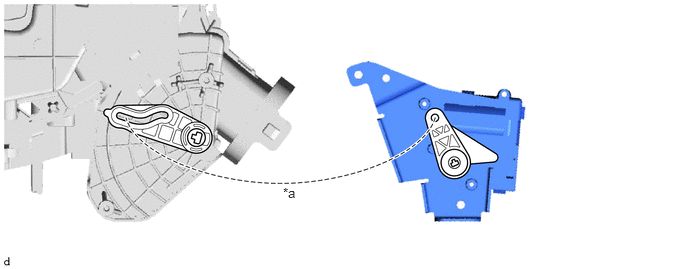
| *a | Align as shown | - | - |
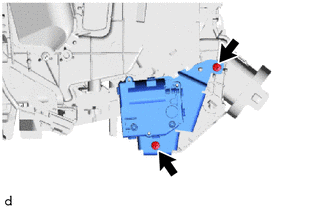
Install the No. 2 air conditioning radiator damper servo sub-assembly with the 2 screws.
87050C
6.INSTALL NO. 1 AIR CONDITIONING RADIATOR DAMPER SERVO SUB-ASSEMBLY (for Automatic Air Conditioning System)
Align each gear on the air conditioning radiator assembly side as shown in the illustration, and then check that the gears of the No. 1 air conditioning radiator damper servo sub-assembly are aligned as shown in the illustration.
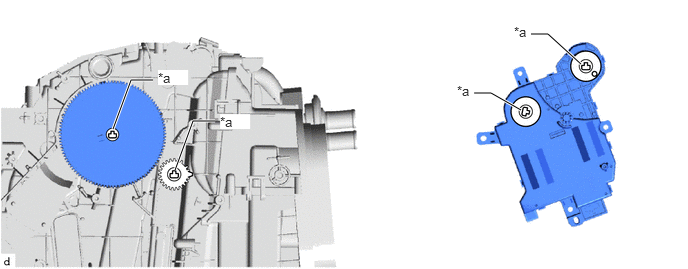
| *a | Align as shown | - | - |
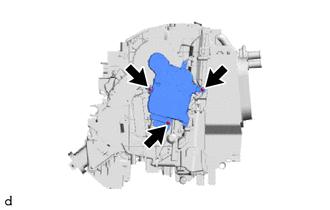
Install the No. 1 air conditioning radiator damper servo sub-assembly with the 3 screws.
55906A
7.INSTALL DEFROSTER DAMPER CONTROL CABLE SUB-ASSEMBLY (for Manual Air Conditioning System)
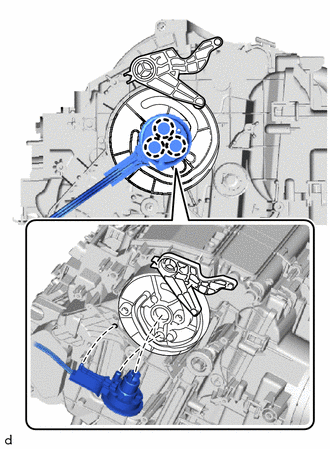
Attach the arm of the defroster damper control cable sub-assembly to the link of the blower assembly as shown in the illustration.
Attach the claw to install the defroster damper control cable sub-assembly.
55909A
8.INSTALL AIR MIX DAMPER CONTROL CABLE SUB-ASSEMBLY (for Manual Air Conditioning System)
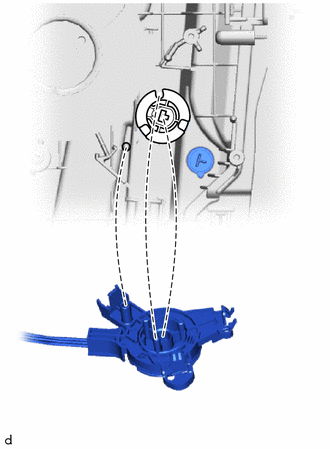
Attach the arm of the air mix damper control cable sub-assembly to the link of the blower assembly as shown in the illustration.
Attach the claw to install the air mix damper control cable sub-assembly.
88650N
9.INSTALL AIR CONDITIONING AMPLIFIER ASSEMBLY
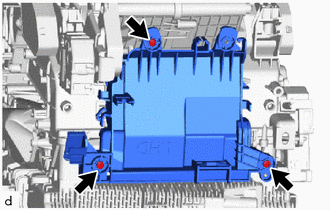
Install the air conditioning amplifier bracket with the 3 screws.
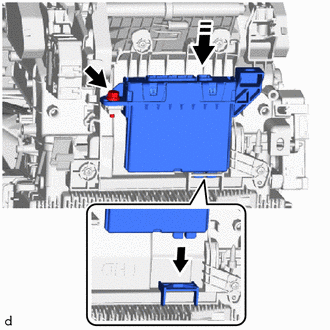
|
|
Install in this Direction |
for Automatic Air Conditioning System:
Install the air conditioning amplifier assembly with the bolt.
- Torque:
- 6.0 N*m (61 kgf*cm, 53 in.*lbf)
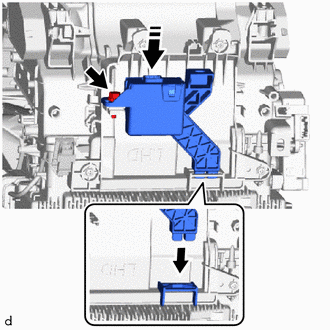
|
|
Install in this Direction |
for Manual Air Conditioning System:
Install the air conditioning amplifier assembly with the bolt.
- Torque:
- 6.0 N*m (61 kgf*cm, 53 in.*lbf)
82210K
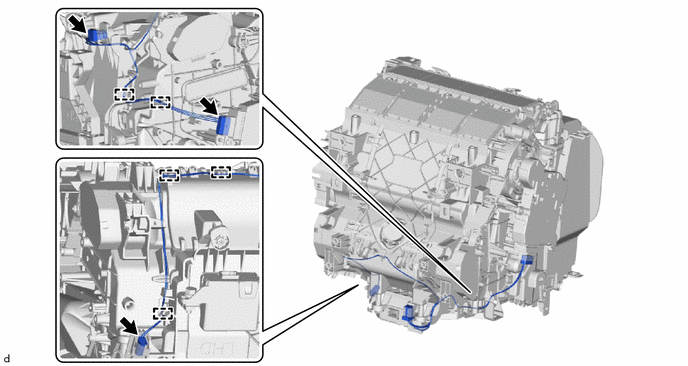
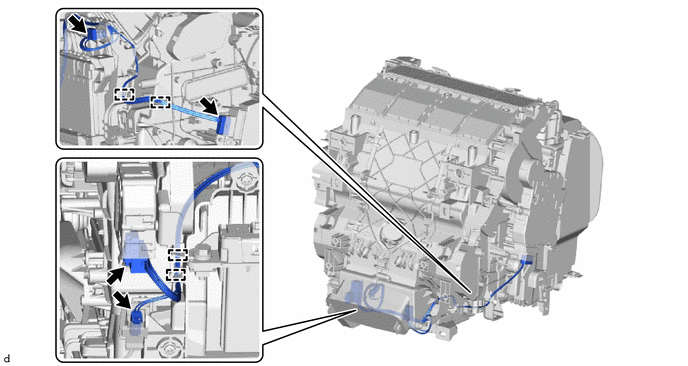
10.INSTALL AIR CONDITIONING HARNESS ASSEMBLY (for Automatic Air Conditioning System)
w/o Rear Duct:
Attach the clamp to install the air conditioning harness assembly.
Connect the 3 connectors.
w/ Rear Duct:
Attach the clamp to install the air conditioning harness assembly.
Connect the 4 connectors.
88505
11.INSTALL AIR CONDITIONING DUCT SUB-ASSEMBLY (for Automatic Air Conditioning System)
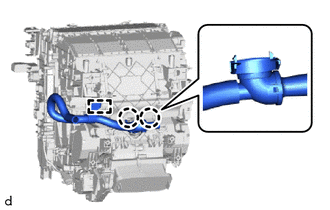
Attach the claw and clamp to install the air conditioning duct sub-assembly.
87130D
12.INSTALL BLOWER ASSEMBLY
87114B
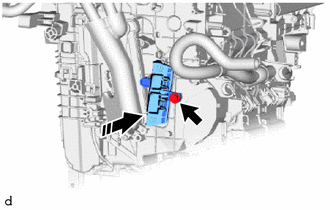
13.INSTALL HEATER COVER
|
|
Install in this Direction |
Install the heater cover with the screw.