5L-E ENGINE MECHANICAL CAMSHAFT REMOVAL
CAUTION / NOTICE / HINT
The necessary procedures (adjustment, calibration, initialization or registration) that must be performed after parts are removed, installed or replaced during the camshaft removal/installation are shown below.
| Replacement Part or Procedure | Necessary Procedures | Effects/Inoperative when not Performed | Link |
|---|---|---|---|
| Replacement of timing belt | Mode reset operation | ·
Does not illuminate when replacement is necessary ·
Illuminates when replacement is not necessary |
( ) |
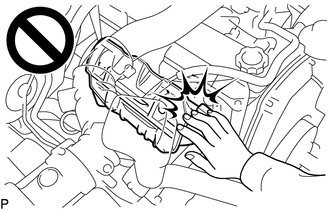
- CAUTION:
-
-
To prevent burns, do not touch the engine, exhaust manifold or other high temperature components while the engine is hot.
PROCEDURE

 13568
1.REMOVE TIMING BELT
2.DRAIN ENGINE OIL
3.DISCONNECT WIRE HARNESS
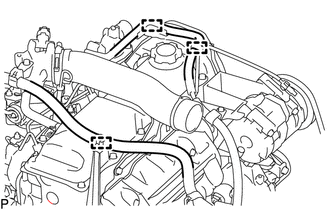
Detach the 3 wire harness clamps.
17130
4.REMOVE INTAKE PIPE
11201
5.REMOVE CYLINDER HEAD COVER SUB-ASSEMBLY
13523P
6.REMOVE CAMSHAFT TIMING PULLEY
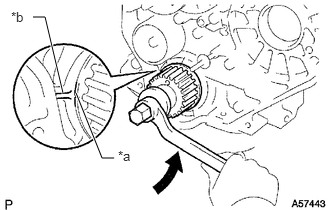
| *a | Timing Mark |
| *b | Protrusion |

|
Turn |
Using the crankshaft pulley bolt, turn the crankshaft 90° counterclockwise and align the timing mark of the crankshaft timing pulley with the protrusion of the timing belt case sub-assembly.
- HINT:
-
Set the No. 1 cylinder to 90° BTDC/compression to avoid interference with the piston top and valve head.
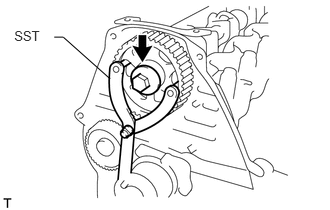
Using SST, loosen the camshaft timing pulley bolt.
- SST
- 09960-10010 (09962-01000, 09963-01000)
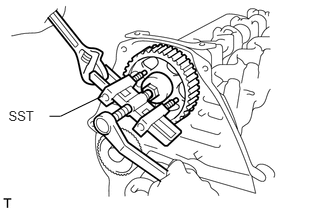
Using SST, disconnect the camshaft timing pulley from the camshaft.
- SST
- 09950-50013 (09951-05010, 09952-05010, 09953-05010, 09954-05021)
Remove the camshaft timing pulley bolt and camshaft timing pulley.
Remove the timing pulley woodruff key.
11322B
7.REMOVE NO. 2 TIMING BELT COVER
Remove the 4 bolts and No. 2 timing belt cover.
11385
8.REMOVE CAMSHAFT OIL SEAL RETAINER
Remove the 4 bolts, camshaft oil seal retainer and gasket.
11305A
9.REMOVE CAMSHAFT OIL SEAL
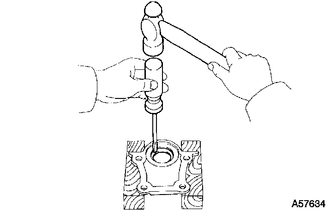
Using a screwdriver and hammer, tap out the camshaft oil seal.
- NOTICE:
-
Be careful not to damage the camshaft oil seal retainer.
13511
10.REMOVE CAMSHAFT
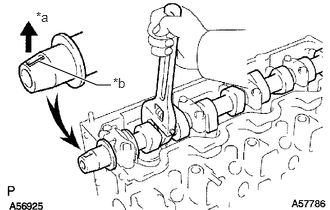
| *a | Upward |
| *b | Timing Pulley Woodruff Key Groove |
Turn the camshaft with a wrench so that the timing pulley woodruff key groove faces upward.
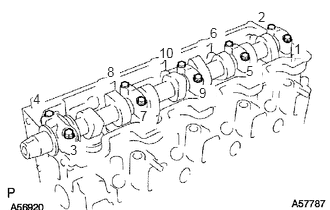
Uniformly loosen and remove the 10 camshaft bearing cap bolts in several passes in the sequence shown in the illustration.
Remove the 5 camshaft bearing caps and camshaft.
- HINT:
-
Arrange the camshaft bearing caps in the correct order.