INTERIOR PANELS / TRIM LOWER INSTRUMENT PANEL INSTALLATION
CAUTION / NOTICE / HINT
- HINT:
- ·
Use the same procedure for RHD and LHD vehicles.
·The procedure listed below is for RHD vehicles.
·A bolt without a torque specification is shown in the standard bolt chart.
Click hereGeneral>SPECIFICATIONS>STANDARD BOLT>SPECIFIED TORQUE FOR STANDARD BOLTS
PROCEDURE

 55303B
1.INSTALL LOWER INSTRUMENT PANEL SUB-ASSEMBLY
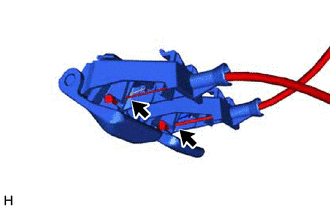
Connect the hood lock control cable and fuel lid lock open cable.
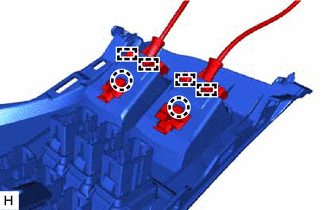
Attach the guide and claw to connect the hood lock control lever sub-assembly and fuel lid lock open lever to the lower instrument panel sub-assembly.
Connect the connector.
Attach the guide to install the lower instrument panel sub-assembly.
Install the 7 screws <B>, 2 bolts <C> and screw <D>.
Attach the clamp and connect the illumination light.
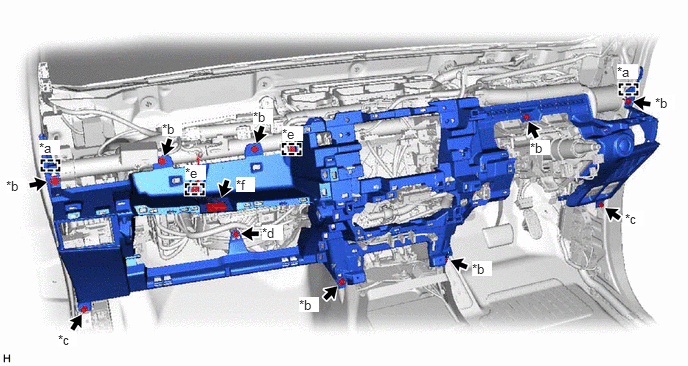
| *a | Guide | *b | Screw <B> |
| *c | Bolt <C> | *d | Screw <D> |
| *e | Clamp | *f | Illumination Light |
55054
2.INSTALL GLOVE COMPARTMENT DOOR STOPPER SUB-ASSEMBLY
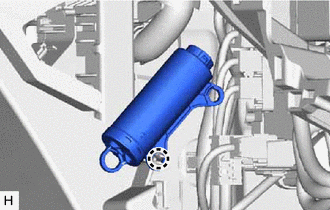
Attach the claw to install the glove compartment door stopper sub-assembly.
55550
3.INSTALL GLOVE COMPARTMENT DOOR ASSEMBLY
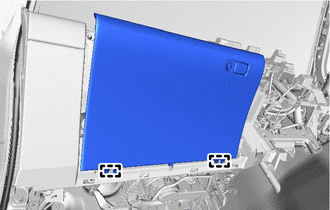
Attach the hinge to install the glove compartment door assembly.
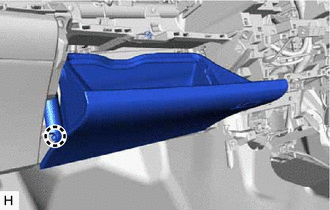
Attach the claw to connect the glove compartment door stopper sub-assembly.
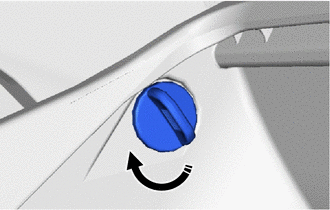

|
Install in this Direction |
Install the glove door stopper pin and twist it as shown in the illustration.
- HINT:
-
Use the same procedure for both glove door stopper pins.
55607
4.INSTALL NO. 2 INSTRUMENT PANEL UNDER COVER SUB-ASSEMBLY
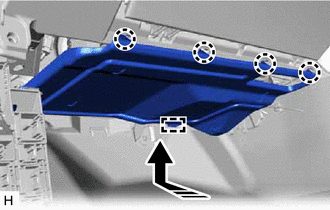
|
|
Install in this Direction |
Attach the guide.
Attach the claw to install the No. 2 instrument panel under cover sub-assembly as shown in the illustration.
73900
5.INSTALL LOWER NO. 1 INSTRUMENT PANEL AIRBAG ASSEMBLY
55606
6.INSTALL NO. 1 INSTRUMENT PANEL UNDER COVER SUB-ASSEMBLY
Attach the claw to connect the DLC3.
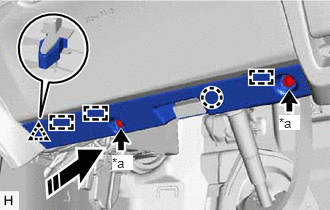
| *a | Screw <A> |
|
|
Install in this Direction |
Attach the guide, clip and claw to install the No. 1 instrument panel under cover sub-assembly as shown in the illustration.
Install the 2 screws <A>.
55447C
7.INSTALL NO. 2 SWITCH HOLE BASE
for Automatic Air Conditioning System:
Connect the cooler thermistor connector and hose.
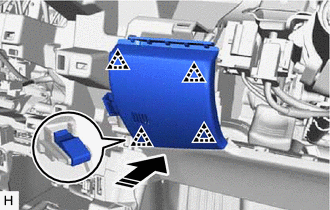
|
|
Install in this Direction |
Attach the clip to install the No. 2 switch hole base as shown in the illustration.
55407C
8.INSTALL LOWER INSTRUMENT COVER SUB-ASSEMBLY
except 4WD:
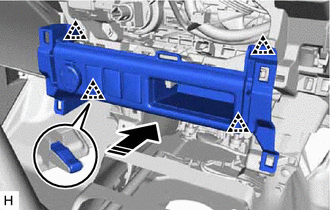
|
|
Install in this Direction |
Connect the connector.
Attach the clip to install the lower instrument cover sub-assembly as shown in the illustration.
for 4WD:
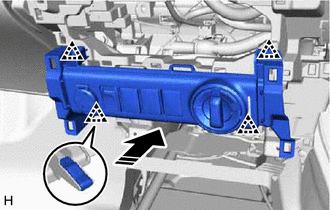
|
|
Install in this Direction |
Connect the connector.
Attach the clip to install the lower instrument cover sub-assembly as shown in the illustration.
84013A
9.INSTALL INTEGRATION PANEL SUB-ASSEMBLY
for Manual Air Conditioning System:
for Manual Cooler System:
55905J
10.INSTALL CONTROL KNOB SUB-ASSEMBLY
for Manual Air Conditioning System:
for Manual Cooler System:
55900
11.INSTALL AIR CONDITIONING CONTROL ASSEMBLY (for Automatic Air Conditioning System)
86212
12.INSTALL NO. 2 RADIO BRACKET (w/o Audio, w/o Cover)
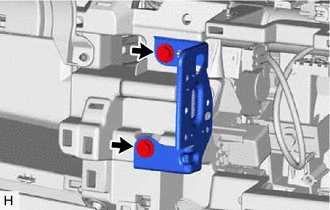
Install the No. 2 radio bracket with the 2 screws.
86211
13.INSTALL NO. 1 RADIO BRACKET (w/o Audio, w/o Cover)
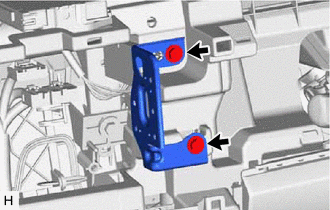
Install the No. 1 radio bracket with the 2 screws.
55522B
14.INSTALL RADIO TUNER OPENING COVER (w/o Audio, w/ Cover)
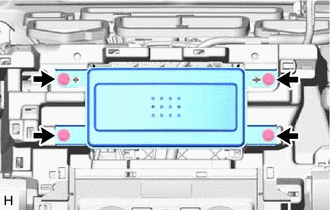
Install the radio tuner opening cover with the 4 screws.
86120
15.INSTALL RADIO RECEIVER ASSEMBLY (w/ Audio, for Radio Receiver Type)
86140A
16.INSTALL RADIO AND DISPLAY RECEIVER ASSEMBLY (w/ Audio, for Radio and Display Type)
86120L
17.INSTALL NAVIGATION RECEIVER ASSEMBLY (w/ Navigation System)
84140
18.INSTALL HEADLIGHT DIMMER SWITCH ASSEMBLY
58810J
19.INSTALL CONSOLE BOX ASSEMBLY
55302A
20.INSTALL UPPER INSTRUMENT PANEL SUB-ASSEMBLY
21.CONNECT CABLE TO NEGATIVE BATTERY TERMINAL
- NOTICE:
-
When disconnecting the cable, some systems need to be initialized after the cable is reconnected.
-
Click hereGeneral>INTRODUCTION>REPAIR INSTRUCTION>INITIALIZATION
22.CHECK SRS WARNING LIGHT