SEAT FRONT SEAT ASSEMBLY DISASSEMBLY
CAUTION / NOTICE / HINT
- CAUTION:
-
Wear protective gloves. Sharp areas on the parts may injure your hands.
- HINT:
- ·
Use the same procedure for RHD and LHD vehicles.
·The procedure listed below is for LHD vehicles.
·Use the same procedure for the RH and LH sides.
·The procedure listed below is for the LH side.
PROCEDURE

 1.REMOVE FRONT SEAT INNER BELT ASSEMBLY LH (for Driver Side)
2.REMOVE FRONT SEAT INNER BELT ASSEMBLY RH (for Front Passenger Side)
3.REMOVE FRONT SEAT CUSHION COVER LH
Remove the front seat cushion cover LH.
4.REMOVE FRONT SEAT INNER CUSHION SHIELD LH
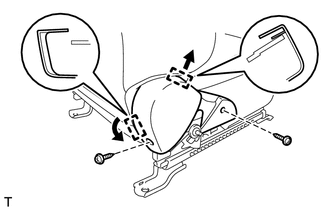
Remove the 2 screws.
Detach the 2 hooks in the order shown in the illustration and remove the front seat inner cushion shield LH.
5.REMOVE VERTICAL SEAT ADJUSTER KNOB LH (for Driver Side)
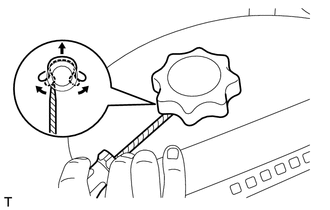
| *1 | Protective Tape |
Using a screwdriver, remove the snap ring as shown in the illustration.
- HINT:
-
Tape the screwdriver tip before use.
Remove the vertical seat adjuster knob LH.
6.REMOVE RECLINING ADJUSTER RELEASE HANDLE LH
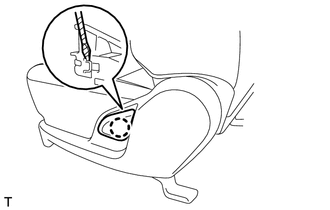
| *1 | Protective Tape |
Raise the reclining adjuster release handle LH to reveal the claw. Using a screwdriver, detach the claw and remove the reclining adjuster release handle LH.
- HINT:
-
Tape the screwdriver tip before use.
7.REMOVE FRONT SEAT CUSHION SHIELD LH
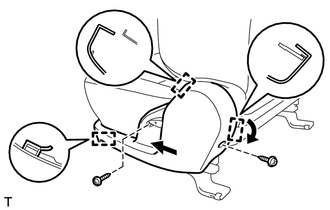
| *1 | Hook |
| *2 | Guide |
Remove the 2 screws.
Detach the 2 hooks in the order shown in the illustration, and then detach the guide and remove the front seat cushion shield LH.
8.REMOVE SEATBACK SPRING LH
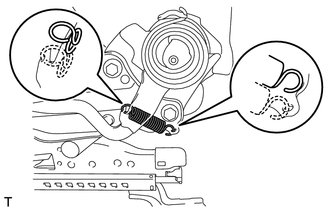
Remove the seatback spring LH.
9.REMOVE SEPARATE TYPE FRONT SEATBACK COVER
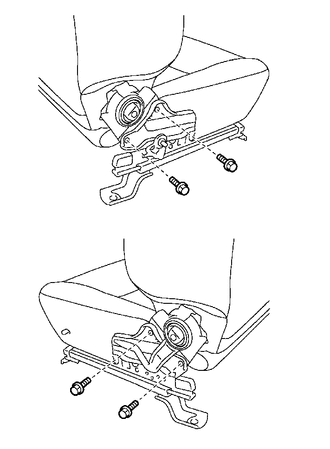
Remove the 4 bolts and front seatback assembly.
Detach the 2 hooks and remove the hog rings, and then roll up the separate type front seatback cover.
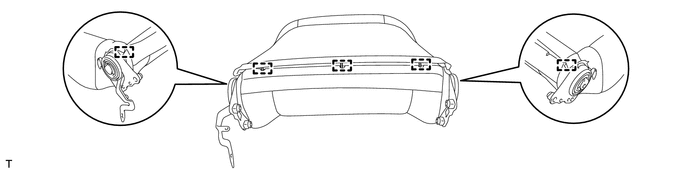
| *1 | Hook | *2 | Hog Ring |
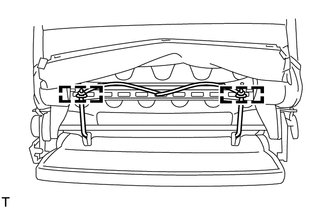
Remove the hog rings and detach the 2 straps of the separate type front seatback cover, and then roll up the separate type front seatback cover.
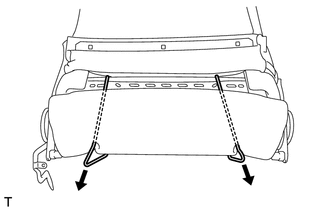
Pass the strap of the separate type front seatback cover through the holes of the separate type front seatback pad.
Remove the hog rings and roll up the separate type front seatback cover.
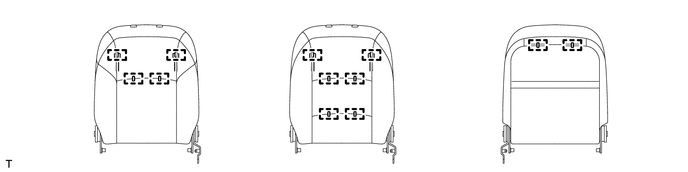
| *A | for Cloth Seat | *B | for Leather Seat |
| *a | Front view of front seatback | *b | Rear view of front seatback |
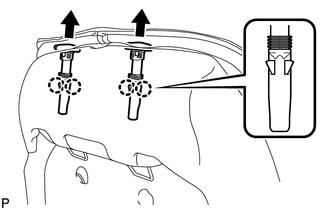
Detach the 4 claws and remove the 2 front seat headrest supports and separate type front seatback cover.
10.REMOVE SEPARATE TYPE FRONT SEATBACK PAD
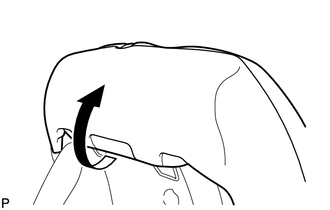
Remove the separate type front seatback pad.
11.REMOVE NO. 1 SEATBACK CLOTH (for RHD)
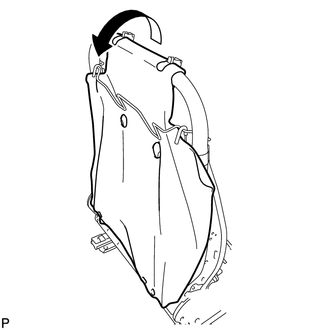
Remove the No. 1 seatback cloth from the separate type front seatback spring assembly.
12.REMOVE SEPARATE TYPE FRONT SEAT CUSHION COVER
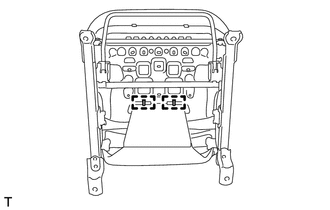
Remove the hog rings and fold back the separate type front seat cushion cover.
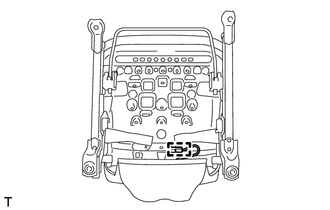
for Front Passenger Side:
Detach the wire harness clamp.
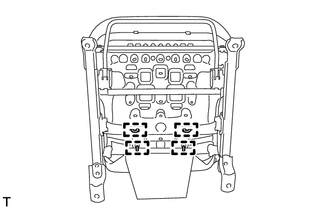
Remove the hog rings.
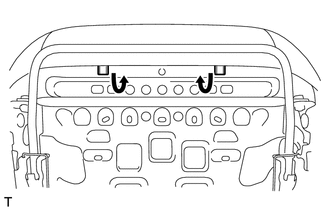
Bend the 2 front seat cushion frame claws upward.
Detach the hooks and remove the separate type front seat cushion cover together with the pad from the front seat cushion frame sub-assembly LH.
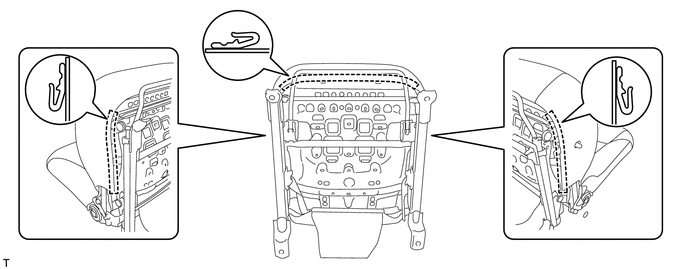
Remove the hog rings and separate type front seat cushion cover.
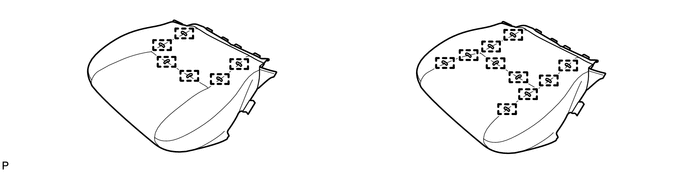
| *A | for Cloth Seat | *B | for Leather Seat |
13.REMOVE FRONT SEAT CUSHION PROTECTOR
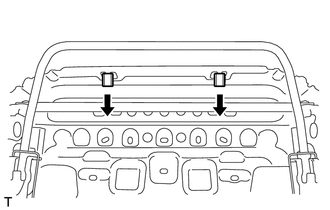
Remove the 2 front seat cushion protectors.
14.REMOVE FRONT SEAT CUSHION FRAME SUB-ASSEMBLY LH
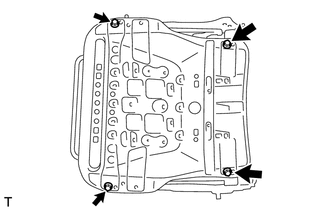
Remove the 4 bolts and front seat cushion frame sub-assembly LH.
15.REMOVE FRONT SEAT ADJUSTER ROD (for Driver Side)
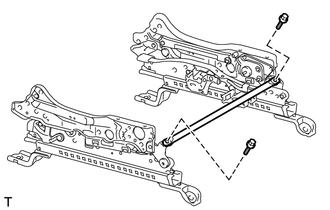
Remove the 2 bolts and front seat adjuster rod.
16.REMOVE SEAT TRACK HANDLE SUB-ASSEMBLY LH
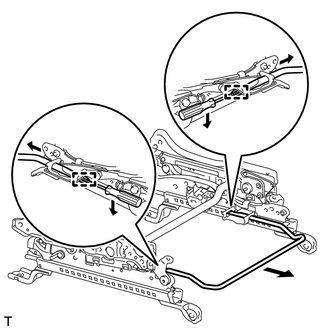
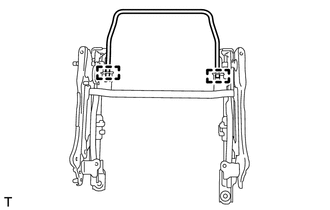
Using a screwdriver, detach the 2 springs and remove the seat track handle sub-assembly LH as shown in the illustration.
- HINT:
-
The seat track handle sub-assembly LH will get caught on the springs when removing it. Detach the springs to remove the seat track handle sub-assembly LH.
17.REMOVE SEAT SPRING (for Driver Side)
Temporarily install the vertical seat adjuster knob LH.
Turn the vertical seat adjuster knob LH clockwise and move the lower reclining adjuster arm sub-assembly to the uppermost position.
Remove the vertical seat adjuster knob LH.
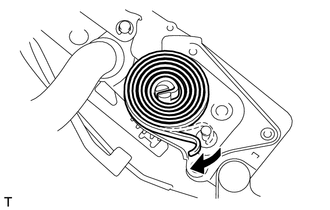
Detach the seat spring from the lower reclining adjuster arm sub-assembly.
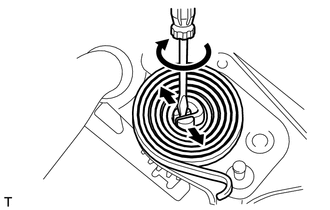
Using a screwdriver, spread apart the tabs that hold the spring, and then remove the seat spring.
18.REMOVE FRONT NO. 2 SEAT ADJUSTER PIN LH (for Driver Side)
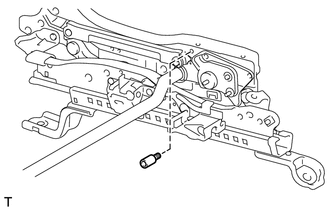
Using a 6 mm socket hexagon wrench, remove the front No. 2 seat adjuster pin LH.
19.REMOVE VERTICAL ADJUSTING SHAFT SUB-ASSEMBLY (for Driver Side)
Temporarily install the vertical seat adjuster knob LH.
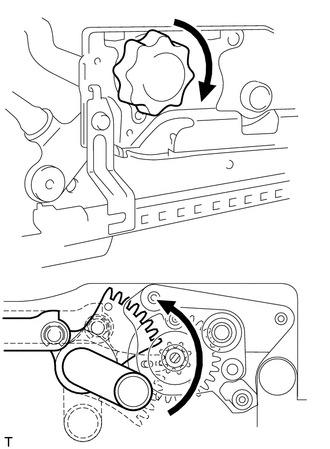
Turn the vertical seat adjuster knob LH clockwise and move the gear of the vertical adjusting shaft sub-assembly to the position shown in the illustration.
Remove the vertical seat adjuster knob LH.
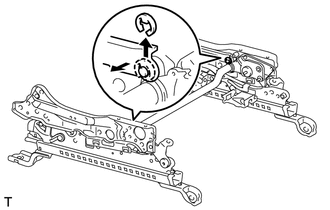
| *1 | Vertical Travel Link |
Using a screwdriver, remove the 2 E-rings.
Disconnect the 2 vertical travel links from the vertical adjusting shaft sub-assembly.
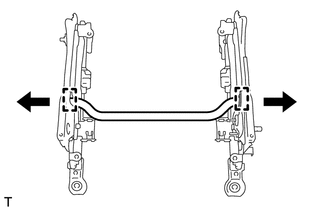
Disconnect the vertical adjusting shaft sub-assembly from the 2 lower reclining adjuster arms and remove the vertical adjusting shaft sub-assembly.
20.REMOVE LOWER RECLINING ADJUSTER ARM SUB-ASSEMBLY LH
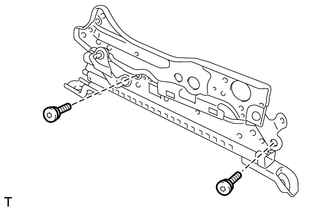
for Driver Side:
Using a T40 "TORX" socket wrench, remove the 2 "TORX" bolts and lower reclining adjuster arm sub-assembly LH.
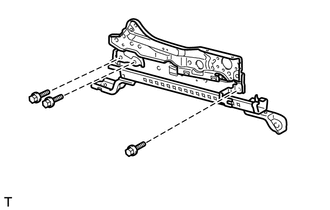
for Front Passenger Side:
Remove the 3 bolts and lower reclining adjuster arm sub-assembly LH.
21.REMOVE LOWER RECLINING ADJUSTER ARM SUB-ASSEMBLY RH
for Driver Side:
- HINT:
-
Use the same procedure described for the LH side.
for Front Passenger Side:
- HINT:
-
Use the same procedure described for the LH side.
22.REMOVE FRONT SEAT CUSHION EDGE PROTECTOR LH
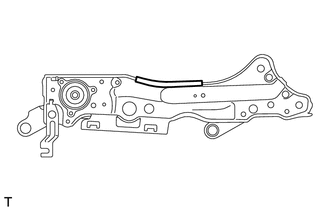
Remove the front seat cushion edge protector LH.