HEATING / AIR CONDITIONING AIR CONDITIONING SYSTEM(for Automatic Air Conditioning System) Blower Motor Circuit
DESCRIPTION
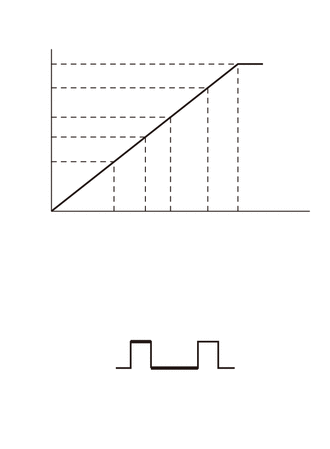
The blower with fan motor sub-assembly is operated by signals from the air conditioning amplifier. Blower with fan motor sub-assembly speed signals are determined by changes in the duty ratio*.
The blower motor control controls the blower with fan motor sub-assembly speed. The blower motor control reads the signal from the air conditioning amplifier assembly and controls rotation and speed.
- HINT:
-
*: The duty ratio is the ratio of the blower with fan motor sub-assembly on time (A) to the total of the blower with fan motor sub-assembly on and off time (A + B).
WIRING DIAGRAM
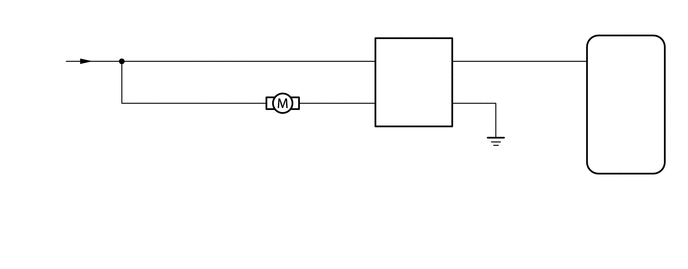
CAUTION / NOTICE / HINT
- NOTICE:
-
Inspect the relays for circuits related to this system before performing the following procedure.
PROCEDURE
Enter actuator check mode.
Place your hand in front of a vent and check that the air flow level changes according to the display code.
| Display Code | Blower Level |
|---|---|
| 0 | 0 |
| 1 | 1 |
| 2 | 16 |
| 3 | 16 |
| 4 | 16 |
| 5 | 16 |
| 6 | 16 |
| 7 | 16 |
| 8 | 16 |
| 9 | 31 |
- OK:
Blower level changes in accordance with each display code.
- HINT:
-
The progression through the steps of the actuator check can be changed from automatic to manual by pressing the front DEF switch.
- Result:
Proceed to OK NG
OK
NG
Remove the blower with fan motor sub-assembly.
Click hereVehicle Interior>HEATING / AIR CONDITIONING>FRONT BLOWER MOTOR>REMOVAL
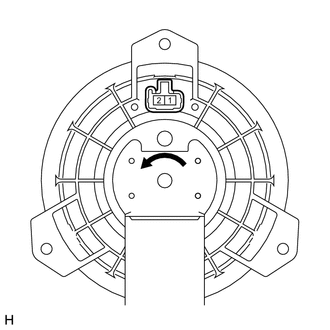
Apply battery voltage to the blower with fan motor sub-assembly and check the operation of the blower motor.
- OK:
Measurement Condition Specified Condition Battery positive (+) → Terminal 2
Battery negative (-) → Terminal 1The blower motor operates smoothly
- Result:
Proceed to OK NG
OK
NG
Disconnect the G78 blower motor control connector.
Disconnect the G94 air conditioning amplifier assembly connector.
Measure the resistance according to the value(s) in the table below.
- Standard Resistance:
Tester Connection Condition Specified Condition G78-3 (SI) - G94-2 (BLW) Always Below 1 Ω G78-4 (GND) - Body ground G78-3 (SI) - Body ground Always 10 kΩ or higher G78-2 (+B) - Body ground G78-1 (VM) - Body ground
- Result:
Proceed to OK NG
OK
NG
Disconnect the G78 blower motor control connector.
Disconnect the G15 blower with fan motor sub-assembly connector.
Measure the voltage according to the value(s) in the table below.
- Standard Voltage:
Tester Connection Switch Condition Specified Condition G78-2 (+B) - Body ground ·Ignition switch ON
·Blower switch on (LO level)
11 to 14 V ·Ignition switch ON
·Blower switch off
Below 1 Ω G15-2 - Body ground ·Ignition switch ON
·Blower switch on (LO level)
11 to 14 V ·Ignition switch ON
·Blower switch off
Below 1 V
Measure the resistance according to the value(s) in the table below.
- Standard Resistance:
Tester Connection Condition Specified Condition G15-1 - Body ground Always 10 kΩ or higher G15-2 - Body ground G78-1 (VM) - G15-1 Always Below 1 Ω
- Result:
Proceed to OK NG
OK
NG
Remove the air conditioning amplifier assembly with its connectors still connected.
| *a | Component with harness connected
(Air Conditioning Amplifier Assembly) |
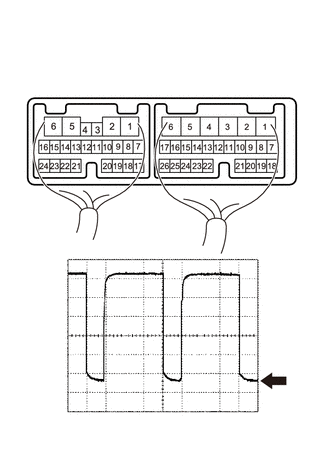
Using an oscilloscope, check the waveform of the amplifier.
- Measurement Condition:
Item Content Tester Connection G94-2 (BLW) - Body ground Tool Setting 1 V/DIV., 50 μsec./DIV. Condition Ignition switch ON, Blower switch on (LO level)
- OK:
Waveform is as shown in the illustration.
- HINT:
-
Waveform varies depending on the blower switch setting.
- Result:
Proceed to OK NG
OK
NG