HEATING / AIR CONDITIONING AIR CONDITIONING SYSTEM(for Automatic Air Conditioning System) 21 Solar Sensor Circuit
DESCRIPTION
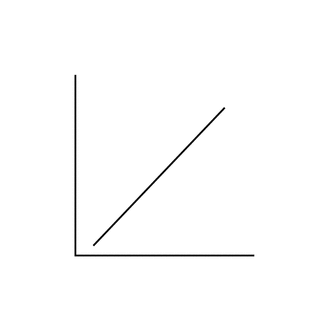
The cooler thermistor (solar sensor), which is installed on the upper side of the instrument panel, detects sunlight and controls the air conditioning in AUTO mode. The output current from the cooler thermistor (solar sensor) varies according to the amount of sunlight. When the amount of sunlight increases, the output current increases. As the amount of sunlight decreases, the output current decreases. The air conditioning amplifier assembly detects the output current from the cooler thermistor (solar sensor).
| DTC No. | Detection Item | DTC Detection Condition | Trouble Area | Memory | Note |
|---|---|---|---|---|---|
| 21 | Solar Sensor Circuit | An open in cooler thermistor (solar sensor) circuit
(If check is performed in a dark place, DTC 21 may be stored) |
·
Cooler thermistor (solar sensor) ·
Harness or connector ·
Air conditioning amplifier assembly |
Memorized
(8.5 min. or more) (Only when circuit is shorted) |
- |
- HINT:
-
Memory: The air conditioning amplifier stores the DTC of the respective malfunction that has been detected for the period of time indicated in parentheses.
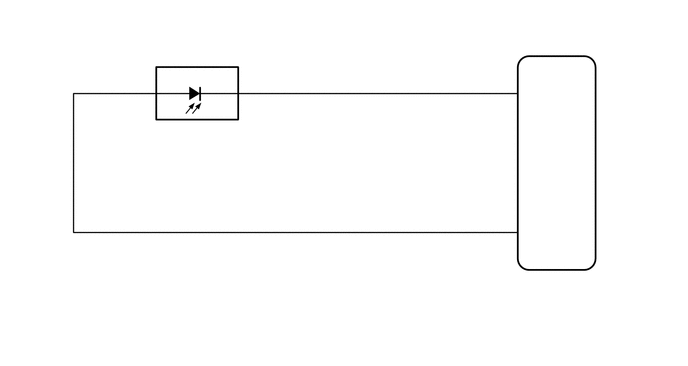
WIRING DIAGRAM
CAUTION / NOTICE / HINT
- HINT:
-
If the check is performed in a dark place, DTC 21 may be stored even though the system is normal.
PROCEDURE
Remove the air conditioning amplifier assembly with its connectors still connected.
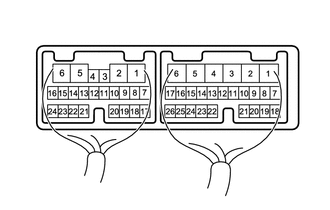
| *a | Component with harness connected
(Air Conditioning Amplifier Assembly) |
Measure the voltage according to the value(s) in the table below.
- Standard Voltage:
Tester Connection Condition Specified Condition G95-2 (S5-3) - G95-7 (TS) ·Ignition switch ON
·Solar sensor subjected to electric light
·Vehicle indoors
0.8 to 4.3 V ·Ignition switch ON
·Solar sensor covered with a cloth
·Vehicle indoors
Below 0.8 V
- HINT:
- ·
As the inspection light is moved away from the sensor, the voltage decreases.
·Use an incandescent light for inspection. Bring it within 30 cm (11.8 in.) of the sensor.
- Result:
Result Proceed to OK (When troubleshooting according to problem symptoms table.) A OK (When troubleshooting according to DTC.) B NG C
A
B
C
Remove the cooler thermistor (solar sensor).
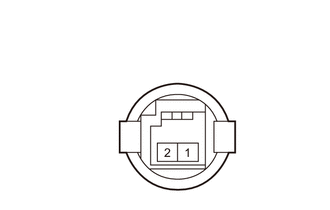
Measure the resistance according to the value(s) in the table below.
Connect the positive (+) lead of the ohmmeter to terminal 2 and the negative (-) lead to terminal 1 of the cooler thermistor.
- Standard Resistance:
Tester Connection Condition Specified Condition 1 - 2 ·Vehicle indoors
·Solar sensor is subjected to electric light
Below 10 kΩ ·Vehicle indoors
·Solar sensor is covered with a cloth
10 kΩ or higher
- NOTICE:
-
The connection procedure for a digital tester, such as a TOYOTA electrical tester, is shown above. When using an analog tester, connect the negative (-) lead to terminal 2 and positive (+) lead to terminal 1.
- HINT:
- ·
As the inspection light is moved away from the cooler thermistor (solar sensor), the resistance increases.
·Use an incandescent light for inspection. Bring it within 30 cm (11.8 in.) from the sensor.
- Result:
Proceed to OK NG
OK
NG
Disconnect the G111 cooler thermistor (solar sensor) connector.
Disconnect the G95 air conditioning amplifier assembly connector.
Measure the resistance according to the value(s) in the table below.
- Standard Resistance:
Tester Connection Condition Specified Condition G95-2 (S5-3) - G111-1 Always Below 1 Ω G95-7 (TS) - G111-2 G95-2 (S5-3) - Body ground Always 10 kΩ or higher G95-7 (TS) - Body ground
- Result:
Proceed to OK NG
OK
NG