2013-2015 Land Cruiser Prado · Service Manual Engine / Hybrid System

REMOVAL

Removal / installation · Vehicles built from Aug 2013


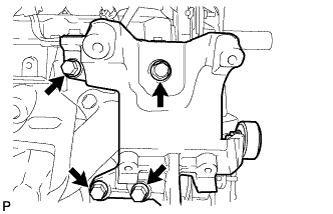
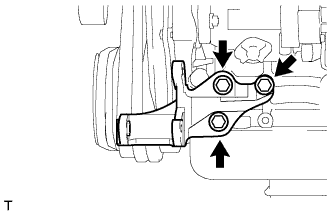
1. REMOVE NO. 1 COMPRESSOR MOUNTING BRACKET

  1. A121135E01
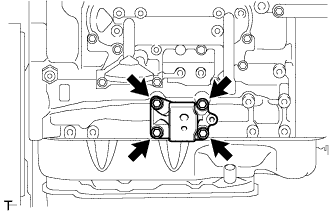
    Remove the 4 bolts and compressor mounting bracket.


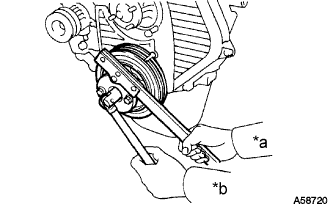
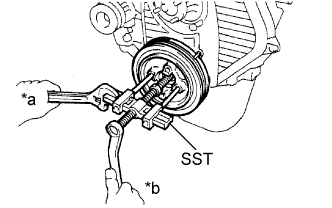
2. REMOVE CRANKSHAFT PULLEY

A058720E02
  1. Using SST, remove the pulley bolt.

    SST
    09213-54015   (91651-60855)
    09330-00021  
    Text in Illustration 
    *a
    Hold
    *b
    Turn

  1. A058719E02
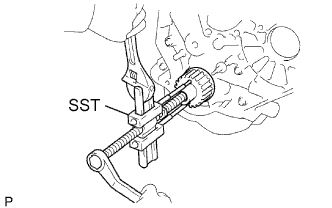
    Using SST, remove the pulley.
    SST
    09950-50013   (09951-05010, 09952-05010, 09953-05020, 09954-05021)
    09950-60010   (09951-00490)
    09950-40011   (09957-04010)
    Text in Illustration 
    *a
    Hold
    *b
    Turn


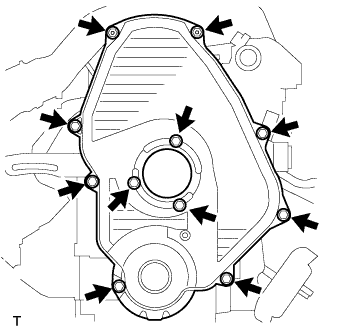
3. REMOVE TIMING BELT COVER

  1. A112017
    Remove the 11 bolts, washers, timing belt cover, and 2 gaskets.


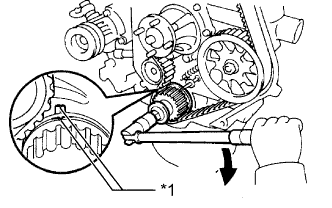
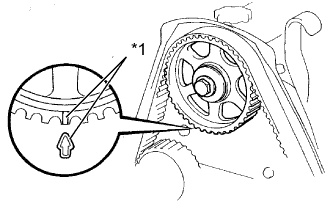
4. SET NO. 1 CYLINDER TO TDC/COMPRESSION

  1. A058728E03
    Using the crankshaft pulley bolt, align the groove of the crankshaft pulley with the timing pointer by turning the crankshaft clockwise.
    Text in Illustration 
    *1
    Timing Mark
    V100135
    Turn

  1. A058729E02
    Check that the timing marks of the camshaft timing pulley and No. 2 timing belt cover are aligned.
    Text in Illustration 
    *1
    Timing Mark
    If not, turn the crankshaft 1 revolution (360°).


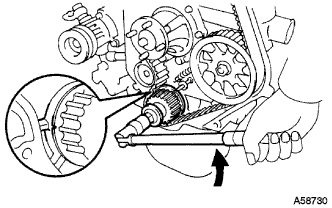
5. REMOVE TIMING BELT

HINT:
If reusing the timing belt, draw a direction arrow on the timing belt (in the direction the belt move when the engine is running), and place matchmarks on the pulleys and timing belt.

  1. A058730
    Turn the crankshaft 90° counterclockwise, and align the timing mark of the crankshaft timing pulley with the protrusion of the timing belt case.
    Text in Illustration 
    V100135
    Turn

    NOTICE:
    If the timing belt is disengaged, having the crankshaft timing pulley at the wrong angle can cause the piston head and valve head to come into contact with each other when removing the camshaft timing pulley, and camshaft causing damage. Therefore, always set the crankshaft pulley is removed at the correct angle.

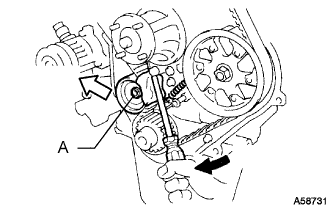
  1. A058731E02
    Loosen the No. 1 timing belt idler bolt (A), and shift the idler to the left as far as possible.
    Text in Illustration 
    V100135
    Pry
    V100136
    Move

  1. Tighten the No. 1 timing belt idler bolt (A), and then relieve the timing belt tension.

  1. Remove the timing belt.


6. REMOVE CRANKSHAFT TIMING PULLEY

  1. A056898E02
    Using a screwdriver, remove the crankshaft timing pulley.
    SST
    09950-50013   (09951-05010, 09952-05010, 09953-05010, 09953-05020, 09954-05010)

    HINT:
    If the timing pulley cannot be removed by using a screwdriver, remove it with SST.


7. REMOVE INTAKE FLANGE

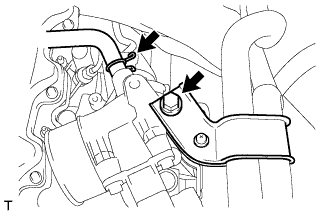
  1. A224307
    Remove the bolt and disconnect the PCV hose and heater hose bracket.

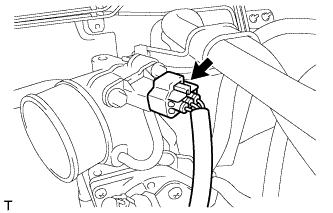
  1. A224306
    Disconnect the manifold absolute pressure sensor connector.

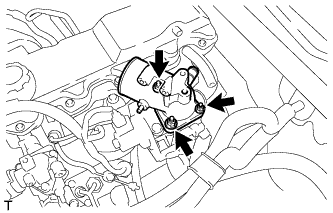
  1. A224831
    Remove the 3 nuts, intake flange and gasket.


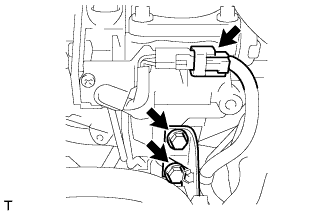
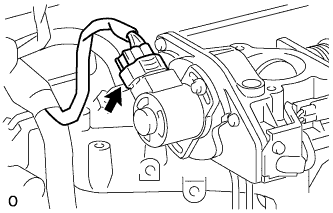
8. REMOVE DIESEL THROTTLE BODY

  1. A224308
    Disconnect the throttle open switch connector.

  1. Remove the 2 bolts and disconnect the wire harness bracket.

  1. A111053E02
    Disconnect the throttle control motor connector.

  1. Remove the diesel throttle body and gasket.


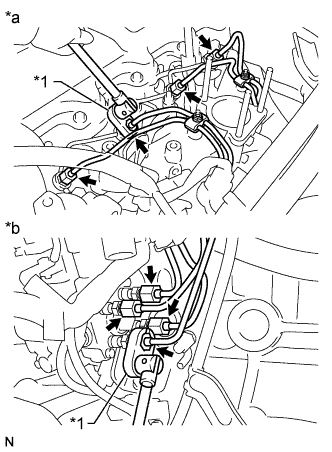
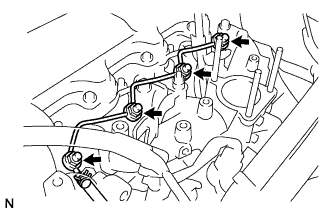
9. REMOVE INJECTION PIPE SET

  1. A121940E03
    Using a union nut wrench, loosen the 8 union nuts of the 4 injection pipes.
    Text in Illustration 
    *1
    Union Nut Wrench
    *a
    for Injection Nozzle Side
    *b
    for Injection Pump Side

  1. Remove the 2 nuts, 2 upper pipe clamps and 4 injection pipes with 2 lower pipe clamps.


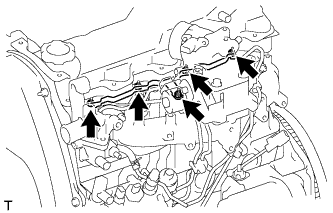
10. REMOVE NO. 1 GLOW PLUG CONNECTOR

  1. A224317
    Remove the nut, No. 2 glow plug resistor insulator and washer and disconnect the wire harness.

  1. Remove the 4 screw grommets and 4 nuts.

  1. Remove the No. 1 glow plug connector and No. 1 glow plug resistor insulator.


11. REMOVE NOZZLE LEAKAGE PIPE ASSEMBLY

  1. A121941
    Disconnect the fuel hose from the leakage pipe.

  1. Remove the 4 nuts, leakage pipe and 4 ring packing washers.


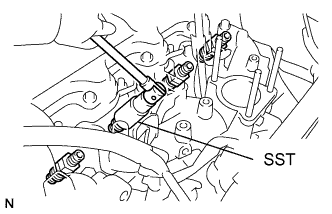
12. REMOVE NOZZLE HOLDER & NOZZLE SET

  1. A121942E01
    Using SST, remove the 4 injection nozzles, 4 injection nozzle seats and 4 injection nozzle seat gaskets.
    SST
    09268-64010   (09268-64020)


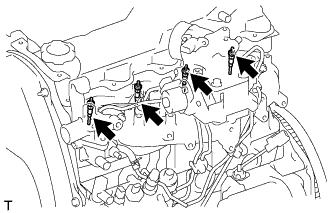
13. REMOVE GLOW PLUG ASSEMBLY

  1. A224318
    Using a 12 mm deep socket wrench, remove the 4 glow plugs.


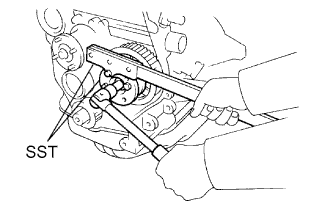
14. REMOVE INJECTION PUMP DRIVE PULLEY

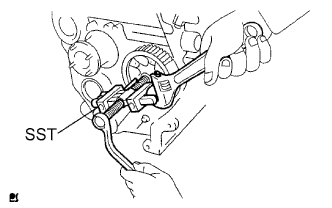
  1. A071313E01
    Using SST, remove the pulley nut.
    SST
    09213-14010   (91651-60865)
    09330-00021  

  1. A071314E01
    Using SST, remove the drive pulley.
    SST
    09950-50013   (09951-05010, 09952-05010, 09953-05010, 09954-05021)


15. REMOVE INJECTION PUMP ASSEMBLY

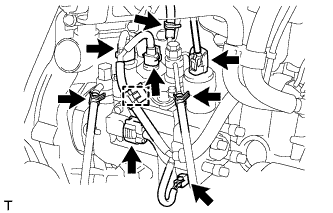
  1. A227188
    Disconnect the 5 connectors and detach the wire harness clamp.

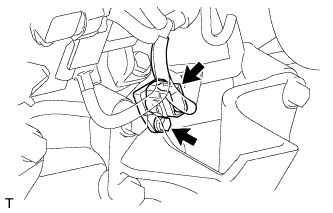
  1. Disconnect the 3 fuel hoses.

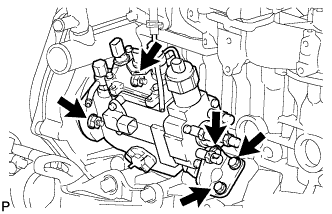
  1. A223860
    Remove the 3 bolts and injection pump stay.
  1. Remove the 2 nuts and injection pump.

16. REMOVE CRANK POSITION SENSOR

  1. A223429
    Disconnect the crankshaft position sensor connector.

  1. Remove the bolt and crankshaft position sensor.


17. REMOVE WATER OUTLET HOUSING

  1. A113081
    Remove the 3 bolts, outlet housing and gasket.


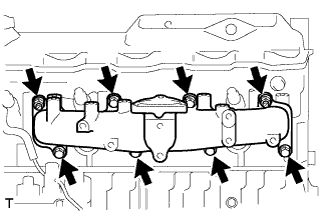
18. REMOVE INTAKE MANIFOLD

  1. A113083
    Remove the 6 bolts, 2 nuts, intake manifold and gasket.


19. REMOVE WATER BY-PASS HOSE UNION
  1. Remove the water by-pass hose union.


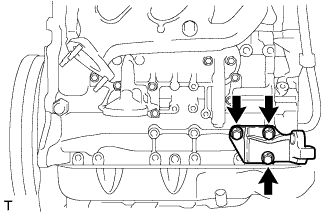
20. REMOVE NO. 1 GENERATOR BRACKET

  1. A225171
    Remove the 3 bolts and No. 1 generator bracket.


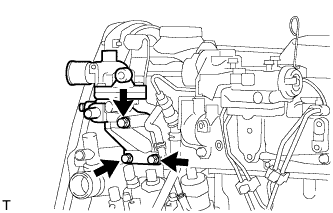
21. REMOVE PUMP BRACKET

  1. A225174
    Remove the 3 bolts and pump bracket.


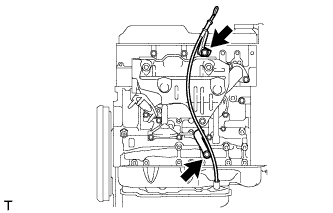
22. REMOVE ENGINE OIL LEVEL DIPSTICK GUIDE
  1. Remove the dipstick.

  1. A225177
    Remove the 2 bolts and dipstick guide.

  1. Remove the O-ring from the dipstick guide.


23. REMOVE NO. 1 FRONT ENGINE MOUNTING BRACKET RH

  1. A225176
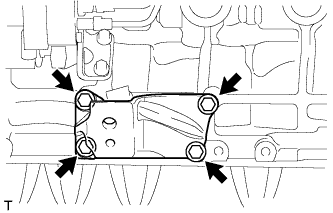
    Remove the 4 bolts and engine mounting bracket.


24. REMOVE VACUUM PUMP OIL INLET HOSE

  1. A118121
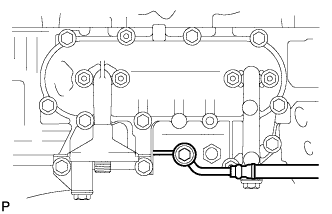
    Remove the union bolt and gasket, and then disconnect the vacuum pump oil inlet hose from the cylinder block.


25. REMOVE UNION

  1. A227358
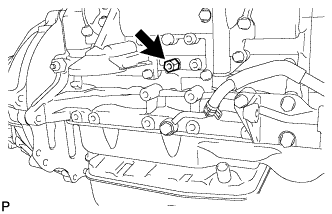
    Remove the union from the cylinder block.


26. REMOVE VACUUM PUMP OIL OUTLET HOSE

  1. A227360
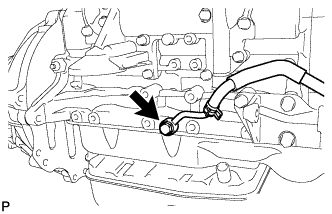
    Remove the bolt, 2 gaskets and vacuum pump outlet hose.


27. REMOVE NO. 1 FRONT ENGINE MOUNTING BRACKET LH

  1. A225175
    Remove the 4 bolts and engine mounting bracket.


28. REMOVE NO. 1 EXHAUST MANIFOLD HEAT INSULATOR

  1. A222728
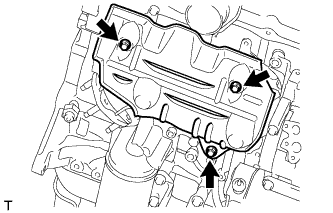
    Remove the 3 bolts and insulator.


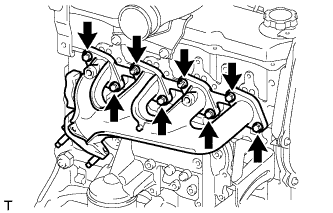
29. REMOVE EXHAUST MANIFOLD

  1. A222729
    Remove the 2 nuts, 6 bolts and manifold.

  1. Remove the gasket.


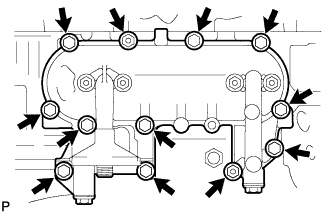
30. REMOVE OIL FILTER BRACKET SUB-ASSEMBLY

  1. A118122
    Remove the 10 bolts, 2 nuts, oil filter bracket and gasket.


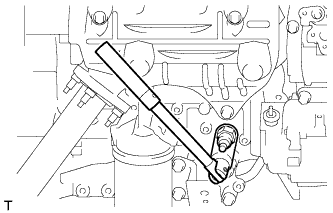
31. REMOVE ENGINE OIL PRESSURE SWITCH ASSEMBLY

  1. A229802
    Using a 24 mm deep socket wrench, remove the oil pressure switch.

← COMPONENTS (from Aug 2013)DISASSEMBLY (from Aug 2013) →