2013-2015 Land Cruiser Prado · Service Manual Engine / Hybrid System

REMOVAL

Removal / installation · Vehicles built from Aug 2013


1. REMOVE UPPER RADIATOR SUPPORT SEAL
  1. Remove the 13 clips and upper radiator support seal.


2. REMOVE FRONT BUMPER COVER LOWER
  1. Remove the clip, 5 bolts and front bumper cover lower.


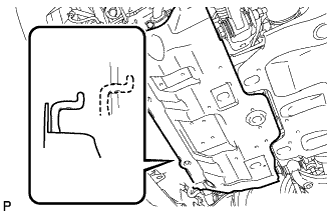
3. REMOVE NO. 1 ENGINE UNDER COVER SUB-ASSEMBLY

  1. A224743
    Remove the 4 bolts.

  1. Unhook the engine under cover from the vehicle body as shown in the illustration.


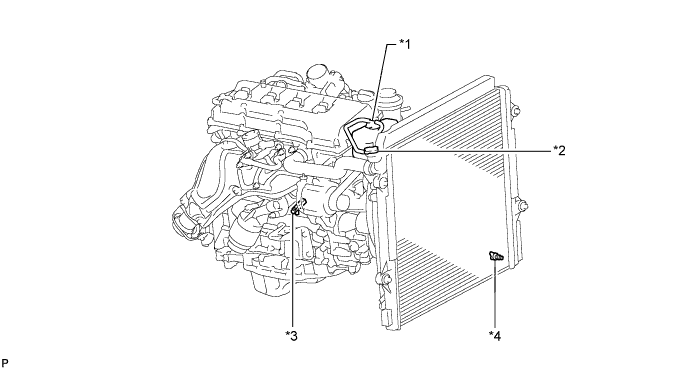
4. DRAIN ENGINE COOLANT

CAUTION:
Do not remove the radiator cap while the engine and radiator are still hot. Pressurized, hot engine coolant and steam may be released and cause serious burns.


A223311E01
Text in Illustration 
*1
Reservoir Cap
*2
Radiator Cap
*3
Cylinder Block Drain Cock Plug
*4
Radiator Drain Cock Plug

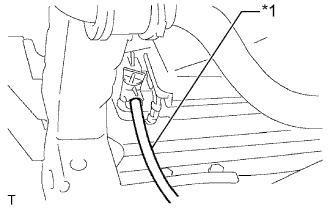
  1. G038197E02
    Install a vinyl hose to the radiator side.
    Text in Illustration 
    *1
    Vinyl Hose

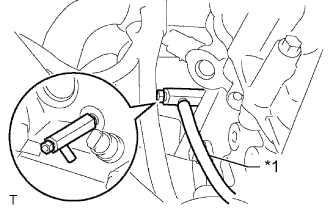
  1. G038198E02
    Install a vinyl hose to the engine side.
    Text in Illustration 
    *1
    Vinyl Hose

  1. Loosen the radiator drain cock plug.

  1. Remove the radiator cap and drain the coolant.

    HINT:
    Collect the coolant in a container and dispose of it according to the regulations in your area.

  1. Loosen the cylinder block drain cock plug and drain the coolant from the engine.


5. REMOVE RADIATOR RESERVOIR

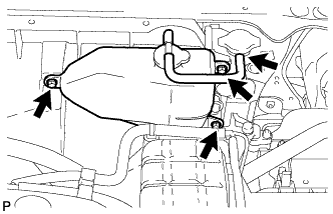
  1. A223323
    Disconnect the reservoir hose from the radiator.

  1. Remove the 3 bolts and radiator reservoir.


6. REMOVE FAN SHROUD

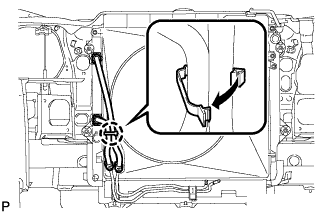
  1. A223324
    Detach the claw to open the flexible hose clamp.

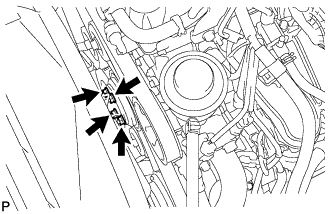
  1. A223325
    Loosen the 4 nuts holding the fluid coupling fan.

  1. Remove the fan and generator V-belt (Click here).

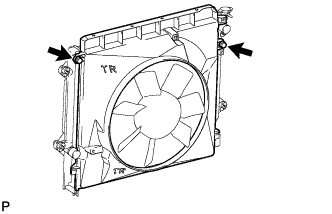
  1. A223326
    Remove the 2 bolts holding the fan shroud.

  1. Remove the 4 nuts of the fluid coupling fan, and then remove the shroud together with the coupling fan.

    NOTICE:
    Be careful not to damage the radiator core.


7. REMOVE AIR CLEANER AND HOSE

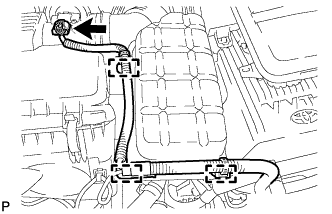
  1. A223920
    Detach the 3 clamps and disconnect the mass air flow meter connector.

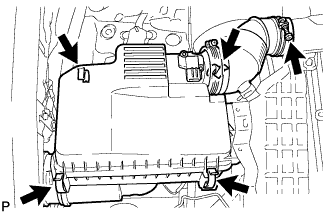
  1. A223921
    Detach the 4 clamps.

  1. Loosen the hose clamp and remove the air cleaner and hose.


8. REMOVE GENERATOR ASSEMBLY (for 80A Type)

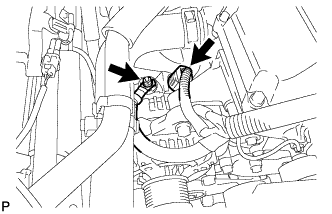
  1. A223928
    Remove the terminal cap.

  1. Remove the nut and generator wire.

  1. Disconnect the generator connector.

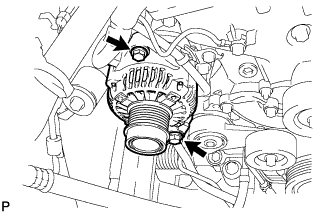
  1. A223930
    Remove the 2 bolts and generator.


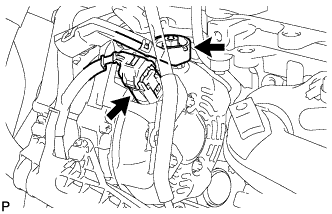
9. REMOVE GENERATOR ASSEMBLY (for 100A Type)

  1. A222881
    Open the terminal cap.

  1. Remove the nut and disconnect the wire harness from terminal B.

  1. Disconnect the generator connector from the generator assembly.

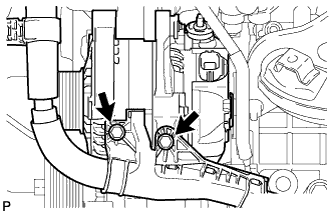
  1. A222884
    Remove the 2 bolts and disconnect the wire harness.

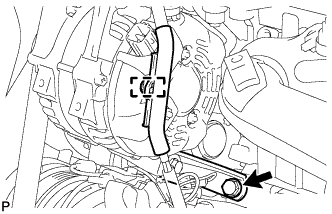
  1. A222882
    Disconnect the wire harness clamp.

  1. Remove the bolt and disconnect the generator bracket.

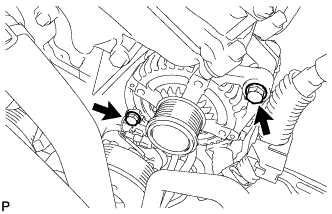
  1. A222883
    Remove the 2 bolts and generator assembly.

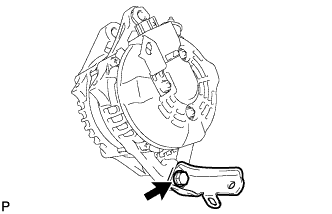
  1. A222885
    Remove the bolt and generator bracket.


10. REMOVE NO. 1 IDLER PULLEY SUB-ASSEMBLY

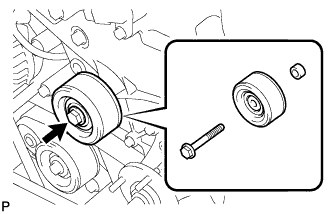
  1. A222362
    Remove the bolt, idler pulley and spacer.


11. REMOVE V-RIBBED BELT TENSIONER ASSEMBLY

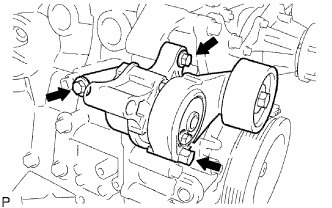
  1. G035081E03
    Remove the 3 bolts and belt tensioner.


12. REMOVE WATER PUMP ASSEMBLY

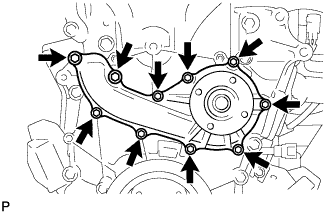
  1. A223314
    Remove the 10 bolts, and then remove the water pump and gasket.

← ON-VEHICLE INSPECTION (from Aug 2013)INSTALLATION (from Aug 2013) →