REASSEMBLY
Removal / installation · Vehicles built from Aug 2013
| 1. INSTALL STUD BOLT |

- NOTICE:
- If a stud bolt is deformed or the threads are damaged, replace it.
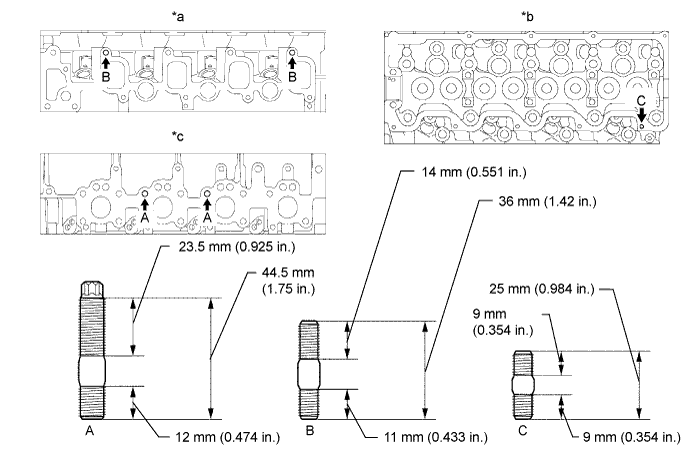

| *a |
Intake Manifold Side B |
*b |
Cylinder Head Cover Side |
| *c |
Exhaust Manifold Side |
- |
- |
- Torque:
- for bolt A:
- 26 N*m{ 265 kgf*cm , 19 ft.*lbf }
- for bolt B:
- 12 N*m{ 120 kgf*cm , 9 ft.*lbf }
- for bolt C:
- 6.0 N*m{ 60 kgf*cm , 53 in.*lbf }
| 2. INSTALL SEMICIRCULAR PLUG |
Remove any old packing (FIPG material).
Apply seal packing to the semicircular plug as shown in the illustration.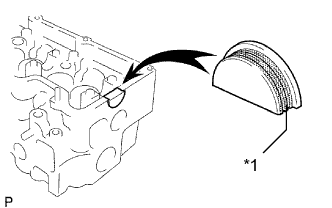
- Seal packing:
- Toyota Genuine Seal Packing Black, Three Bond 1207B or equivalent
Text in Illustration *1
Seal Packing
- NOTICE:
- The semicircular plug must be installed within 3 minute from the completion of applying the seal packing.
- Prevent FIPG from being stuck to the camshaft thrust groove.
- The semicircular plug must be installed within 3 minute from the completion of applying the seal packing.
Install the semicircular plug to the cylinder head.
| 3. INSTALL COMBUSTION CHAMBER SUB-ASSEMBLY |
Select the number of shim, according to the table below.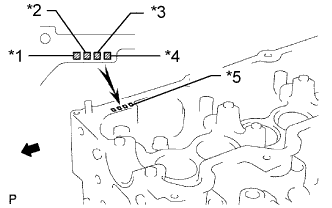
- Select a new combustion chamber:
Item
Specified Condition
Mark 1
5.91 to 5.94 mm (0.2327 to 0.2338 in.)
Mark 2
5.94 to 5.97 mm (0.2338 to 0.2350 in.)
Mark 3
5.97 to 6.00 mm (0.2350 to 0.2362 in.)
Text in Illustration *1
No. 1 Combustion Chamber
*2
No. 2 Combustion Chamber
*3
No. 3 Combustion Chamber
*4
No. 4 Combustion Chamber
*5
Mark 1, 2 or 3

Front
Align the combustion chamber knock pin with the cylinder head notch.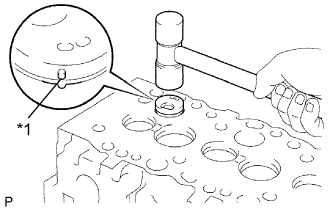
Text in Illustration *1
Pin
Using a plastic-faced hammer, tap in the combustion chamber.
Using a dial indicator, check the combustion chamber protrusion.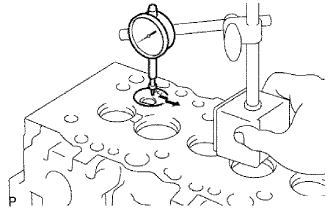
- Combustion chamber protrusion:
- -0.03 to 0.03 mm (- 0.00118 to 0.00118 in.)
If the protrusion is more than the specification, replace the chamber and recheck the protrusion.
| 4. INSTALL VALVE STEM OIL SEAL |
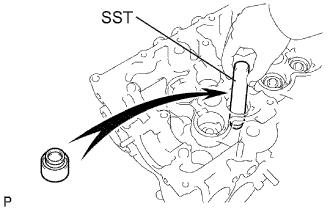 |
Using SST, push in a new oil seal.
- SST
- 09201-41020
| 5. INSTALL INTAKE VALVE |
Install the valve, spring seat plate washer, valve spring and spring retainer.
Using SST, compress the valve spring and place the 2 retainer locks around the valve stem.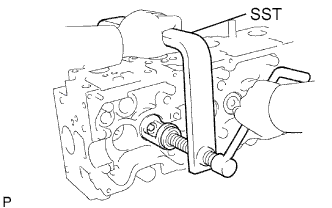
- SST
- 09202-70020
(09202-00030)
Using a 5 mm pin punch and plastic-faced hammer, lightly tap the valve stem tip to ensure a proper fit.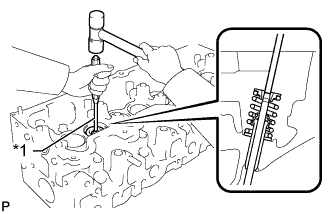
Text in Illustration *1
5 mm Pin Punch
- NOTICE:
- Be careful not to damage the valve stem tip.
| 6. INSTALL EXHAUST VALVE |
Install the valve, spring seat, valve spring and spring retainer.
Using SST, compress the valve spring and place the 2 retainer locks around the valve stem.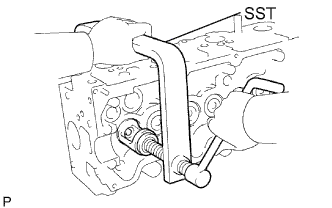
- SST
- 09202-70020
(09202-00030)
Using a 5 mm pin punch and plastic-faced hammer, lightly tap the valve stem tip to ensure a proper fit.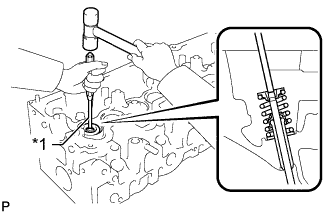
Text in Illustration *1
5 mm Pin Punch
- NOTICE:
- Be careful not to damage the valve stem tip.
| 7. INSTALL VALVE LIFTER |
Install the valve lifter and shim.
Check that the valve lifter rotates smoothly by hand.