REPAIR
Removal / installation · Vehicles built from Aug 2013
| 1. REPAIR INTAKE VALVE SEAT |

- NOTICE:
- Repair the seat while checking the seating position.
- Keep the lip free of foreign matter.
- Take off the cutter gradually to make the intake valve seat smooth.
- Repair the seat while checking the seating position.
Check the valve seating position.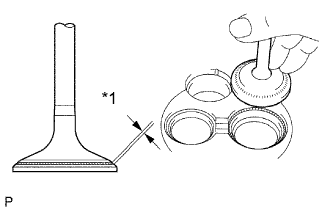

Apply a light coat of Prussian blue to the valve face.
Lightly press the valve against the seat. Do not rotate valve.
If blue appears 360° around the face, the valve is concentric. If not, replace the valve.
If blue appears 360° around the valve seat, the guide and face are concentric. If not, resurface the seat.
Check that the seat contact is the middle of the valve face with the width below.
- Standard width:
- 1.5 to 1.9 mm (0.0591 to 0.0748 in.)
Text in Illustration *1
Width
If the seating is too high on the valve face, use 30° and 45° cutters to correct the seat.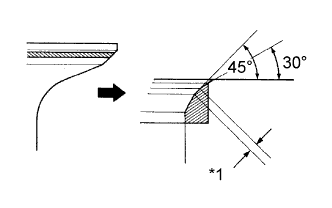
Text in Illustration *1
Width
If the seating is too low on the valve face, use 60° and 45° cutters to correct the seat.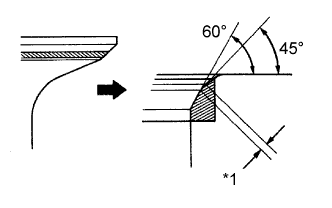
Text in Illustration *1
Width
Hand-lap the valve and valve seat with an abrasive compound.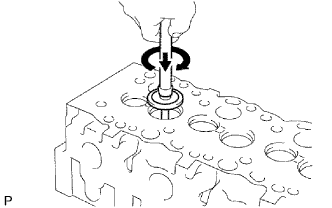
Clean the valve and valve seat.
| 2. REPAIR EXHAUST VALVE SEAT |
- NOTICE:
- Repair the seat while checking the seating position.
- Keep the lip free of foreign matter.
- Take off the cutter gradually to make the exhaust valve seat smooth.
- Repair the seat while checking the seating position.
Check the valve seating position.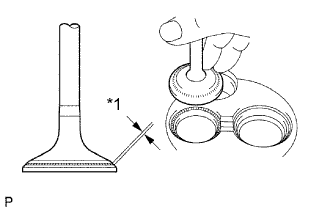
Text in Illustration *1
Width
Apply a light coat of Prussian blue to the valve face.
Lightly press the valve against the seat. Do not rotate valve.
Prussian blue appears 360° around the face, the valve is concentric. If not, replace the valve.
Prussian blue appears 360° around the valve seat, the guide and face are concentric. If not, resurface the seat.
Check that the seat contact is the middle of the valve face with the width below.
- Standard width:
- 1.8 to 2.2 mm (0.0709 to 0.0866 in.)
If the seating is too high on the valve face, use 30° and 45° cutters to correct the seat.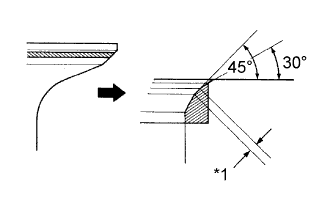
Text in Illustration *1
Width
If the seating is too low on the valve face, use 60° and 45° cutters to correct the seat.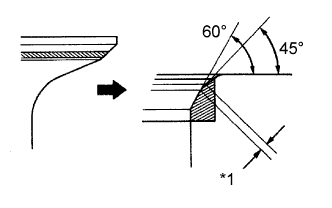
Text in Illustration *1
Width
Hand-lap the valve and valve seat with an abrasive compound.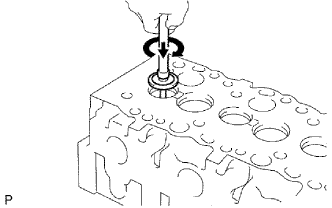
Clean the valve and valve seat.