2013-2015 Land Cruiser Prado · Service Manual Engine / Hybrid System

REMOVAL

Removal / installation · Vehicles built from Aug 2013


1. REMOVE FRONT BUMPER LOWER COVER
  1. Remove the clip, 5 bolts and front bumper lower cover.


2. REMOVE NO. 1 ENGINE UNDER COVER SUB-ASSEMBLY
  1. Remove the 4 bolts and No. 1 engine under cover.


3. DRAIN ENGINE COOLANT

CAUTION:
Do not remove the radiator cap while the engine and radiator are still hot. Pressurized, hot engine coolant and steam may be released and cause serious burns.

  1. Loosen the radiator drain cock plug.

    HINT:
    Collect the coolant in a container and dispose of it according to the regulations in your area.

  1. A218364
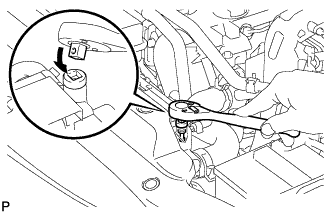
    Drain the coolant by removing the reservoir cap and, using a wrench, remove the vent plug.

  1. Loosen the cylinder block drain cock plug.

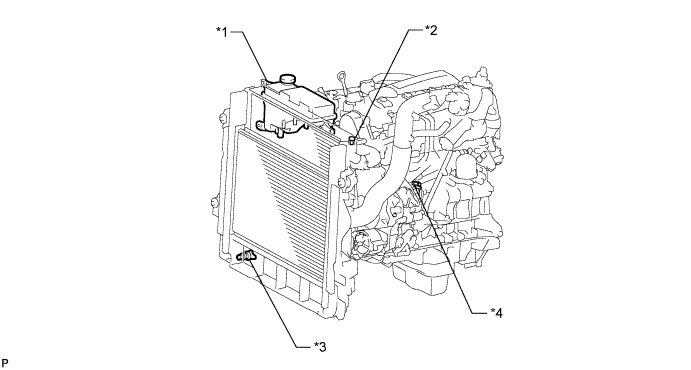
    A218365E01

    Text in Illustration 
    *1
    Radiator Reservoir
    *2
    Vent Plug
    *3
    Radiator Drain Cock Plug
    *4
    Cylinder Block Drain Cock Plug


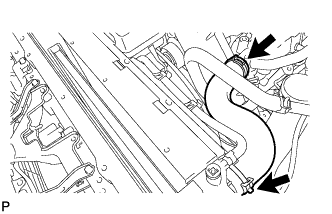
4. REMOVE NO. 1 RADIATOR HOSE

A246596

5. REMOVE FAN SHROUD

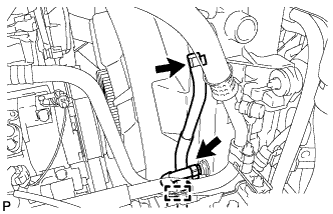
  1. A218371
    Disconnect the No. 1 water by-pass hose and detach the 2 clamps from the fan shroud.

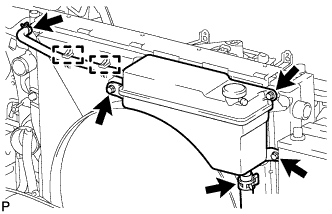
  1. Disconnect the No. 2 water by-pass hose from the radiator reservoir.

  1. Remove the 3 bolts and radiator reservoir.

  1. for Automatic Transmission:

    1. A218382
      Remove the inlet and outlet oil cooler hoses and detach the clamp from the fan shroud.

    2. Disconnect the 2 oil cooler hoses from the radiator.

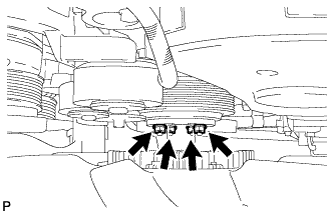
  1. A224959
    Loosen the 4 nuts holding the fan with fluid coupling.

  1. Remove the fan and generator V belt (Click here).

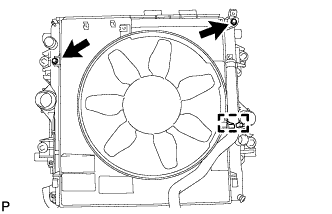
  1. A218369
    Remove the 2 bolts holding the fan shroud.

  1. Remove the 4 nuts for the fan with fluid coupling, and then remove the shroud together with the fan with fluid coupling.
    NOTICE:
    Be careful not to damage the radiator core.

  1. Detach the No. 2 water by-pass hose from the hose clamp on the fan shroud.

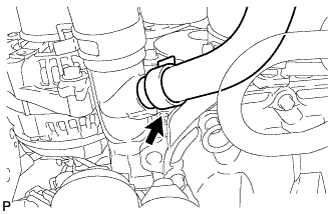
  1. A224943
    Remove the No. 2 water by-pass hose from the water inlet.

  1. Remove the fan pulley from the water pump.


6. REMOVE CRANKSHAFT PULLEY COVER (w/ DPF)

  1. A239358
    Remove the 2 bolts and crankshaft pulley cover.


7. REMOVE CRANKSHAFT PULLEY

  1. A225341E01
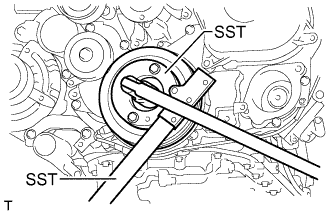
    Using SST, hold the crankshaft pulley and loosen the pulley bolt.
    SST
    09213-58014  
    09330-00021  

  1. A225342E01
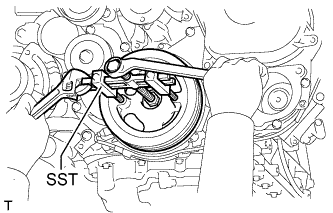
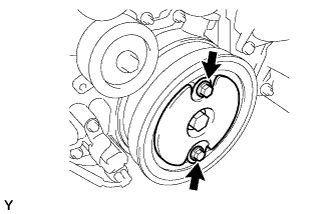
    Using SST, remove the pulley bolt and crankshaft pulley.
    SST
    09950-50013   (09951-05010, 09952-05010, 09953-05020, 09954-05021)


8. REMOVE FRONT CRANKSHAFT OIL SEAL

  1. A225343E01
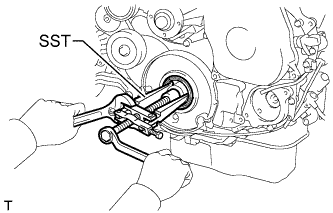
    Using SST, remove the front crankshaft oil seal.
    SST
    09308-10010  
    09950-40011   (09957-04010)
    09950-60010   (09951-00350)

    HINT:
    After removal, check the crankshaft for damage. If damaged, smooth the surface with #400 sandpaper.

← COMPONENTS (from Aug 2013)INSTALLATION (from Aug 2013) →