Removal / installation · Vehicles built from Aug 2013
1.
INSPECT GENERATOR WITH VACUUM PUMP ASSEMBLY
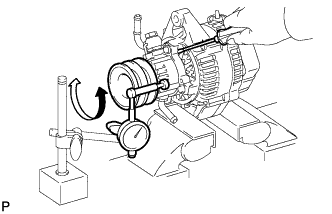
Mount the generator in a vise between aluminum plates.
Insert a screwdriver to hold the generator rotor.
Install a bolt and nut to the outside of the pulley so that the bolt head and nut clamp the pulley, and then position a dial indicator as shown in the illustration.
Turn the pulley and measure the backlash between the generator rotor and vacuum pump shaft.
Maximum backlash:
1.6 mm (0.0630 in.)
If the backlash is more than the maximum, replace the generator rotor and vacuum pump shaft.
2.
REMOVE VACUUM PUMP ASSEMBLY
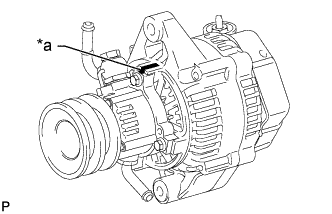
Place matchmarks as shown in the illustration.
Text in Illustration
*a
Matchmark
Remove the 4 bolts and vacuum pump.
3.
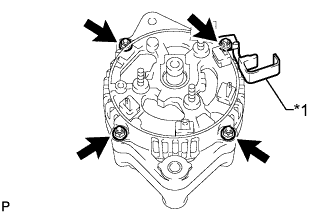
REMOVE GENERATOR REAR END COVER
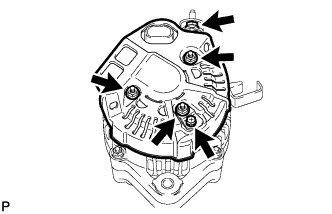
Remove the nut and terminal insulator.
Remove the bolt, 3 nuts, rectifier plate and rear end cover.
4.
REMOVE GENERATOR BRUSH HOLDER ASSEMBLY
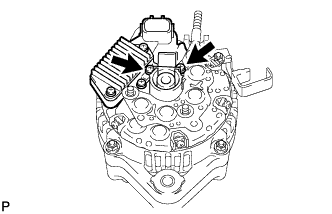
Remove the brush holder cover.
Remove the 2 screws and brush holder.
Remove the plate seal.
5.
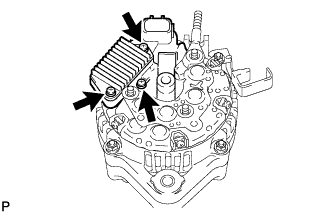
REMOVE GENERATOR REGULATOR ASSEMBLY
Remove the 3 screws and generator regulator.
6.
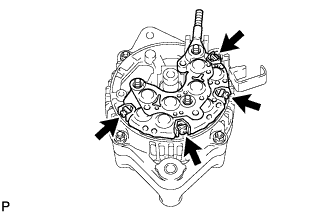
REMOVE GENERATOR HOLDER WITH RECTIFIER
Remove the 4 screws and generator holder with rectifier.