REMOVAL
Removal / installation · Vehicles built from Aug 2013
| 1. REMOVE AIR CLEANER AND HOSE |

Detach the 3 clamps and disconnect the mass air flow meter connector.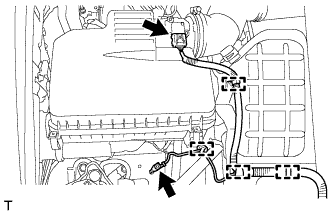

Remove the bolt, detach the clamp and disconnect the ground wire.
Detach the 4 clamps.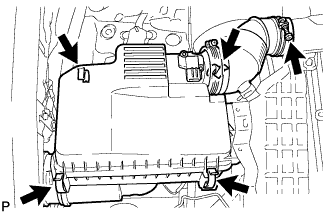
Loosen the hose clamp and remove the air cleaner cap.
| 2. REMOVE AIR CLEANER CASE |
Remove the air cleaner filter element.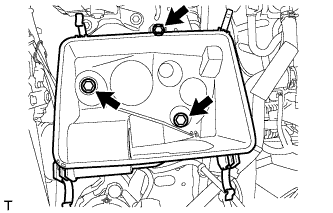
Remove the 3 bolts and air cleaner case.
| 3. REMOVE FRONT NO. 1 FENDER APRON TO FRAME SEAL RH |
Remove the 5 clips and front No. 1 fender apron to frame seal.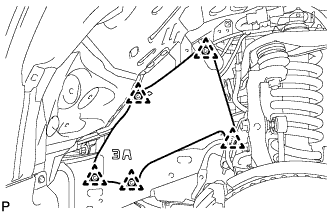
| 4. DISCONNECT NO. 1 AIR INJECTION SYSTEM HOSE |
Disconnect the No. 1 air injection system hose.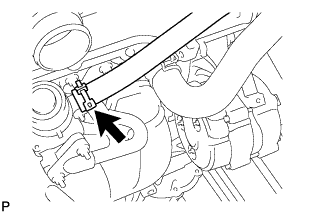
| 5. REMOVE NO. 1 EXHAUST MANIFOLD HEAT INSULATOR |
Remove the 5 bolts and No. 1 exhaust manifold heat insulator.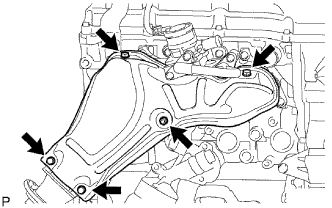
- HINT:
- It is only necessary to move the No. 1 exhaust manifold heat insulator so that the intake pipe can be removed in a later step.
- It is not possible to fully remove the No. 1 exhaust manifold heat insulator in this step.
- It is only necessary to move the No. 1 exhaust manifold heat insulator so that the intake pipe can be removed in a later step.
| 6. REMOVE NO. 4 INTAKE PIPE |
Remove the 4 nuts, No. 4 intake pipe and 2 gaskets.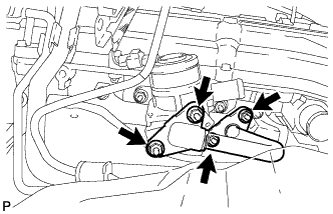
- NOTICE:
- Be careful not to damage the installation surface of the gaskets.
| 7. REMOVE AIR SWITCHING VALVE ASSEMBLY |
w/ Manifold Absolute Pressure Sensor: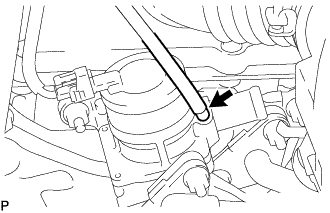
Disconnect the vacuum hose.
Disconnect the connector.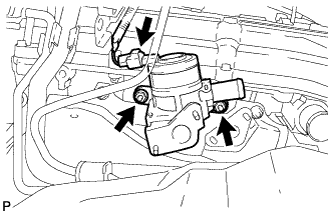
Remove the 2 nuts and air switching valve.
Remove the No. 1 exhaust manifold heat insulator.