ADJUSTMENT
Removal / installation · Vehicles built from Aug 2013
| 1.
REMOVE WASHER NOZZLE SUB-ASSEMBLY
|
 |
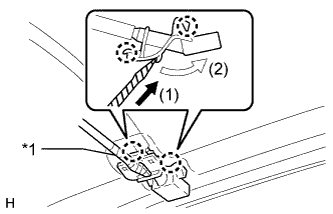
- Using a screwdriver, detach the 2 claws and separate the washer nozzle sub-assembly as shown in the illustration.
- HINT:
- Tape the screwdriver tip before use.
Text in Illustration
*1
|
Protective Tape
|
- NOTICE:
- Be careful not to damage the windshield.
- Disconnect the washer nozzle sub-assembly from the washer hose.
- NOTICE:
- Washer nozzles cannot be reused.
| 2.
ADJUST WASHER NOZZLE SUB-ASSEMBLY |
|
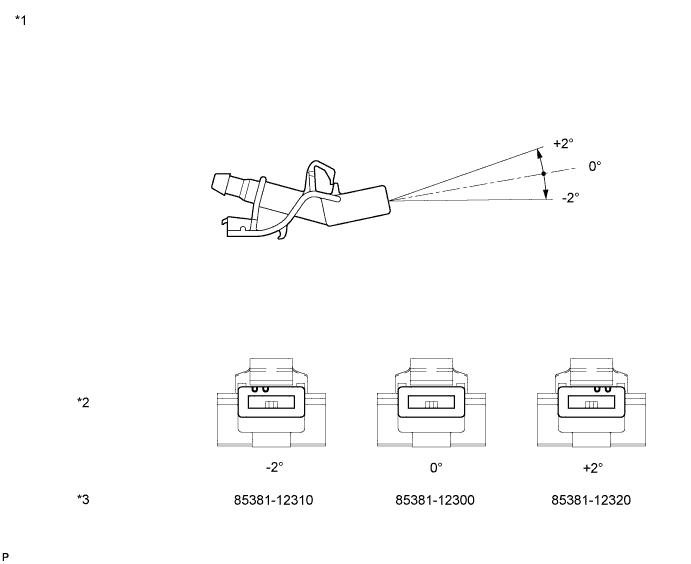
Select a washer nozzle so that the contact area is within the standard. Replace the washer nozzle with the selected one.

Text in Illustration
*1
|
Available Washer Nozzles
|
*2
|
Washer Fluid Spray Angle
|
*3
|
Part Number
|
-
|
-
|
| 3.
INSTALL WASHER NOZZLE SUB-ASSEMBLY
|
|
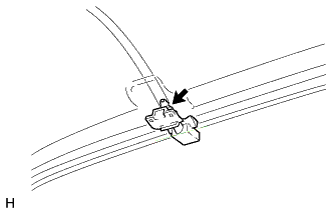
Connect a new washer nozzle sub-assembly to the washer hose.
Attach the 2 claws to install the washer nozzle sub-assembly.