INSTALLATION
Removal / installation · Vehicles built from Aug 2013
- HINT:
- Use the same procedure for the RH and LH sides.
- The procedure listed below is for the LH side.
- A bolt without a torque specification is shown in the standard bolt chart (Click here).
- Use the same procedure for the RH and LH sides.
| 1. TEMPORARILY INSTALL REAR UPPER CONTROL ARM ASSEMBLY LH |

Temporarily install the upper control arm assembly and washer with the nut and bolt.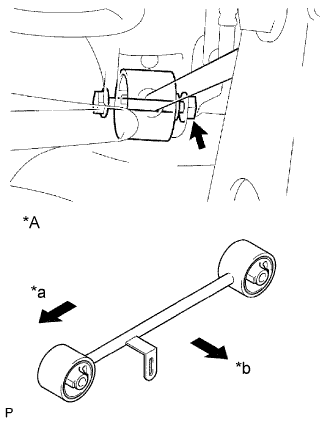

Text in Illustration *A
w/ Air Suspension
*a
Front
*b
Outer Side
- HINT:
- If the vehicle is equipped with an air suspension, install the rear upper control arm in the direction shown in the illustration.
Temporarily install the upper control arm assembly to the rear axle housing with the nut and washer and bolt.
| 2. CONNECT REAR HEIGHT CONTROL SENSOR LINK (w/ Air Suspension) |
Connect the height control sensor link sub-assembly (Click here).
| 3. INSTALL REAR WHEEL |
- Torque:
- 112 N*m{ 1142 kgf*cm , 83 ft.*lbf }
| 4. STABILIZE SUSPENSION |
Lower the vehicle.
Bounce the vehicle up and down several times to stabilize the suspension.
| 5. TIGHTEN REAR UPPER CONTROL ARM ASSEMBLY LH |
Tighten the 2 nuts.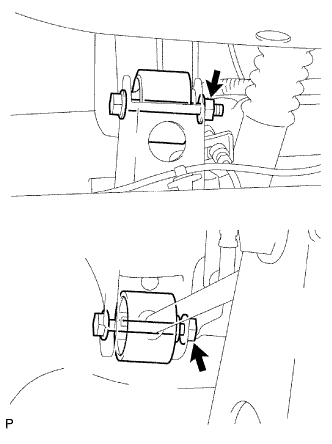
- Torque:
- 80 N*m{ 816 kgf*cm , 59 ft.*lbf }
- HINT:
- Turn the nut while holding the bolt.