REMOVAL
Removal / installation · Vehicles built from Aug 2013
- HINT:
- Use the same procedure for RHD and LHD vehicles.
- The procedure listed below is for LHD vehicles.
- Use the same procedure for RHD and LHD vehicles.
| 1. REMOVE DOOR SCUFF PLATE ASSEMBLY RH |

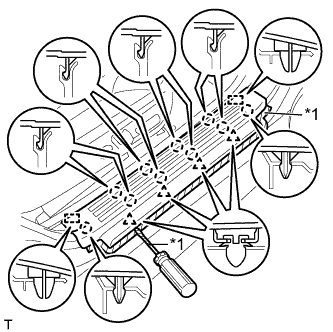  |
Put protective tape around the door scuff plate.
Using a screwdriver, detach the 4 clips, 10 claws and 2 guides and remove the door scuff plate.
- HINT:
- Tape the screwdriver tip before use.
Text in Illustration *1
Protective Tape
| 2. REMOVE COWL SIDE TRIM BOARD RH |
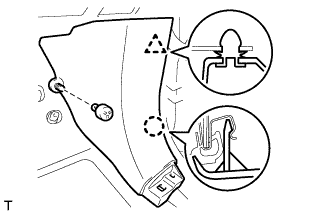 |
Remove the clip.
Detach the clip and claw and remove the cowl side trim board.
| 3. REMOVE INSTRUMENT SIDE PANEL RH |
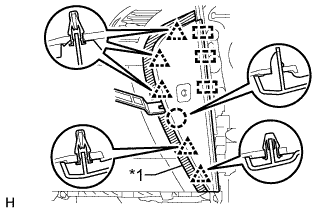 |
Put protective tape around the instrument side panel.
Text in Illustration *1
Protective Tape
Using a moulding remover, detach the 5 clips, claw, and 3 guides.
Disconnect the connector and remove the instrument side panel.
| 4. REMOVE INSTRUMENT PANEL ORNAMENT |
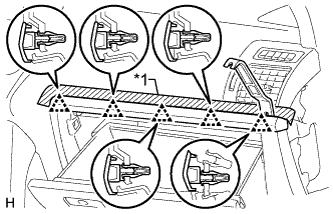 |
Put protective tape around the instrument panel ornament.
Text in Illustration *1
Protective Tape
Using a moulding remover, detach the 5 clips and remove the instrument panel ornament.
| 5. REMOVE NO. 2 INSTRUMENT PANEL UNDER COVER SUB-ASSEMBLY |
Remove the screw.
Detach the 3 clips and 2 guides and remove the No. 2 instrument panel under cover.
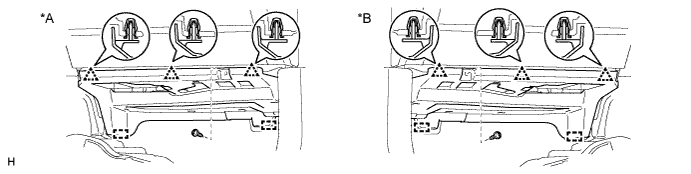
Text in Illustration *A
for LHD
*B
for RHD
| 6. REMOVE GLOVE COMPARTMENT DOOR ASSEMBLY |
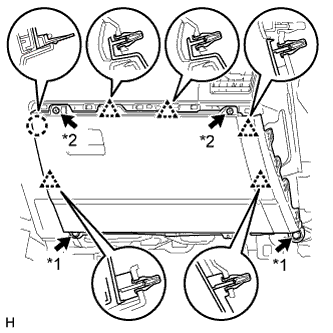 |
Remove the 2 bolts <C> and 2 screws <A> or <B>.
Text in Illustration *1
Bolt
*2
Screw
Detach the 5 clips and claw.
Disconnect each connector and remove the glove compartment door.
| 7. REMOVE NO. 2 AIR DUCT SUB-ASSEMBLY |
Remove the screw.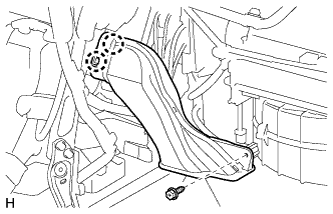
Detach the 2 claws and remove the No. 2 air duct sub-assembly.
| 8. REMOVE ECU INTEGRATION BOX RH |
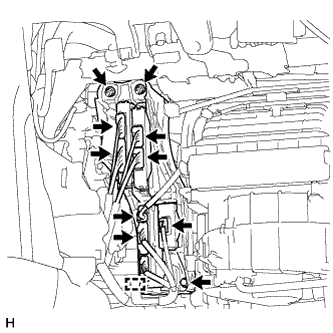 |
Disconnect the connectors.
Detach the clamp.
Remove the 2 nuts, bolt and ECU integration box RH.
| 9. REMOVE DRIVING SUPPORT ECU ASSEMBLY |
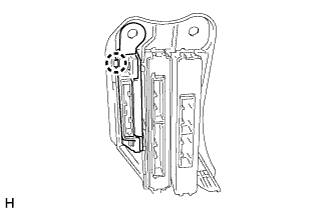 |
Detach the claw and remove the driving support ECU assembly.