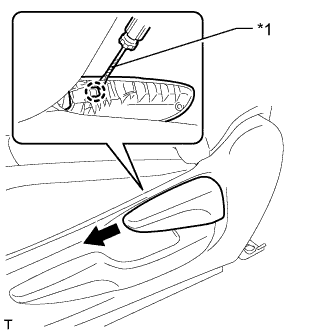
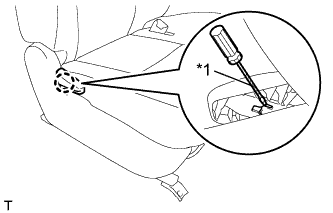
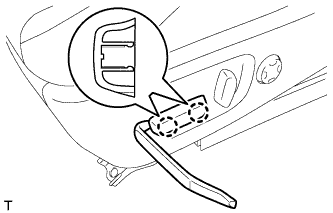
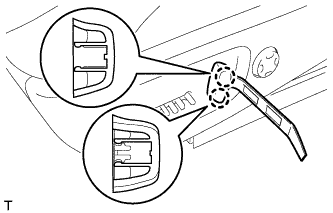
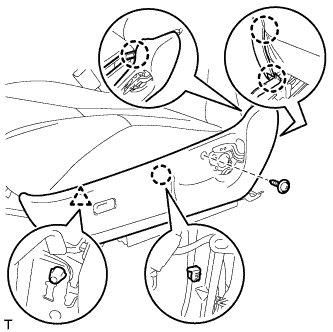
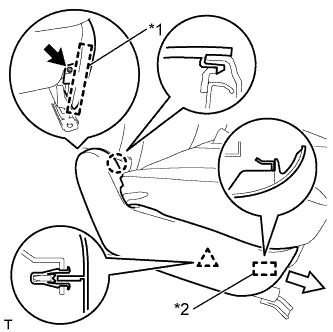
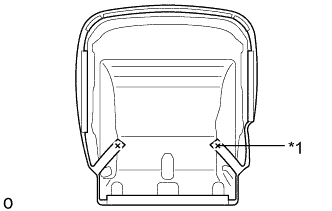
Detach the clip and guide, and remove the front seat cushion shield RH.
Text in Illustration
*1
Hook
*2
Guide
8.
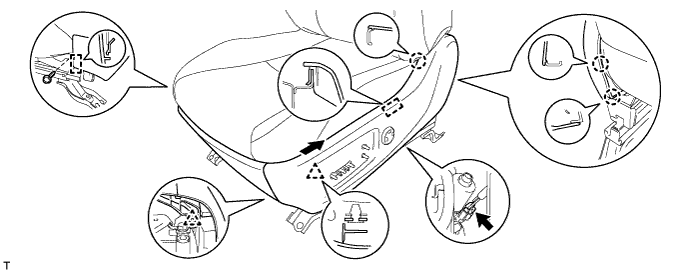
REMOVE FRONT SEAT CUSHION SHIELD RH (for Power Seat)
Disconnect the lifter motor connector.
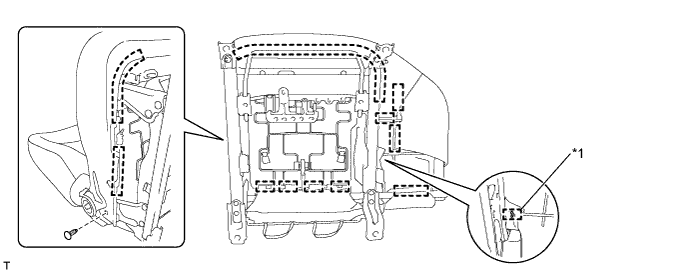
Remove the screw of the front seat No. 1 inner cushion shield LH and detach the guide.
Detach the clip of the front seat No. 1 inner cushion shield LH.
Using a moulding remover, detach the 3 claws and guide.
Move the front seat cushion shield LH in the direction of the arrow to detach the clip and remove the front seat No. 1 inner cushion shield LH together with the front seat cushion shield LH as a unit.
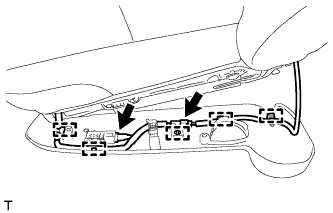
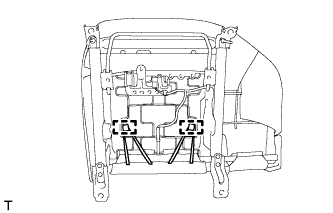
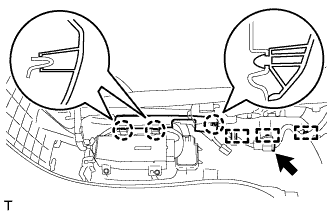
Detach the 3 claws and open the wire harness cover.
Detach the 3 wire harness clamps and disconnect the seat wire connector.
9.
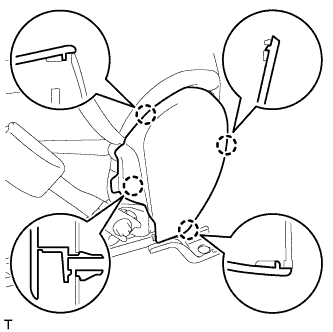
REMOVE FRONT SEAT INNER CUSHION SHIELD RH (for Separate Seat Type)
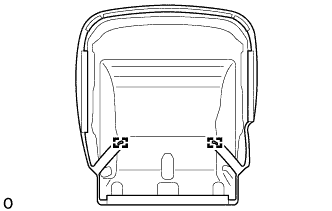
Using a moulding remover, detach the 4 claws and remove the cushion shield.
10.
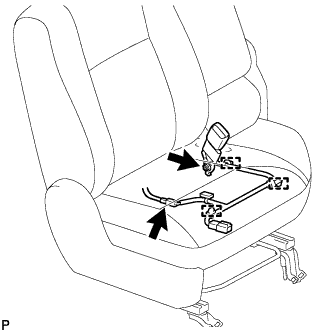
REMOVE FRONT SEAT INNER BELT ASSEMBLY RH (for Separate Seat Type)
for Manual Seat, Power Seat 4 Way Seat Type: Disconnect the 2 connectors and detach the 3 clamps.
for Power Seat 8 Way Seat Type: Disconnect the 2 connectors and detach the 6 clamps.
Remove the nut and front seat inner belt assembly RH.
11.
REMOVE FRONT SEAT INNER BELT ASSEMBLY RH (for Bench Seat Type)
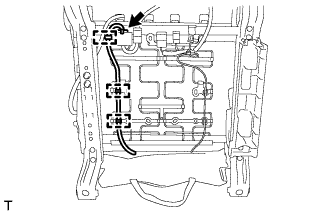
Disconnect the occupant detection sensor connector and detach the 3 wire harness clamps.
Remove the nut.
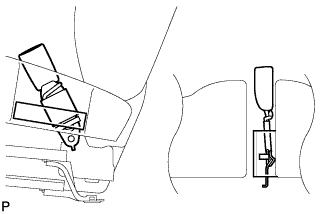
Pass the front seat inner belt assembly RH through the band of the front seat cushion cover as shown in the illustration to remove the front seat inner belt assembly RH.
12.
REMOVE FRONT SEAT CUSHION COVER WITH PAD (for Separate Seat Type)
w/ Seat Heater System: Disconnect the seat heater connector and detach the 3 wire harness clamps.
Detach the hooks.
for Front Passenger Side: Detach the claw and disconnect the connector.
Remove the seat cushion cover with pad.
13.
REMOVE FRONT SEAT CUSHION COVER WITH PAD (for Bench Seat Type)
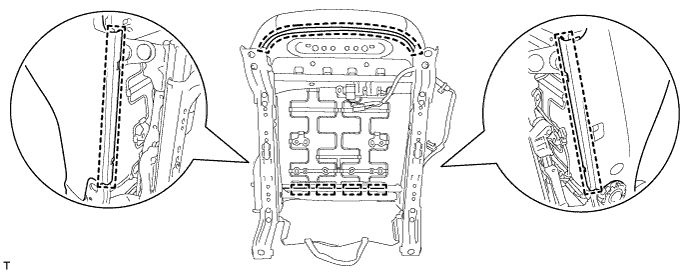
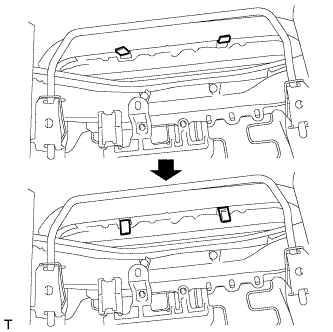
Bend out the 2 cushion edge tabs.
NOTICE:
Be careful not to break the cushion edge tabs.
Using a clip remover, remove the clip.
Remove the hog ring and detach the hooks.
Text in Illustration
*1
Hog Ring
-
-
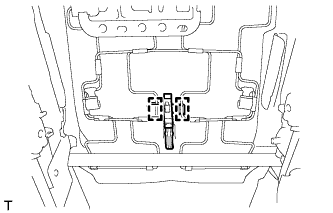
Detach the 2 clamps and remove the connector holder.
Remove the front seat cushion cover with pad from the front seat frame assembly with adjuster RH.
14.
REMOVE SEPARATE TYPE FRONT SEAT CUSHION PAD (OCCUPANT DETECTION SENSOR) (for Separate Seat Type)
Type A:
Remove the hog rings and disconnect the straps.
Type B:
Cut off the tack pins and disconnect the straps.
Text in Illustration
*1
Tack Pin
Remove the hog rings and separate type front seat cushion pad (occupant detection sensor) from the seat cushion cover.
15.
REMOVE SEPARATE TYPE FRONT SEAT CUSHION PAD (OCCUPANT DETECTION SENSOR) (for Bench Seat Type)
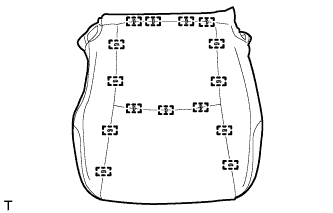
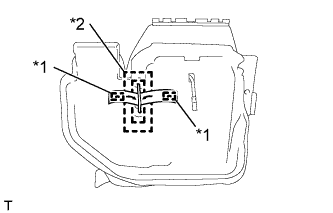
Remove the hog rings.
Detach the hook.
Text in Illustration
*1
Hog Ring
*2
Hook
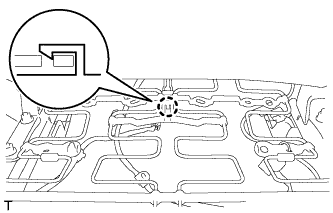
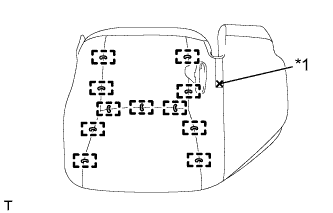
Cut off the tack pin.
Text in Illustration
*1
Tack Pin
Remove the hog rings and separate type front seat cushion pad from the separate type front seat cushion cover.