INSTALLATION
Removal / installation · Vehicles built Aug 2013 – Jul 2014
Versions by build date: Aug 2013 – Jul 2014 from Aug 2014
- HINT:
- Use the same procedure for the RH and LH sides.
- The procedure listed below is for the LH side.
- Use the same procedure for the RH and LH sides.
| 1. INSTALL CURTAIN SHIELD AIRBAG ASSEMBLY LH (w/ Rear No. 2 Seat) |

Install the curtain shield airbag with the 17 new bolts.
- Torque:
- 9.8 N*m{ 100 kgf*cm , 87 in.*lbf }
- NOTICE:
- Do not twist the curtain shield airbag when installing it.
Connect the connector.
- NOTICE:
- When handling the airbag connector, take care not to damage the airbag wire harness.
| 2. INSTALL CURTAIN SHIELD AIRBAG ASSEMBLY LH (w/o Rear No. 2 Seat) |
Install the curtain shield airbag with the 13 new bolts.
- Torque:
- 9.8 N*m{ 100 kgf*cm , 87 in.*lbf }
- NOTICE:
- Do not twist the curtain shield airbag when installing it.
Connect the connector.
- NOTICE:
- When handling the airbag connector, take care not to damage the airbag wire harness.
| 3. INSTALL CURTAIN SHIELD AIRBAG ASSEMBLY LH (for 3 Door) |
Install the curtain shield airbag with the 11 new bolts.
- Torque:
- 9.8 N*m{ 100 kgf*cm , 87 in.*lbf }
- NOTICE:
- Do not twist the curtain shield airbag when installing it.
Connect the connector.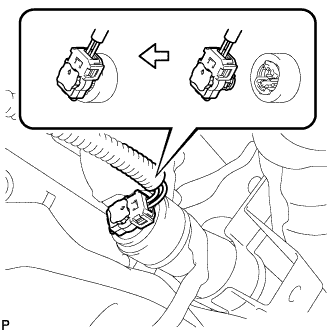

- NOTICE:
- When handling the airbag connector, take care not to damage the airbag wire harness.
| 4. INSTALL REAR NO. 2 SIDE RAIL SPACER LH (for 3 Door) |
Attach the 4 claws to install the rear side rail spacer.
Install the clip.
| 5. INSTALL NO. 1 AIR DUCT REAR SIDE (w/ Rear Cooler) |
Insert the upper part of the duct into the roof side duct and, using that point as a pivot point, swing the duct into place and install it to the rear cooling unit.
Attach the 2 claws to install the cooler plate.
| 6. INSTALL NO. 2 AIR DUCT REAR SIDE (w/ Rear Cooler) |
Install the duct with the 2 clips and attach the clamp.
| 7. INSTALL ROOF HEADLINING ASSEMBLY |
for 5 Door:
Install the roof headlining (Click here).
for 3 Door:
Install the roof headlining (Click here).