REMOVAL
Removal / installation · Vehicles built from Aug 2013
- CAUTION:
- Wear protective gloves. Sharp areas on the parts may injure your hands.
- HINT:
- Use the same procedure for the RH and LH sides.
- The procedure listed below is for the LH side.
| 1.
REMOVE REAR SEAT SIDE COVER LH |
 |
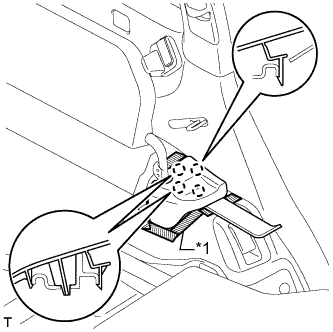
- Put protective tape around the rear seat side cover.
Text in Illustration
*1
|
Protective Tape
|
Using a moulding remover, detach the 4 claws and remove the cover.
| 2.
REMOVE REAR NO. 2 SEAT ASSEMBLY LH |
|
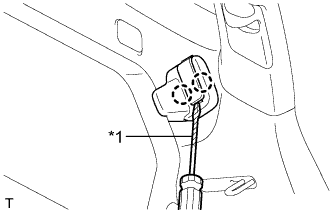
- Using a screwdriver, detach the 2 claws and open the cover.
Text in Illustration
*1
|
Protective Tape
|
- HINT:
- Tape the screwdriver tip before use.
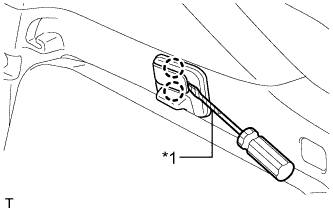
- Using a screwdriver, detach the 2 claws and open the cover.
Text in Illustration
*1
|
Protective Tape
|
- HINT:
- Tape the screwdriver tip before use.
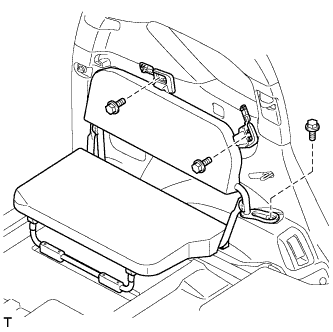
- Remove the 3 bolts.
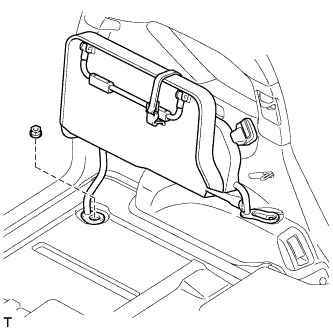
- Fold the seat cushion.
Attach the rear side seat band and fix the seat cushion in place.
Remove the nut and rear No. 2 seat assembly from the vehicle.
- NOTICE:
- Be careful not to damage the vehicle body.