REMOVAL
Removal / installation · Vehicles built from Aug 2013
| 1.
REMOVE UPPER RADIATOR SUPPORT SEAL
|
 |
Remove the 13 clips and upper radiator support seal.
| 2.
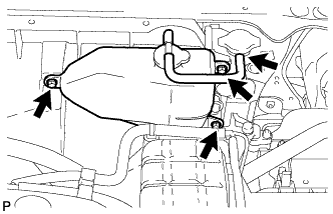
REMOVE RADIATOR RESERVOIR
|
|
- Disconnect the reservoir hose from the radiator.
Remove the 3 bolts and radiator reservoir.
| 3.
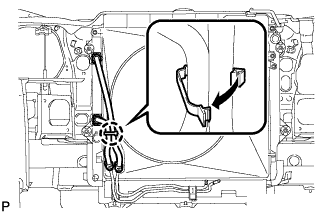
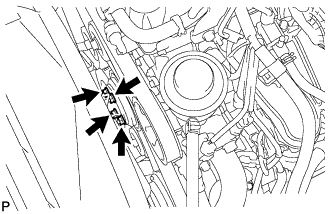
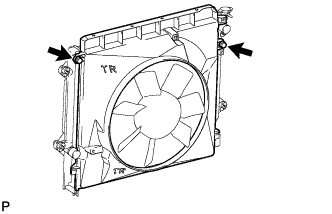
REMOVE FAN SHROUD
|
|
- Detach the claw to open the flexible hose clamp.
- Loosen the 4 nuts holding the fluid coupling fan.
Remove the fan and generator V-belt (Click here).
- Remove the 2 bolts holding the fan shroud.
Remove the 4 nuts of the fluid coupling fan, and then remove the shroud together with the coupling fan.
- NOTICE:
- Be careful not to damage the radiator core.
| 4.
REMOVE CRANKSHAFT PULLEY |
|
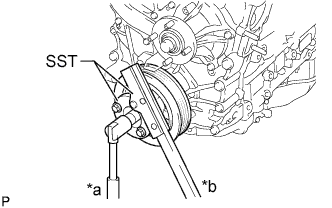
- Using SST, hold the crankshaft pulley and loosen the pulley bolt until 2 or 3 threads are screwed into the crankshaft.
- SST
- 09213-54015
(91651-60855)
09330-00021
Text in Illustration
*a
|
Loosen
|
*b
|
Hold
|
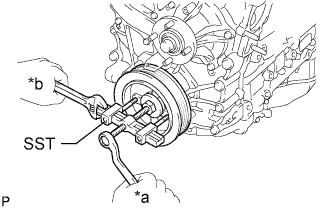
- Using SST and the pulley bolt, remove the crankshaft pulley.
- SST
- 09950-50013
(09951-05010, 09952-05010, 09953-05010, 09954-05021)
Text in Illustration
*a
|
Loosen
|
*b
|
Hold
|
- HINT:
- Apply lubricant to the threads and end of SST.
| 5.
REMOVE TIMING CHAIN COVER OIL SEAL |
|
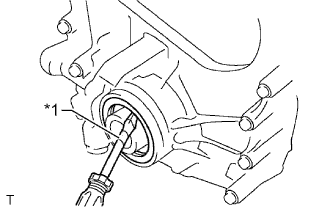
- Using a screwdriver, pry out the oil seal.
Text in Illustration
*1
|
Protective Tape
|
- HINT:
- Tape the screwdriver tip before use.
- NOTICE:
- Do not damage the surface of the oil seal press fit hole or the crankshaft.
- Check the crankshaft for damage after removing the oil seal. If the crankshaft is damaged, smooth the surface with 400-grit sandpaper.