2013-2015 Land Cruiser Prado · Service Manual Vehicle Interior

REMOVAL

Removal / installation · Vehicles built from Aug 2014

Versions by build date: Aug 2013 – Jul 2014 from Aug 2014

CAUTION:
Wear protective gloves. Sharp areas on the parts may injure your hands.

HINT:
  1. Use the same procedure for RHD and LHD vehicles.
  2. The procedure listed below is for LHD vehicles.
  3. Use the same procedure for the RH and LH sides.
  4. The procedure listed below is for the LH side.


1. REMOVE FRONT SEAT ASSEMBLY
  1. Remove the front seat assembly (Click here).


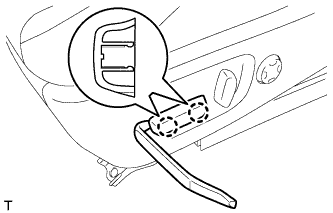
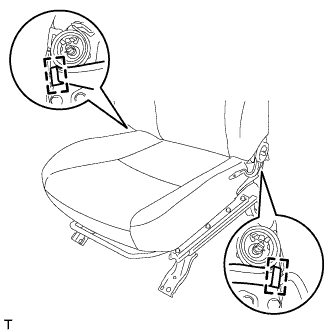
2. REMOVE SLIDE AND VERTICAL POWER SEAT SWITCH KNOB

B239530
  1. Using a moulding remover, detach the 2 claws and remove the slide and vertical power seat switch knob.


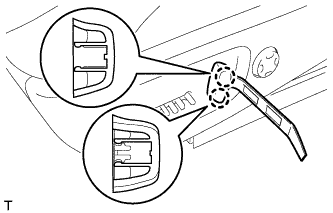
3. REMOVE RECLINING POWER SEAT SWITCH KNOB

B239532
  1. Using a moulding remover, detach the 2 claws and remove the reclining power seat switch knob.


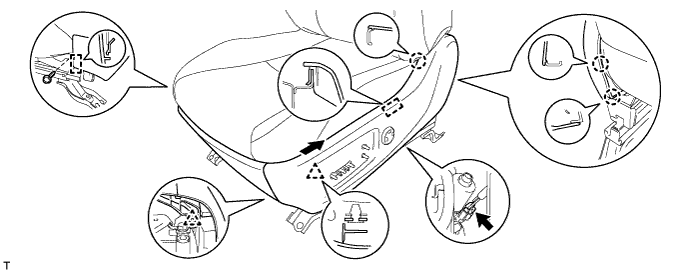
4. REMOVE FRONT SEAT CUSHION SHIELD LH
  1. Disconnect the lifter motor connector.

  1. Remove the screw of the front seat No. 1 inner cushion shield LH and detach the guide.

  1. Detach the clip of the front seat No. 1 inner cushion shield LH.

  1. Using a moulding remover, detach the 3 claws and guide.

  1. Move the front seat cushion shield LH in the direction of the arrow to detach the clip and remove the front seat No. 1 inner cushion shield LH together with the front seat cushion shield LH as a unit.

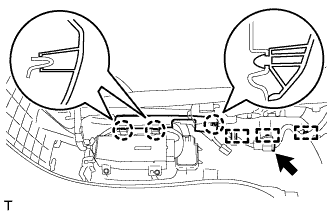
    B239534

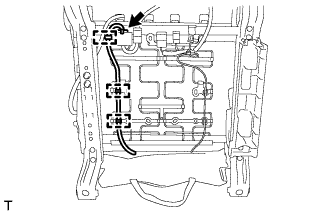
  1. B239536
    Detach the 3 claws and open the wire harness cover.

  1. Detach the 3 wire harness clamps and disconnect the seat wire connector.


5. REMOVE FRONT POWER SEAT SWITCH LH
  1. Remove the 3 screws.

  1. B239589
    w/ Seat Memory System:
    Disconnect the 2 power seat switch connectors and remove the front power seat switch LH.

  1. B239537
    w/o Seat Memory System:
    Disconnect the power seat switch connector and remove the front power seat switch LH.


6. REMOVE LUMBAR SWITCH ASSEMBLY (for Driver Side)

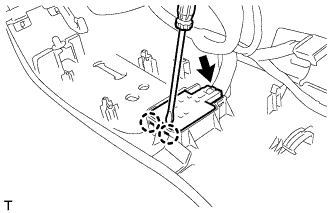
B239538
  1. Using a screwdriver, detach the 2 claws.

  1. Disconnect the lumbar switch connector and remove the lumbar switch.


7. REMOVE FRONT SEAT INNER CUSHION SHIELD LH

B239167
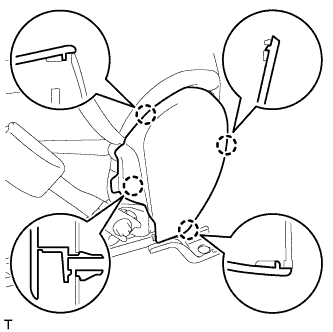
  1. Using a moulding remover, detach the 3 claws and remove the front seat inner cushion shield LH.


8. REMOVE FRONT SEAT INNER CUSHION SHIELD RH (for Front Passenger Side)

B239169
  1. Using a moulding remover, detach the 4 claws and remove the front seat inner cushion shield RH.


9. REMOVE FRONT SEAT INNER BELT ASSEMBLY LH
  1. for Driver Side:
    (Click here)

  1. for Front Passenger Side:
    (Click here)


10. REMOVE SEAT CUSHION COVER WITH PAD

  1. B239173
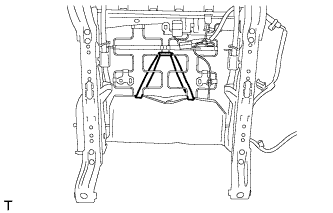
    Remove the rubber band from the seat cushion spring.

  1. B241810
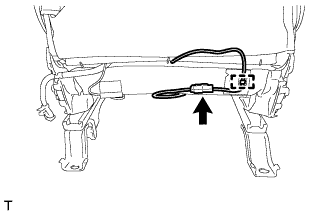
    Disconnect the seat heater connector and detach the wire harness clamp.

  1. B241812E01
    w/ Front Seat Side Airbag:

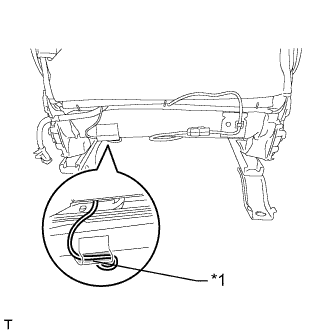
    1. Detach the fastening tape and open the cover.

      Text in Illustration 
      *1
      Fastening Tape

    2. Disconnect the airbag wire harness.

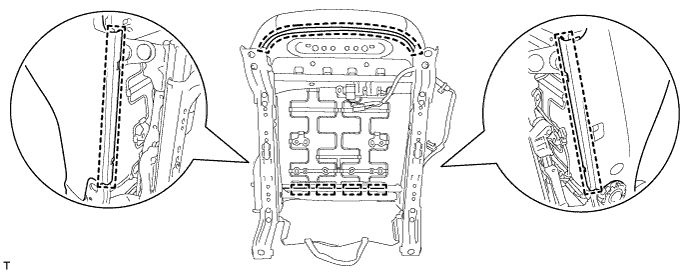
  1. B239177
    Detach the 2 hooks.

  1. B241811
    Disconnect the seat heater connector and detach the 3 wire harness clamps.

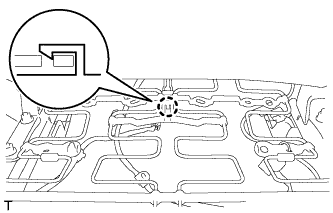
  1. Detach the hooks.

    B239180

  1. B239181
    for Front Passenger Side:
    Detach the claw and disconnect the connector.

  1. Remove the seat cushion cover with pad.


11. REMOVE SEPARATE TYPE FRONT SEAT CUSHION COVER

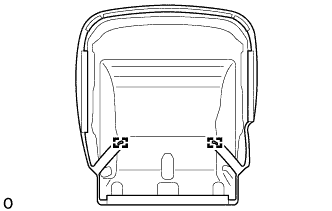
  1. B372264
    Type A:

    1. Remove the hog rings and disconnect the straps.

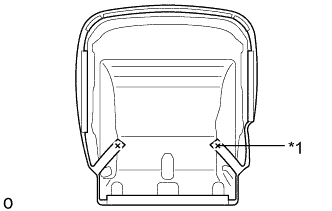
  1. B372267E01
    Type B:

    1. Cut off the tack pins and disconnect the straps.

      Text in Illustration 
      *1
      Tack Pin

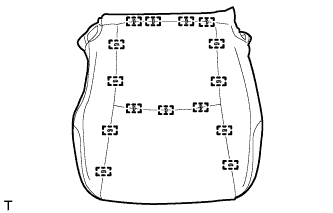
  1. B239182
    Remove the 15 hog rings and separate type front seat cushion cover from the separate type front seat cushion pad.


12. REMOVE FRONT SEAT CUSHION HEATER ASSEMBLY LH

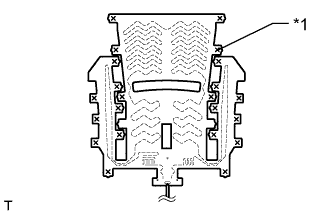
B239184E01
  1. Cut off the tack pins and remove the front seat cushion heater from the front seat cushion cover.

    Text in Illustration 
    *1
    Tack Pin

← REMOVAL (Aug 2013 – Jul 2014)INSPECTION (from Aug 2013) →