REMOVAL
Removal / installation · Vehicles built from Aug 2014
Versions by build date: Aug 2013 – Jul 2014 from Aug 2014
- CAUTION:
- Wear protective gloves. Sharp areas on the parts may injure your hands.
| 1.
REMOVE REAR SEAT ASSEMBLY RH |
 |
Remove the rear No. 1 seat assembly RH (Click here).
| 2.
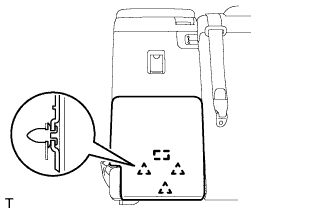
REMOVE NO. 1 SEATBACK BOARD SUB-ASSEMBLY
|
|
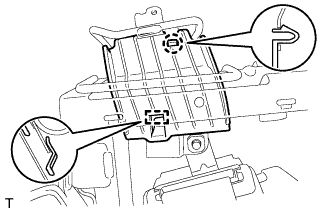
Using a clip remover, detach the 3 clips.
Detach the guide and remove the board.
| 3.
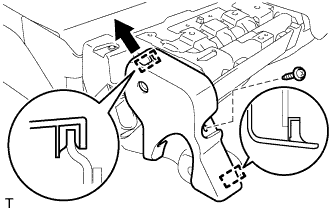
REMOVE REAR SEAT INNER RECLINING COVER RH
|
|
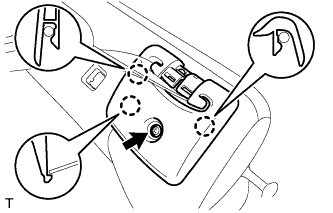
Remove the screw.
Detach the 2 guides and remove the cover.
| 4.
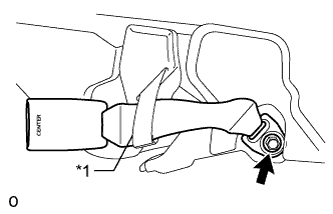
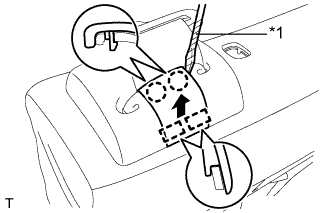
REMOVE REAR CENTER SEAT INNER BELT ASSEMBLY
|
|
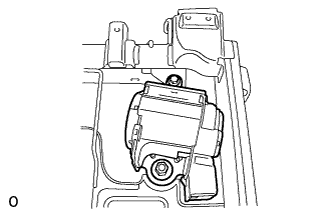
Detach the fastening tape and remove the band.
Remove the bolt and inner belt.
Text in Illustration
*1
|
Band
|
| 5.
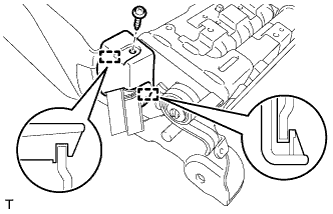
REMOVE CENTER SEATBACK COVER SUB-ASSEMBLY
|
|
Remove the screw.
Detach the 2 guides and remove the cover.
| 6.
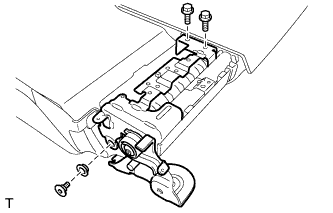
REMOVE CENTER SEATBACK ASSEMBLY
|
|
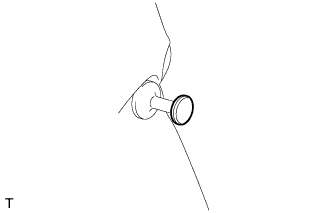
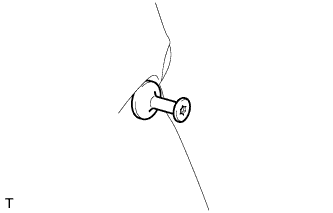
Using a T45 "TORX" socket wrench, remove the "TORX" bolt and bush.
Remove the 2 bolts and center seatback.
| 7.
REMOVE CENTER NO. 2 SEATBACK COVER
|
|
Remove the screw.
Detach the 2 claws and remove the cover.
| 8.
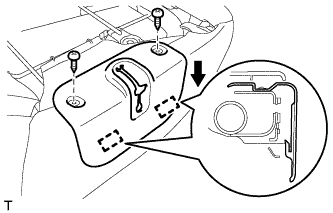
REMOVE REAR SEATBACK LOCK COVER RH
|
|
Remove the 2 screws.
Detach the 2 guides and remove the cover.
| 9.
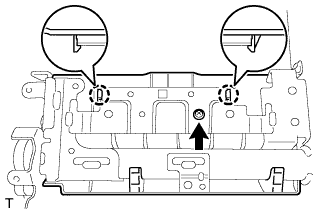
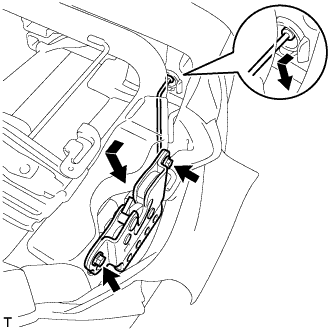
REMOVE REAR SEATBACK LOCK ASSEMBLY RH
|
|
- Remove the 2 hog rings.
- Remove the 2 bolts.
While moving the release button in the direction of the arrow in the illustration, detach it from the grommet and remove the seatback lock.
| 10.
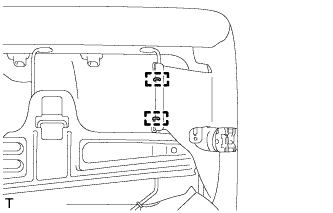
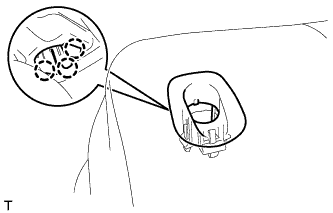
REMOVE REAR SEATBACK STOP BUTTON GROMMET
|
|
Detach the 3 claws and remove the grommet.
| 11.
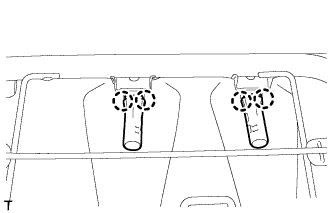
REMOVE REAR NO. 1 SEAT HEADREST SUPPORT ASSEMBLY
|
|
Detach the 4 claws and remove the 2 supports.
| 12.
REMOVE SEAT BELT ANCHOR COVER CAP
|
|
Using a screwdriver, detach the 2 claws and 2 guides, and then remove the cap.
- HINT:
- Tape the screwdriver tip before use.
Text in Illustration
*1
|
Protective Tape
|
| 13.
REMOVE REAR SEAT SHOULDER BELT COVER
|
|
Remove the screw.
Detach the 3 claws and remove the cover.
Disconnect the outer belt from the cover.
| 14.
REMOVE REAR SEATBACK LOCK STRIKER PROTECTOR
|
|
Remove the protector from the striker.
| 15.
REMOVE REAR SEAT LOCK STRIKER
|
|
Using a T45 "TORX" socket wrench, remove the striker.
| 16.
REMOVE SEATBACK COVER WITH PAD
|
|
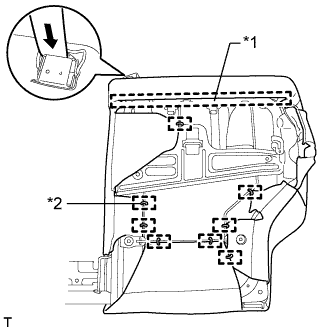
Remove the hog rings, detach the hook, and then remove the seatback cover with pad.
Text in Illustration
*1
|
Hook
|
*2
|
Hog Ring
|
Disconnect the outer belt from the seatback cover with pad.
| 17.
REMOVE REAR SEATBACK EDGE PROTECTOR
|
|
Remove the protector from the seatback frame.
| 18.
REMOVE REAR SEAT SHOULDER BELT GUIDE
|
|
Detach the claw and guide, and then remove the belt guide.
| 19.
REMOVE NO. 1 SEAT 3 POINT TYPE BELT ASSEMBLY RH |
|
Remove the nut and bolt, and then detach the 2 claws and remove the seat belt.