INSTALLATION
Removal / installation · Vehicles built from Aug 2014
Versions by build date: Aug 2013 – Jul 2014 from Aug 2014
| 1. INSTALL INTAKE MANIFOLD |

Install the No. 2 fuel vapor feed hose to the intake manifold.
Install the 2 wire harness clamp brackets to the intake manifold with the 2 bolts.
- Torque:
- 8.0 N*m{ 82 kgf*cm , 71 in.*lbf }
Install a new gasket to the intake manifold.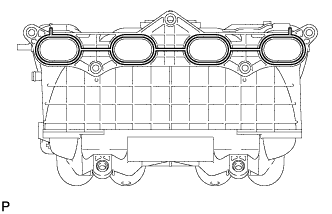

Install the intake manifold with the 5 bolts and 2 nuts.
- Torque:
- 25 N*m{ 255 kgf*cm , 18 ft.*lbf }
for Engine Rear Side:
Attach the No. 2 water by-pass hose and connect the No. 3 ventilation hose to the intake manifold.
for Engine Front Side:
Attach the 2 wire harness clamps to the 2 wire harness clamp brackets.
| 2. INSTALL PURGE VSV |
Install the purge VSV with the bolt.
- Torque:
- 9.0 N*m{ 92 kgf*cm , 80 in.*lbf }
Connect the 2 purge line hoses to the purge VSV.
Connect the purge VSV connector.
| 3. INSTALL FUEL DELIVERY PIPE WITH FUEL INJECTOR |
Install the fuel delivery pipe with fuel injector (Click here).
| 4. INSTALL THROTTLE WITH MOTOR BODY ASSEMBLY |
Install the throttle with motor body (Click here).
| 5. INSTALL STARTER ASSEMBLY |
for 1.4 kW Type:
Install the starter (Click here).
for 2.0 kW Type:
Install the starter (Click here).
| 6. INSTALL TRANSMISSION OIL FILLER TUBE SUB-ASSEMBLY |
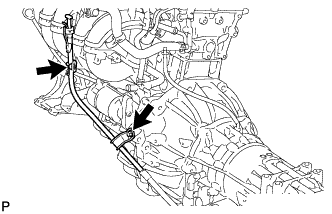 |
Coat a new O-ring with ATF, and install it to the oil filler tube.
Install the oil filler tube to the transmission with the 2 bolts.
- Torque:
- 14 N*m{ 143 kgf*cm , 10 ft.*lbf }
Install the oil dipstick.
| 7. INSTALL FRONT NO. 1 FENDER APRON TO FRAME SEAL LH |
Install the front fender apron to frame seal with the 5 clips.
| 8. INSTALL FRONT FENDER APRON SEAL LH |
Install the front fender apron seal with the 5 clips.
| 9. CONNECT CABLE TO NEGATIVE BATTERY TERMINAL |
- NOTICE:
- When disconnecting the cable, some systems need to be initialized after the cable is reconnected (Click here).