DISASSEMBLY
Removal / installation · Vehicles built from Aug 2014
Versions by build date: Aug 2013 – Jul 2014 from Aug 2014
- HINT:
- Use the same procedure for RHD and LHD vehicles.
- The procedure listed below is for LHD vehicles.
| 1.
REMOVE NO. 1 HEATER TO REGISTER DUCT |
 |
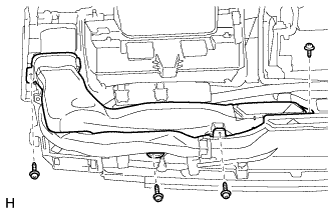
Remove the 4 screws <A> and No. 1 heater to register duct.
| 2.
REMOVE NO. 2 HEATER TO REGISTER DUCT |
|
- HINT:
- Use the same procedure described for the No. 1 heater to register duct.
| 3.
REMOVE NO. 1 SIDE DEFROSTER NOZZLE DUCT |
|
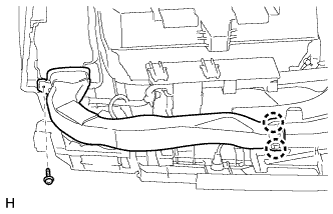
Remove the screw <A>.
Detach the 2 claws and remove the No. 1 side defroster nozzle duct.
| 4.
REMOVE NO. 2 SIDE DEFROSTER NOZZLE DUCT |
|
- HINT:
- Use the same procedure described for the No. 1 side defroster nozzle duct.
| 5.
REMOVE DEFROSTER NOZZLE ASSEMBLY |
|
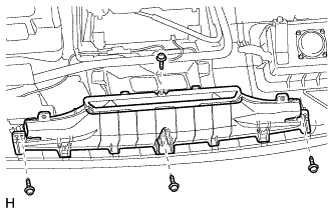
Remove the 4 screws <A> and defroster nozzle.
| 6.
REMOVE NO. 3 HEATER TO REGISTER DUCT |
|
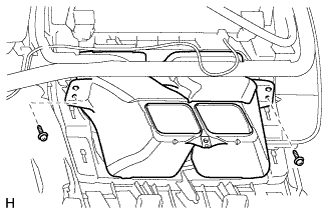
Remove the 2 screws <A> and No. 3 heater to register duct.
| 7.
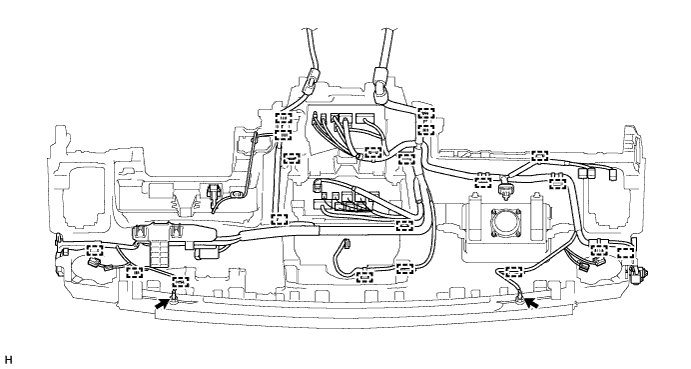
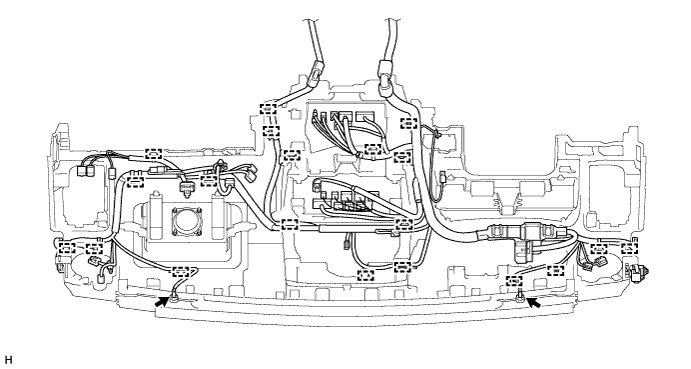
REMOVE NO. 2 INSTRUMENT PANEL WIRE |
|
for LHD:
Disconnect the 2 connectors.
Detach the 20 clamps and remove the No. 2 instrument panel wire.

for RHD:
Disconnect the 2 connectors.
Detach the 20 clamps and remove the No. 2 instrument panel wire.
| 8.
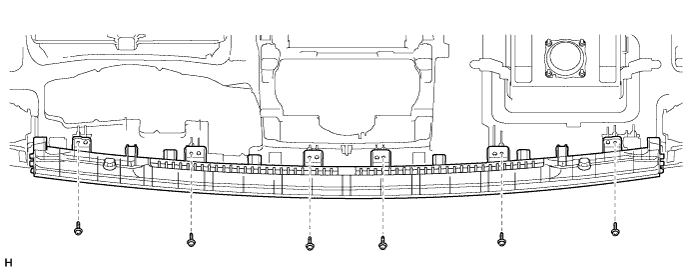
REMOVE NO. 1 DEFROSTER NOZZLE GARNISH |
|
Remove the 6 screws <A> and No. 1 defroster nozzle garnish.
| 9.
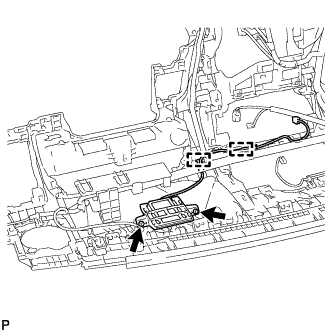
REMOVE NAVIGATION ANTENNA ASSEMBLY (w/ Navigation System)
|
|
- Detach the 2 clamps.
Remove the 2 screws and navigation antenna assembly.
| 10.
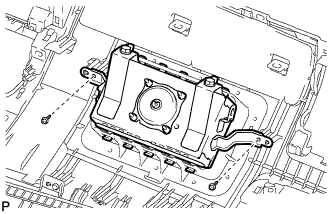
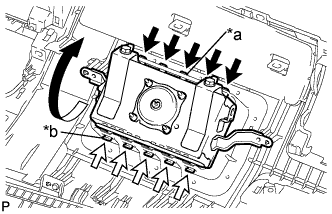
REMOVE INSTRUMENT PANEL PASSENGER AIRBAG ASSEMBLY
|
|
- Remove the 2 screws.
- Detach the 5 hooks (A).
Text in Illustration
*a
|
Hook A
|
*b
|
Hook B
|
Detach the 5 hooks (B) and remove the instrument panel passenger airbag.
| 11.
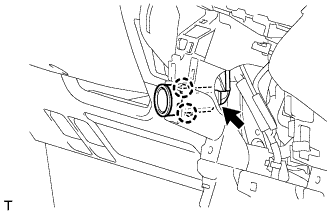
REMOVE ENGINE SWITCH (w/ Entry and Start System)
|
|
- Disconnect the connector.
Detach the 2 claws and remove the engine switch.
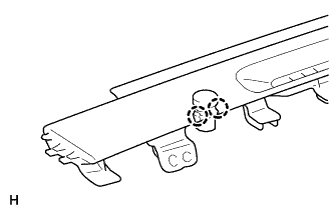
| 12.
REMOVE SUNSHINE SENSOR HOLE COVER (w/o Automatic Light Control System) |
|
- Detach the 2 claws and remove the sunshine sensor hole cover.
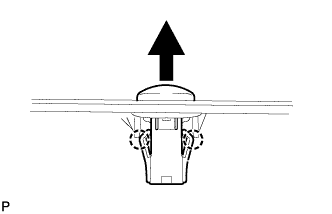
| 13.
REMOVE AUTOMATIC LIGHT CONTROL SENSOR (w/ Automatic Light Control System)
|
|
- Disconnect the connector.
Detach the 2 claws and remove the sensor.
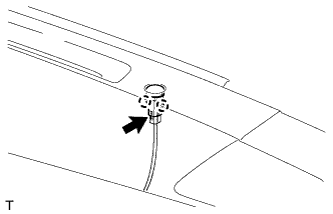
| 14.
REMOVE SECURITY INDICATOR LIGHT ASSEMBLY
|
|
- Disconnect the connector.
Detach the 2 claws and remove the security indicator light.