INSTALLATION
Removal / installation · Vehicles built from Aug 2013
- HINT:
- Use the same procedure for the RH and LH sides.
- The procedure listed below is for the LH side.
- Use the same procedure for the RH and LH sides.
| 1. INSTALL STEERING KNUCKLE LH |

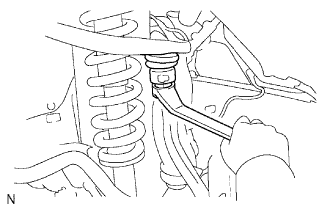  |
Install the steering knuckle to the front suspension upper arm with the nut.
- Torque:
- 110 N*m{ 1122 kgf*cm , 82 ft.*lbf }
Install a new clip.
| 2. INSTALL FRONT LOWER BALL JOINT ATTACHMENT LH |
Install the front lower ball joint attachment with the 2 bolts.
- Torque:
- 160 N*m{ 1632 kgf*cm , 118 ft.*lbf }
| 3. CONNECT TIE ROD END SUB-ASSEMBLY LH |
Connect the tie rod end to the steering knuckle with the nut.
- Torque:
- 91 N*m{ 928 kgf*cm , 67 ft.*lbf }
- NOTICE:
- Tighten the nut up to an additional 60° if the holes for the cotter pin are not aligned.
Install a new cotter pin.
| 4. INSTALL FRONT AXLE HUB SUB-ASSEMBLY LH |
Install the front axle hub (Click here).
| 5. INSTALL FRONT SPEED SENSOR LH |
Install the speed sensor with the bolt.
- Torque:
- 8.5 N*m{ 87 kgf*cm , 75 in.*lbf }
- NOTICE:
- Make sure there are no pieces of iron or other foreign matter attached to the sensor tip.
- While inserting the speed sensor into the knuckle hole, do not strike or damage the sensor tip.
- After installing the speed sensor, make sure there is no clearance or foreign matter between the sensor stay part and the knuckle.
- Make sure there is no foreign matter attached to the speed sensor rotor.
- Make sure there are no pieces of iron or other foreign matter attached to the sensor tip.
| 6. CONNECT CABLE TO NEGATIVE BATTERY TERMINAL |
- NOTICE:
- When disconnecting the cable, some systems need to be initialized after the cable is reconnected (Click here).
| 7. INSTALL FRONT WHEEL |
- Torque:
- 112 N*m{ 1142 kgf*cm , 83 ft.*lbf }
| 8. INSPECT AND ADJUST FRONT WHEEL ALIGNMENT |
Inspect and adjust the front wheel alignment (Click here).
| 9. CHECK FRONT SPEED SENSOR |
Check the front speed sensor (Click here).