REMOVAL
Removal / installation · Vehicles built Aug 2013 – Jul 2014
Versions by build date: Aug 2013 – Jul 2014 from Aug 2014
- CAUTION:
- Wear protective gloves. Sharp areas on the parts may injure your hands.
| 1. REMOVE REAR SEAT HEADREST ASSEMBLY |

Remove the headrest.
| 2. REMOVE REAR SEATBACK COVER |
Press the seatback lock release button to release the lock and fold down the seatback.
Using a screwdriver, detach the 4 claws and remove the cover.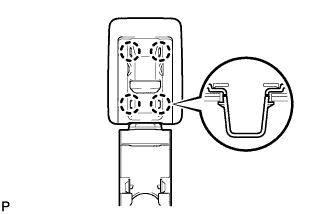

- HINT:
- Tape the screwdriver tip before use.
| 3. REMOVE REAR SEATBACK BOARD CARPET ASSEMBLY RH |
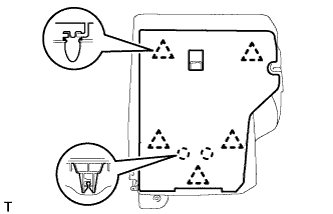 |
Using a clip remover, detach the 5 clips.
Detach the 2 claws and remove the carpet.
| 4. REMOVE REAR SEATBACK ASSEMBLY RH |
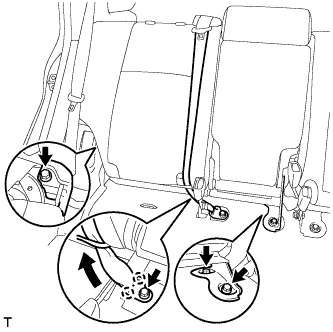 |
Remove the bolt and detach the 2 claws, and then disconnect the outer belt.
Remove the 2 bolts that secure the seatback to the floor.
Fold down the seatback, remove the bolt from the hinge, and then remove the seatback.
- NOTICE:
- Be careful not to damage the vehicle body.
| 5. REMOVE REAR CENTER SEAT INNER BELT ASSEMBLY |
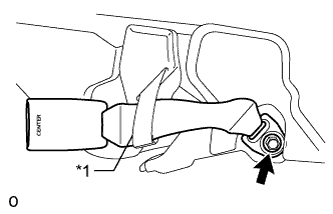 |
Detach the fastening tape and remove the band.
Remove the bolt and inner belt.
Text in Illustration *1
Band