REMOVAL
Removal / installation · Vehicles built Aug 2013 – Jul 2014
Versions by build date: Aug 2013 – Jul 2014 from Aug 2014
| 1.
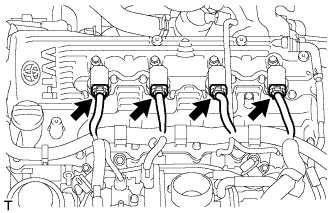
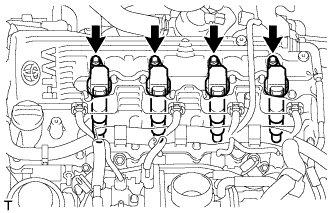
REMOVE IGNITION COIL ASSEMBLY
|
 |
- Disconnect the 4 ignition coil connectors.
- Remove the 4 bolts and 4 ignition coils.
| 2.
REMOVE GENERATOR ASSEMBLY |
|
for 80 A Type:
Remove the generator (Click here).
for 100 A Type:
Remove the generator (Click here).
| 3.
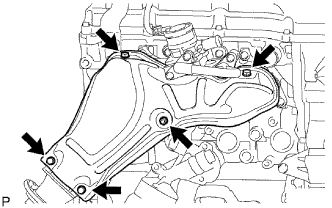
REMOVE NO. 1 EXHAUST MANIFOLD HEAT INSULATOR
|
|
- Remove the 5 bolts and No. 1 exhaust manifold heat insulator.
- HINT:
- It is only necessary to move the No. 1 exhaust manifold heat insulator so that the intake pipe can be removed in a later step.
- It is not possible to fully remove the No. 1 exhaust manifold heat insulator in this step.
| 4.
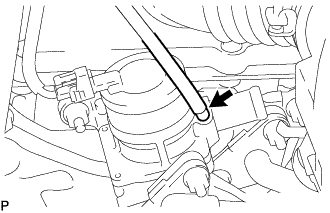
REMOVE NO. 4 INTAKE PIPE
|
|
- Remove the 4 nuts, No. 4 intake pipe and 2 gaskets.
- NOTICE:
- Be careful not to damage the installation surface of the gaskets.
| 5.
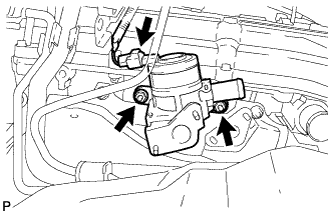
REMOVE AIR SWITCHING VALVE ASSEMBLY
|
|
- w/ Manifold Absolute Pressure Sensor:
Disconnect the vacuum hose.
- Disconnect the connector.
Remove the 2 nuts and air switching valve.
Remove the No. 1 exhaust manifold heat insulator.
| 6.
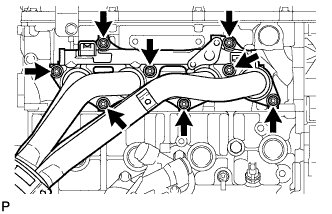
REMOVE EXHAUST MANIFOLD
|
|
- Remove the 8 nuts and exhaust manifold.
Remove the gasket.
| 7.
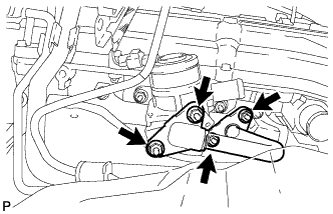
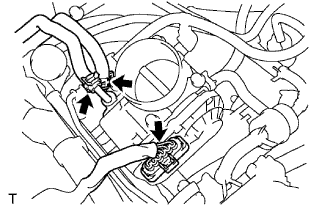
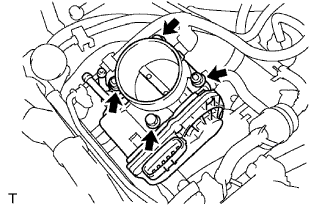
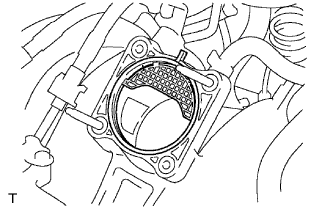
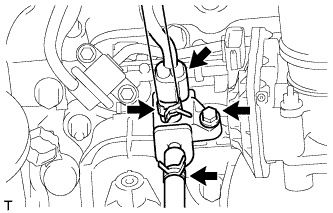
REMOVE THROTTLE WITH MOTOR BODY ASSEMBLY
|
|
- Disconnect the water by-pass hose.
Disconnect the No. 2 water by-pass hose.
Disconnect the throttle position sensor and throttle control motor connector.
- for Type A:
Remove the 2 bolts, 2 nuts and throttle body with motor.
for Type B:
Remove the 4 bolts and throttle body with motor.
- Remove the gasket from the intake manifold.
| 8.
REMOVE FUEL DELIVERY PIPE WITH FUEL INJECTOR |
|
Remove the fuel delivery pipe with fuel injector (Click here).
| 9.
REMOVE PURGE VSV
|
|
- Disconnect the purge VSV connector.
Disconnect the 2 purge line hoses from the purge VSV.
Remove the bolt and purge VSV.
| 10.
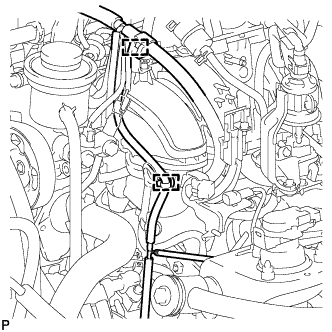
REMOVE INTAKE MANIFOLD
|
|
for Engine Front Side:
Detach the 2 wire harness clamps from the 2 wire harness clamp brackets.
- for Engine Rear Side:
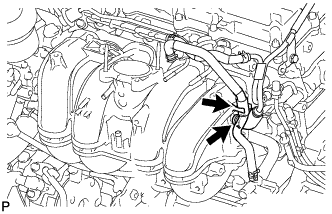
Detach the No. 2 water by-pass hose and disconnect the No. 3 ventilation hose from the intake manifold.
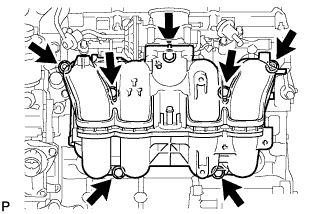
- Remove the 5 bolts, 2 nuts and intake manifold.
Remove the gasket from the intake manifold.
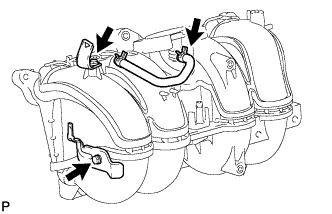
- Remove the 2 bolts, 2 wire harness clamp brackets and No. 2 fuel vapor feed hose from the intake manifold.
| 11.
REMOVE IDLE PULLEY ASSEMBLY |
|
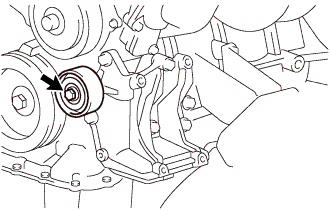
- Loosen the bolt, and then remove the idle pulley assembly.
- HINT:
- The bolt in the illustration cannot be removed from the idle pulley assembly.
| 12.
REMOVE NO. 1 COMPRESSOR MOUNTING BRACKET |
|
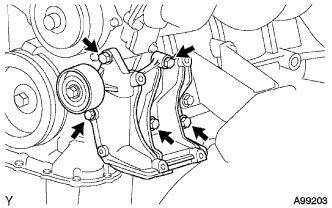
- Remove the 5 bolts and No. 1 compressor mounting bracket.
| 13.
REMOVE NO. 1 IDLER PULLEY SUB-ASSEMBLY
|
|
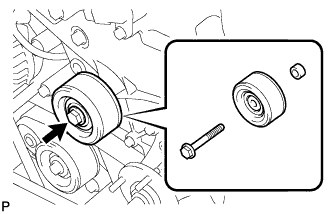
- Remove the bolt, idler pulley and spacer.
| 14.
REMOVE NO. 1 WATER BY-PASS PIPE |
|
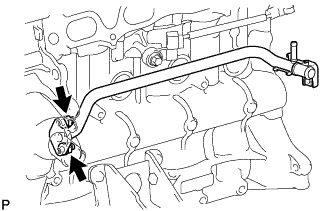
- Remove the 2 nuts, water by-pass pipe and gasket.
| 15.
REMOVE ENGINE OIL LEVEL DIPSTICK GUIDE |
|
Remove the oil level dipstick.
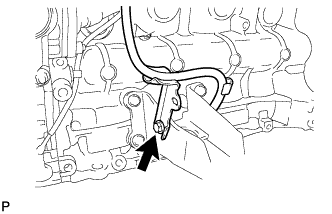
- Remove the bolt and oil level dipstick guide.
| 16.
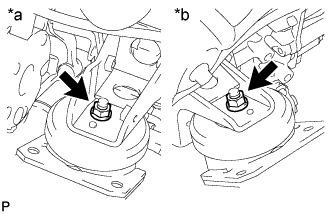
REMOVE FRONT ENGINE MOUNTING INSULATOR |
|
- Remove the 2 nuts and 2 engine mounting insulators.
Text in Illustration
*a
|
LH Side
|
*b
|
RH Side
|
| 17.
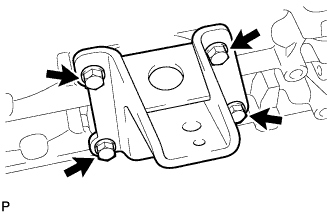
REMOVE FRONT NO. 1 ENGINE MOUNTING BRACKET LH |
|
- Remove the 4 bolts and engine mounting bracket.
| 18.
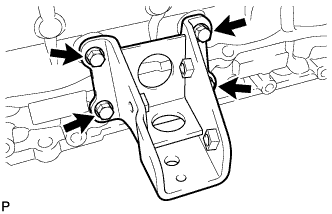
REMOVE FRONT NO. 1 ENGINE MOUNTING BRACKET RH |
|
- Remove the 4 bolts and engine mounting bracket.