Parking Brake Switch Circuit
Circuit diagnosis · Vehicles built Aug 2013 – Jul 2014
Versions by build date: Aug 2013 – Jul 2014 from Aug 2014
DESCRIPTION
This circuit includes the parking brake switch assembly and radio and display receiver assembly.WIRING DIAGRAM
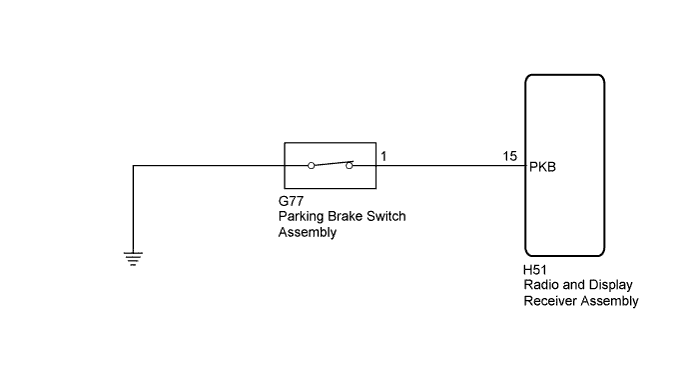

INSPECTION PROCEDURE
| 1. CHECK VEHICLE SIGNAL (OPERATION CHECK) |
 |
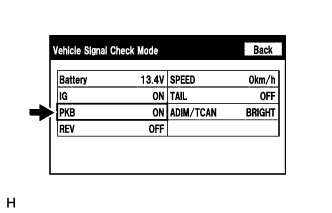
- Display the "Vehicle Signal Check Mode" screen (Click here).
Check that the display changes between ON and OFF according to the parking brake operation.
- OK:
Parking Brake Condition
|
Display
|
Applied
|
ON
|
Released
|
OFF
|
- HINT:
- This display is updated once per second. As a result, it is normal for the display to lag behind the actual parking brake operation.
|
NG |
 |
|
|
|
| OK |
|
 |
|
| PROCEED TO NEXT SUSPECTED AREA SHOWN IN PROBLEM SYMPTOMS TABLE (Click here)
|
|
| 2. CHECK HARNESS AND CONNECTOR (RADIO AND DISPLAY RECEIVER ASSEMBLY - PARKING BRAKE SWITCH ASSEMBLY) |
|
Disconnect the H51 radio and display receiver assembly connector.
Disconnect the G77 parking brake switch assembly connector.
Measure the resistance according to the value(s) in the table below.
- Standard Resistance:
Tester Connection
|
Condition
|
Specified Condition
|
H51-15 (PKB) - G77-1
|
Always
|
Below 1 Ω
|
H51-15 (PKB) - Body ground
|
Always
|
10 kΩ or higher
|
|
NG |
 |
|
| REPAIR OR REPLACE HARNESS OR CONNECTOR |
|
|
| OK |
|
 |
|
| 3. INSPECT PARKING BRAKE SWITCH ASSEMBLY |
|
Remove the parking brake switch assembly (Click here).
Inspect the parking brake switch assembly (Click here).
|
NG |
|
|
| REPLACE PARKING BRAKE SWITCH ASSEMBLY (Click here)
|
|
|
| OK |
|
|
|
| PROCEED TO NEXT SUSPECTED AREA SHOWN IN PROBLEM SYMPTOMS TABLE (Click here)
|
|