INSTALLATION
Removal / installation · Vehicles built Aug 2013 – Jul 2014
Versions by build date: Aug 2013 – Jul 2014 from Aug 2014
- HINT:
- Use the same procedure for RHD and LHD vehicles.
- The procedure listed below is for LHD vehicles.
- Use the same procedure for RHD and LHD vehicles.
| 1. INSTALL NO. 1 RADIO BRACKET |

Install the No. 1 radio bracket with the 3 screws.
- Torque:
- 3.0 N*m{ 31 kgf*cm , 27 in.*lbf }
| 2. INSTALL NO. 2 RADIO BRACKET |
Install the No. 2 radio bracket with the 3 screws.
- Torque:
- 3.0 N*m{ 31 kgf*cm , 27 in.*lbf }
| 3. INSTALL RADIO RECEIVER ASSEMBLY |
Connect each connector.
Insert the radio receiver assembly to attach the 2 guides on its backside.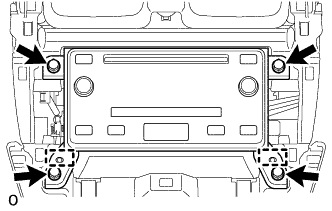

- NOTICE:
- When inserting the receiver, do not press the knobs on it.
Install the radio receiver assembly with the 4 bolts.
- Torque:
- 13 N*m{ 133 kgf*cm , 10 ft.*lbf }
| 4. INSTALL CENTER INSTRUMENT CLUSTER FINISH PANEL ASSEMBLY |
Attach the 10 clips to install the instrument cluster finish panel assembly.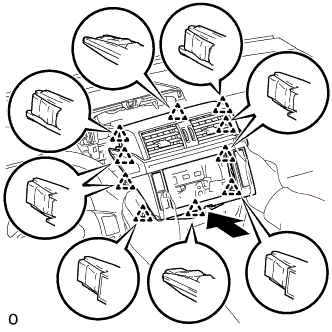
| 5. INSTALL INTEGRATION CONTROL AND PANEL ASSEMBLY |
Connect the connector.
Attach the 4 clips to install the integration control and panel assembly.