PARK ASSIST / MONITORING TELEVISION CAMERA(for Side) REMOVAL
PROCEDURE

 87940
1.REMOVE OUTER REAR VIEW MIRROR ASSEMBLY LH
Remove the outer rear view mirror (See page Vehicle Exterior>MIRROR (EXT)>OUTER REAR VIEW MIRROR>REMOVAL).
87961
2.REMOVE OUTER REAR VIEW MIRROR GLASS
87945C
3.REMOVE OUTER MIRROR COVER
81740
4.REMOVE SIDE TURN SIGNAL LIGHT ASSEMBLY LH
86790C
5.REMOVE SIDE TELEVISION CAMERA ASSEMBLY
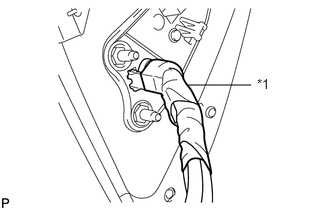
Remove the tape.
| *1 | Tape |
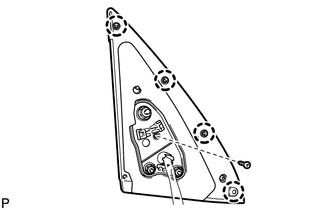
Remove the screw, detach the 4 claws and remove the rubber base.
- HINT:
-
It is not necessary to completely remove the rubber base. Slightly move the rubber base so that the lower mirror cover can be removed in a later step.
Remove the lower mirror cover.
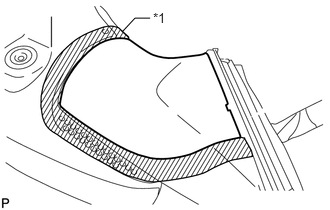
Put protective tape around the lower mirror cover.
| *1 | Protective Tape |
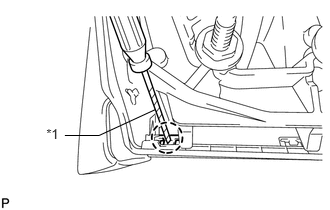
Using a screwdriver, detach the claw.
| *1 | Protective Tape |
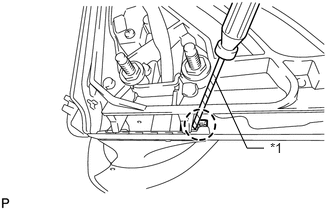
Using a screwdriver, detach the claw.
| *1 | Protective Tape |
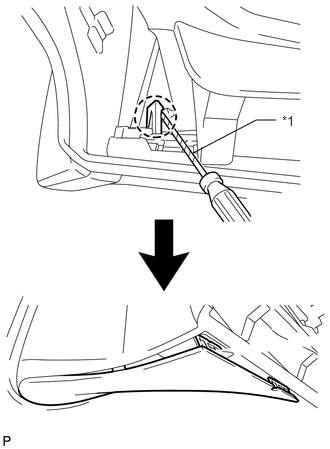
Using a screwdriver, detach the claw to create a space between the lower mirror cover and mirror body as shown in the illustration.
| *1 | Protective Tape |
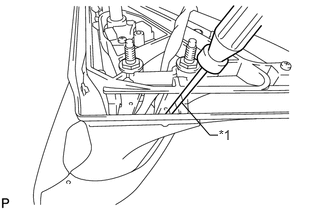
Insert a screwdriver as shown in the illustration.
| *1 | Protective Tape |
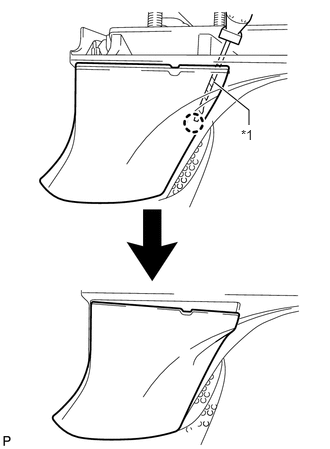
Detach the claw to create a space between the lower mirror cover and mirror body as shown in the illustration.
| *1 | Protective Tape |
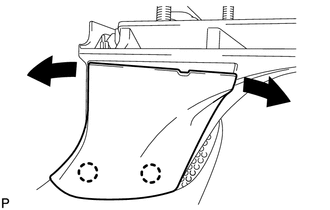
While moving the lower mirror cover back and forth in the directions of the arrows in the illustration, detach the 3 claws and remove the lower mirror cover.
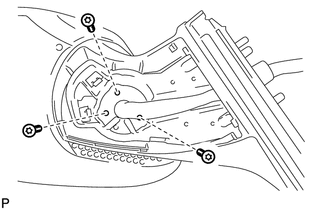
Using a T25 "TORX" socket wrench, remove the 3 screws.
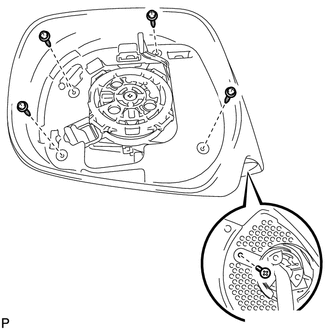
Remove the 5 screws.
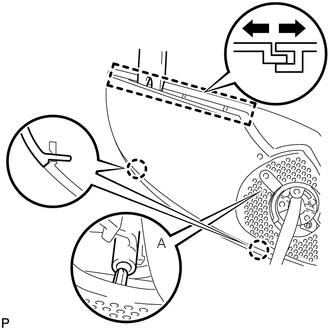
Using a moulding remover, open the mirror body as shown in the illustration.
Using a moulding remover, detach the 2 claws.
- NOTICE:
-
Be careful not to break the claw shown in the part of the illustration labeled A.
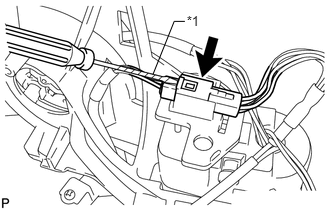
Using a screwdriver, disconnect the connector.
- NOTICE:
-
When disconnecting the connector, be careful not to damage it.
- HINT:
-
Tape the screwdriver tip before use.
Text in Illustration *1 Protective Tape
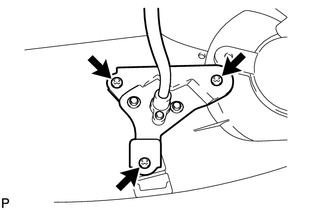
Remove the 3 screws and side television camera.