REMOVAL
Removal / installation · Vehicles built Sep 2011 – Dec 2011
Versions by build date: Sep 2011 – Dec 2011 from Jan 2012
| 1.
DISCHARGE FUEL SYSTEM PRESSURE |
 |
(Click here)
| 2.
DISCONNECT CABLE FROM NEGATIVE BATTERY TERMINAL |
|
- NOTICE:
- When disconnecting the cable, some systems need to be initialized after the cable is reconnected (Click here).
| 3.
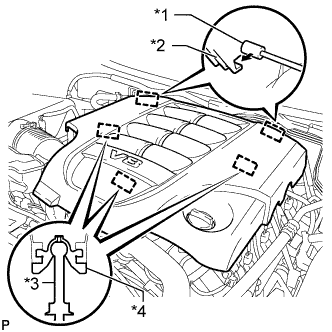
REMOVE V-BANK COVER SUB-ASSEMBLY
|
|
- Raise the front of the V-bank cover to detach the 3 pins. Then remove the 2 V-bank cover hooks from the bracket, and remove the V-bank cover.
Text in Illustration
*1
|
Bracket
|
*2
|
Hook
|
*3
|
Pin
|
*4
|
Grommet
|
| 4.
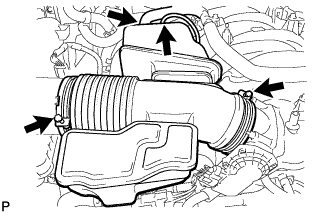
REMOVE AIR CLEANER HOSE ASSEMBLY
|
|
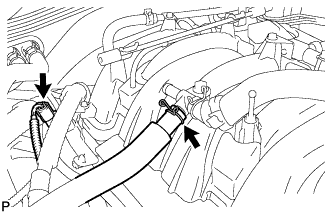
- Disconnect the vacuum hose and No. 2 ventilation hose.
Loosen the 2 hose clamps.
Remove the air cleaner hose.
| 5.
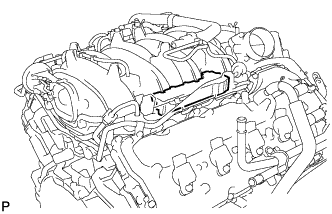
REMOVE NO. 1 ENGINE COVER SUB-ASSEMBLY |
|
- Remove the No. 1 engine cover sub-assembly.
| 6.
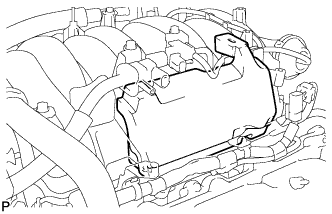
REMOVE NO. 3 ENGINE COVER |
|
- Remove the No. 3 engine cover.
| 7.
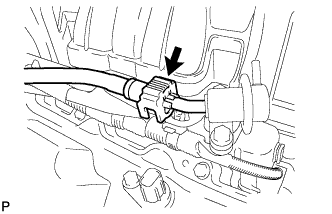
DISCONNECT NO. 2 FUEL TUBE |
|
- Disconnect the No. 2 fuel tube from the fuel pressure regulator (Click here).
| 8.
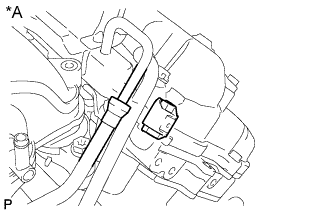
DISCONNECT NO. 1 FUEL TUBE |
|
- Disconnect the No. 1 fuel tube from the fuel delivery pipe RH (for metallic type) (Click here).
- SST
- 09268-21011
Text in Illustration
*A
|
RH Side
|
- LH Side:
Disconnect the No. 1 fuel tube from the fuel delivery pipe LH (Click here).
Text in Illustration
*A
|
LH Side
|
| 9.
DISCONNECT NO. 1 FUEL HOSE |
|
- Disconnect the No. 1 fuel hose from the fuel delivery pipe LH (Click here).
| 10.
REMOVE FUEL DELIVERY PIPE SUB-ASSEMBLY RH |
|
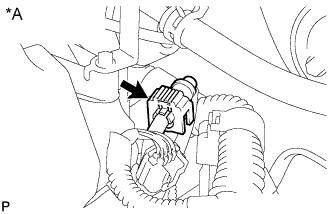
- Disconnect the ventilation hose and No. 6 wire harness connector.
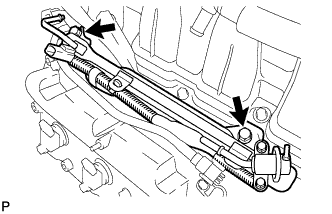
- Remove the 2 bolts and fuel delivery pipe RH.
- NOTICE:
- When removing the delivery pipe, hold the pipe by both ends and pull it straight upward.
Remove the 2 delivery pipe spacers and 4 insulators from the cylinder head RH.
| 11.
REMOVE FUEL DELIVERY PIPE SUB-ASSEMBLY LH |
|
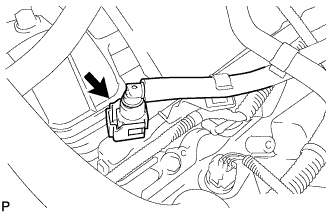
Disconnect the No. 7 wire harness connector.
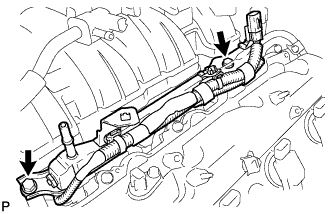
- Remove the 2 bolts and fuel delivery pipe LH.
- NOTICE:
- When removing the delivery pipe, hold the pipe by both ends and pull it straight upward.
Remove the 2 delivery pipe spacers and 4 insulators from the cylinder head LH.
| 12.
REMOVE FUEL INJECTOR ASSEMBLY |
|
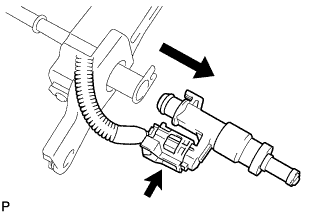
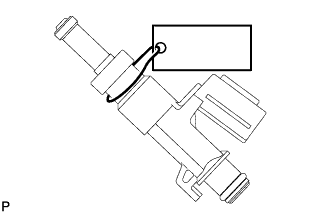
- Remove the fuel injector from the fuel delivery pipe, and then disconnect the injector connector.
- NOTICE:
- For reinstallation, attach a tag or label to the injector shaft.
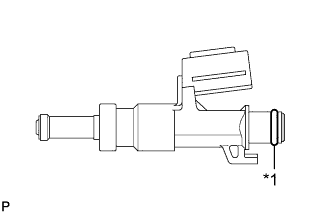
- Remove the O-ring from the fuel injector.
Text in Illustration
*1
|
O-Ring
|
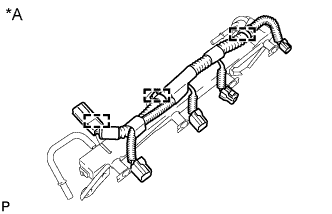
- Detach the 3 clamps and then remove the No. 6 wire harness from the delivery pipe RH.
Text in Illustration
*A
|
Fuel Delivery Pipe RH
|
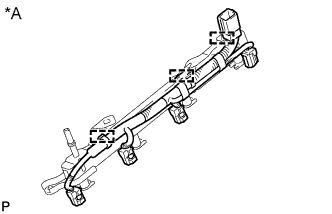
- Detach the 3 clamps and then remove the No. 7 wire harness from the delivery pipe LH.
Text in Illustration
*A
|
Fuel Delivery Pipe LH
|