Removal / installation · Vehicles built Sep 2011 – Dec 2011
1.
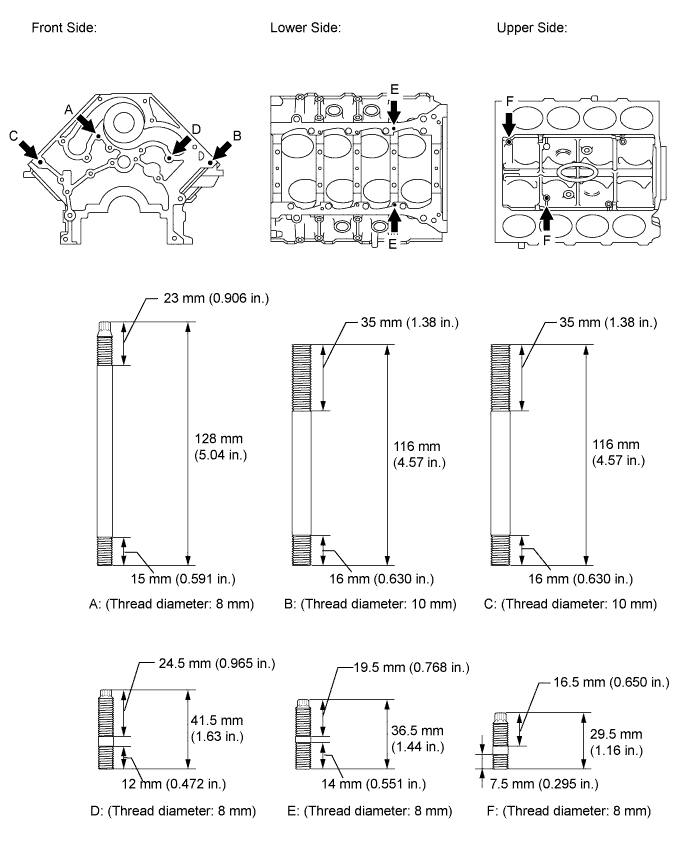
INSTALL STUD BOLT
NOTICE:
If a stud bolt is deformed or the threads are damaged, replace it.
Using E7 and E8 "TORX" socket wrenches, install the stud bolts.
Torque:
for stud bolt A, B, F:
8.0 N*m{
82 kgf*cm
, 71 in.*lbf
}
for stud bolt C:
20 N*m{
204 kgf*cm
, 15 ft.*lbf
}
for stud bolt D:
12 N*m{
122 kgf*cm
, 9 ft.*lbf
}
for stud bolt E:
14 N*m{
143 kgf*cm
, 10 ft.*lbf
}
2.
INSTALL NO. 1 OIL NOZZLE SUB-ASSEMBLY
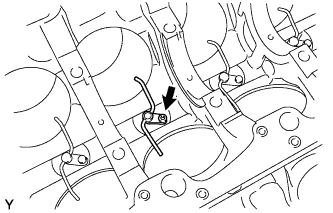
Using a 5 mm hexagon wrench, install the 4 oil nozzles with the 4 bolts.
Torque:
9.0 N*m{
92 kgf*cm
, 80 in.*lbf
}
3.
INSTALL PISTON SUB-ASSEMBLY WITH PIN
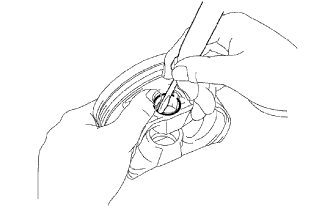
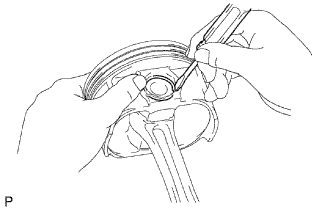
Using a small screwdriver, install a new snap ring on one side of the piston pin hole.
Coat the piston, piston pin and connecting rod with engine oil.
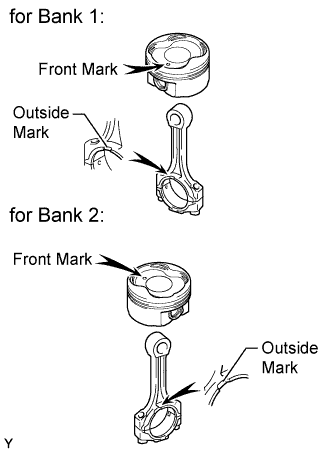
Align the marks of the piston and connecting rod as shown in the illustration. Then push in the piston pin with your thumb until the piston pin contacts the snap ring.
Front Mark:
Item
Front Mark
for Bank 1
1
for Bank 2
2
NOTICE:
For bank 1 side, perform the assembly so that the marks of the piston and connecting rod are on the same side. For bank 2 side, perform the assembly so that the marks of the piston and connecting rod are on opposite sides.
HINT:
The piston and pin are a matched set.
Using a small screwdriver, install a new snap ring on the other side of the piston pin hole.
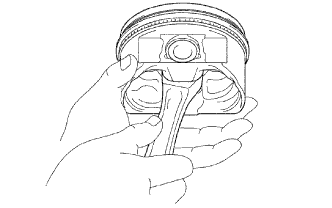
Check the fitting condition between the piston and piston pin.
Move the connecting rod back and forth on the piston pin. Check the fitting condition. If abnormal movement is felt, replace the piston and pin as a set.
Rotate the piston back and forth on the piston pin. Check the fitting condition. If abnormal movement is felt, replace the piston and pin as a set.
4.
INSTALL PISTON RING SET
Install the oil ring expander and 2 side rails by hand.
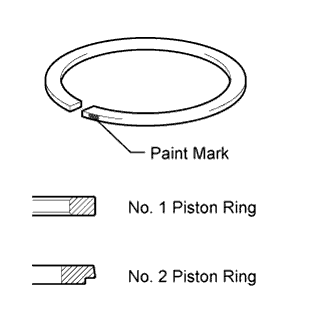
Using a piston ring expander, install the No. 1 and No. 2 piston rings.
Paint Mark:
Piston Ring
Paint Mark
No. 1
Green Color
No. 2
Peach Color
5.
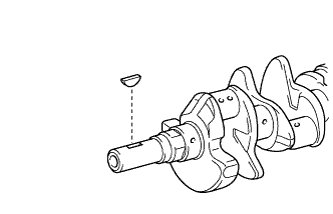
INSTALL CRANKSHAFT PULLEY KEY
Install the pulley key to the crankshaft.
6.
INSTALL CRANKSHAFT BEARING
HINT:
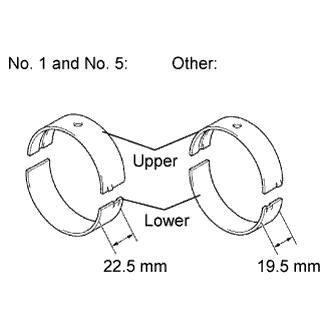
Main bearings come in widths of 19.5 mm (0.768 in.) and 22.5 mm (0.886 in.). Install the 22.5 mm (0.886 in.) bearings in the No. 1 and No. 5 cylinder block journal positions with the crankshaft bearing cap. Install the 19.5 mm (0.768 in.) bearings in the other positions.
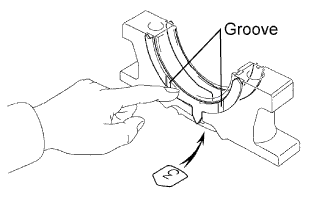
Upper bearings have an oil groove and oil holes; lower bearings do not.
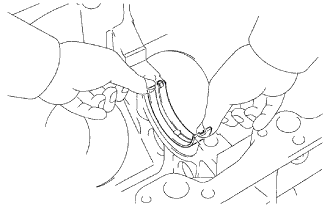
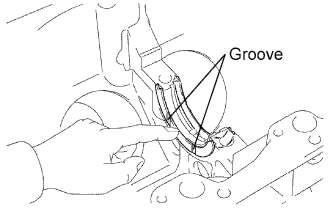
Align the bearing claw with the claw groove of the cylinder block, and push in the 5 upper bearings.
NOTICE:
Do not apply engine oil to the bearings and the contact surfaces.
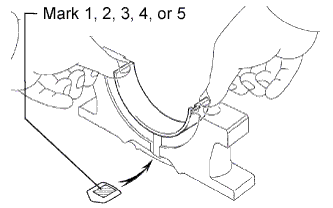
Align the bearing claw with the claw groove of the crankshaft bearing cap, and push in the 5 lower bearings.
NOTICE:
Do not apply engine oil to the bearings and the contact surfaces.
HINT:
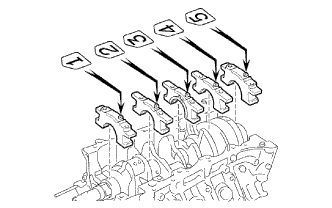
A number is marked on each bearing cap to indicate the installation position.
7.
INSTALL CRANKSHAFT THRUST WASHER SET
Apply engine oil to the thrust washer set.
Install the 2 thrust washers under the No. 3 journal position of the cylinder block with the oil grooves facing outward.
Install the 2 thrust washers on the No. 3 crankshaft bearing cap with the grooves facing outward.
8.
INSTALL CRANKSHAFT
Apply engine oil to the upper bearing and lower bearing, then place the crankshaft on the cylinder block.
Install the 5 crankshaft bearing caps in their proper locations.
HINT:
Place the bearing caps on the level and let them return to their original positions by their own weight.
NOTICE:
Do not install the bearing caps by tapping them.
Apply a light coat of engine oil on the threads and under the heads of the bearing cap bolts.
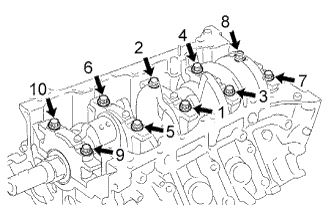
Install the 10 crankshaft bearing cap bolts.
HINT:
If any one of the bearing cap bolts is broken or deformed, replace it.
Uniformly tighten the 10 crankshaft bearing cap bolts in several passes in the sequence shown in the illustration.
Torque:
27 N*m{
275 kgf*cm
, 20 ft.*lbf
}
If any of the bearing cap bolts cannot meet the torque specification, replace the bearing cap bolt.
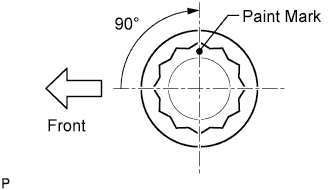
Mark the front of the crankshaft bearing cap bolts with paint.
Tighten the crankshaft bearing cap bolts 90° as shown in the illustration.
Check that the painted marks are now at a 90° angle to the front.
Check that the crankshaft turns smoothly.
9.
INSTALL CONNECTING ROD BEARING
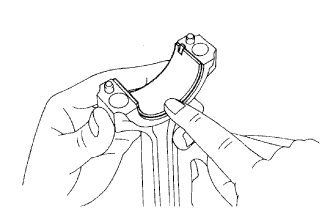
Align the bearing claw with the groove of the connecting rod or connecting cap.
Install the bearings in the connecting rod and connecting rod cap.
NOTICE:
Do not apply engine oil to the bearings and the contact surfaces.
10.
INSTALL PISTON AND CONNECTING ROD
Apply engine oil to the cylinder walls, the pistons, and the surfaces of the connecting rod bearings.
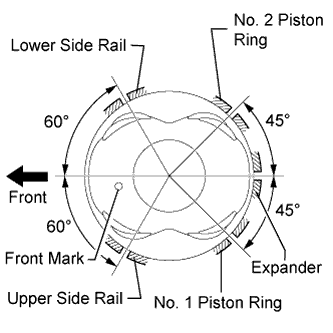
Position the piston rings so that the ring ends are as shown in the illustration.
NOTICE:
Do not align the ring ends.
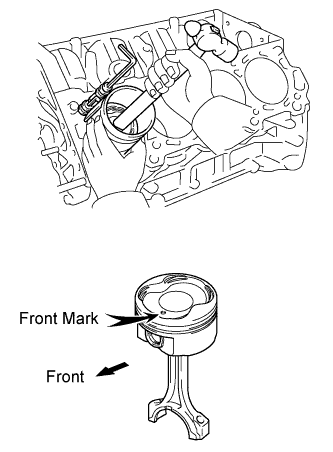
Using a hammer handle and piston ring compressor, press a piston and connecting rod assembly into each cylinder with the front mark of the piston facing forward.
Front Mark:
Item
Front Mark
for Bank 1
1
for Bank 2
2
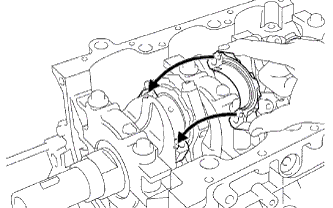
Place the connecting rod cap on the connecting rod.
Match the numbered connecting rod cap with the connecting rod.
Align the pin groove of the connecting rod cap with the pins of the connecting rod, and install the connecting rod cap.
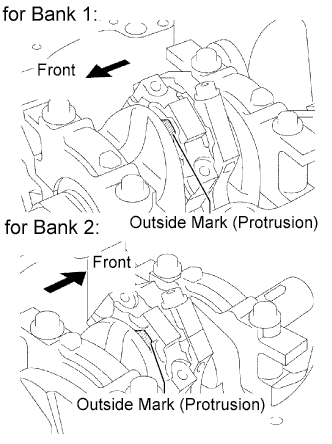
Check that the outside mark of the connecting rod cap is facing in the correct direction.
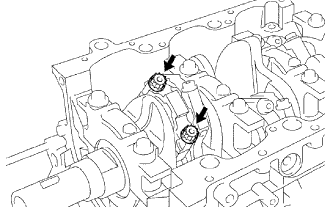
Apply a light coat of engine oil on the threads and under the heads of the connecting rod cap bolts.
Install the connecting rod cap bolts.
HINT:
If any one of the connecting rod cap bolts is broken or deformed, replace it.
Install and alternately tighten the 2 connecting rod cap bolts in several passes.
Torque:
25 N*m{
250 kgf*cm
, 18 ft.*lbf
}
If any of the connecting rod cap bolts cannot meet the torque specification, replace the connecting rod cap bolts.
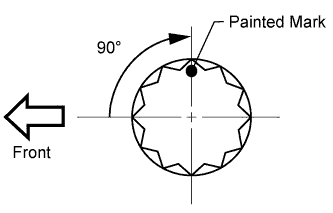
Mark the front of the connecting cap bolt with paint.
Tighten the cap bolts 90° as shown in the illustration.
Check that the painted marks are now at a 90° angle to the front.