INSPECTION
Inspection · Vehicles built from Jan 2012
Versions by build date: Sep 2011 – Dec 2011 from Jan 2012
| CLEAN CYLINDER HEAD SUB-ASSEMBLY |

Using a gasket scraper, remove all the gasket material from the surface which contacts the cylinder block.
- NOTICE:
- Be careful not to scratch the surface which contacts the cylinder block.
Using a wire brush, remove all the carbon from the combustion chambers.
- NOTICE:
- Be careful not to scratch the cylinder block contact surface.
Using a valve guide bushing brush and solvent, clean all the guide bushes.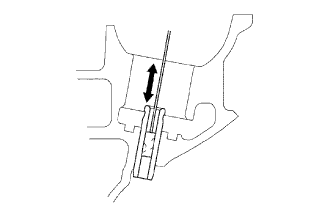

Using a soft brush and solvent, thoroughly clean the cylinder head.
| INSPECT CYLINDER HEAD SUB-ASSEMBLY |
Using a precision straightedge and feeler gauge, measure the warpage of the surfaces which contact the cylinder block sub-assembly and manifolds.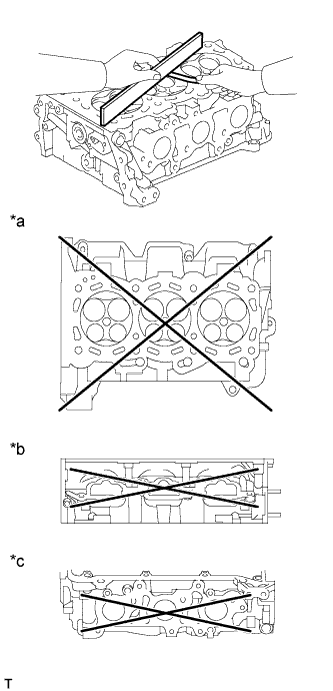
- Standard Warpage:
Item
Specified Condition
Cylinder block side
0.05 mm (0.00197 in.)
Intake side
0.08 mm (0.00315 in.)
Exhaust side
0.08 mm (0.00315 in.)
- Maximum Warpage:
Item
Specified Condition
Cylinder block side
0.10 mm (0.00394 in.)
Intake side
0.10 mm (0.00394 in.)
Exhaust side
0.10 mm (0.00394 in.)
If the warpage is more than the maximum, replace the cylinder head sub-assembly.Text in Illustration *a
Cylinder Block Side
*b
Intake Side
*c
Exhaust Side
Using a dye penetrant, check the intake ports, exhaust ports and cylinder surface for cracks.
If cracked, replace the cylinder head sub-assembly.
| CLEAN VALVE SEAT |
Using a 45° carbon cutter, resurface the valve seats.
- HINT:
- Only remove the amount of metal necessary to clean the seats.
| INSPECT INTAKE VALVE |
Clean the valves.
Using a gasket scraper, chip off any carbon from the valve head.
Using a wire brush, thoroughly clean the valve.
Using a micrometer, measure the diameter of the valve stem.
- Valve stem diameter:
- 5.470 to 5.485 mm (0.215 to 0.216 in.)
Check the valve face angle.
Grind the valve sufficiently to remove pits and carbon.
Check that the valve is ground to the correct valve face angle.
- Standard valve face angle:
- 45.5°
Using a vernier caliper, measure the valve head margin thickness.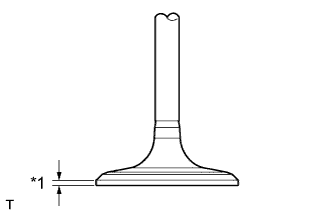
- Standard margin thickness:
- 1.25 mm (0.0492 in.)
- Minimum margin thickness:
- 0.5 mm (0.0197 in.)
If the margin thickness is less than the minimum, replace the intake valve.Text in Illustration *1
Margin Thickness
Using a vernier caliper, measure the valve overall length.
- Standard overall length:
- 105.85 mm (4.17 in.)
- Minimum overall length:
- 105.35 mm (4.15 in.)
| INSPECT EXHAUST VALVE |
Clean the valves.
Using a gasket scraper, chip off any carbon from the valve head.
Using a wire brush, thoroughly clean the valve.
Using a micrometer, measure the diameter of the valve stem.
- Valve stem diameter:
- 5.465 to 5.480 mm (0.215 to 0.216 in.)
Check the valve face angle.
Grind the valve sufficiently to remove pits and carbon.
Check that the valve is ground to the correct valve face angle.
- Standard valve face angle:
- 45.5°
Using a vernier caliper, measure the valve head margin thickness.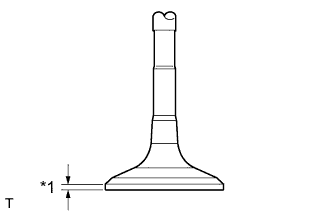
- Standard margin thickness:
- 1.4 mm (0.0551 in.)
- Minimum margin thickness:
- 0.5 mm (0.0197 in.)
If the margin thickness is less than the minimum, replace the exhaust valve.Text in Illustration *1
Margin Thickness
Using a vernier caliper, measure the valve overall length.
- Standard overall length:
- 110.40 mm (4.35 in.)
- Minimum overall length:
- 109.90 mm (4.33 in.)
| INSPECT VALVE GUIDE BUSH OIL CLEARANCE |
Using a caliper gauge, measure the inside diameter of the valve guide bush.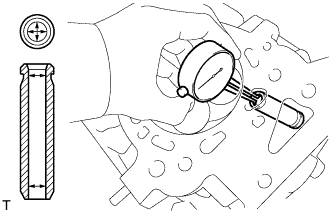
- Bush inside diameter:
- 5.510 to 5.530 mm (0.217 to 0.218 in.)
Subtract the valve stem diameter measurement from the valve guide bush inside diameter measurement.
- Standard Oil Clearance:
Item
Specified Condition
Intake
0.025 to 0.060 mm (0.000984 to 0.00236 in.)
Exhaust
0.030 to 0.065 mm (0.00118 to 0.00256 in.)
- Maximum Oil Clearance:
Item
Specified Condition
Intake
0.08 mm (0.00315 in.)
Exhaust
0.10 mm (0.00394 in.)
| INSPECT INTAKE VALVE SEAT |
Apply a light coat of Prussian blue to the valve face.
Lightly press the valve face against the valve seat.
- NOTICE:
- Do not rotate the valve.
Check the valve face and valve seat by using the following procedure: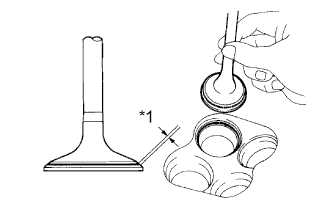
Text in Illustration *1
Width
Check that Prussian blue appears around the entire valve face. If not, replace the valve.
If Prussian blue appears around the entire valve seat, the guide and valve face are concentric. If not, resurface the valve seat.
Check that the valve seat contacts the middle of the valve face with the width between 1.1 and 1.5 mm (0.0433 and 0.0591 in.).
| INSPECT EXHAUST VALVE SEAT |
Apply a light coat of Prussian blue to the valve face.
Lightly press the valve face against the valve seat.
- NOTICE:
- Do not rotate the valve.
Check the valve face and valve seat by using the following procedure: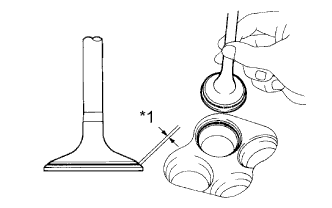
Text in Illustration *1
Width
Check that Prussian blue appears around the entire valve face. If not, replace the valve.
If Prussian blue appears around the entire valve seat, the guide and valve face are concentric. If not, resurface the valve seat.
Check that the valve seat contacts the middle of the valve face with the width between 1.1 and 1.5 mm (0.0433 and 0.0591 in.).
| INSPECT INNER COMPRESSION SPRING |
Using a vernier caliper, measure the free length of the inner compression spring.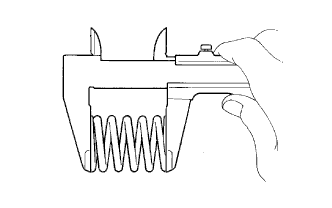
- Standard free length:
- 48.63 mm (1.91 in.)
Using a steel square, measure the deviation of the inner compression spring.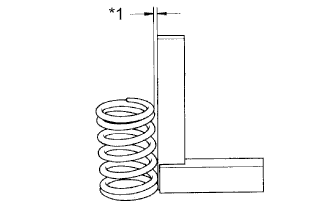
- Maximum deviation:
- 1.0 mm (0.0394 in.)
- Maximum angle (reference):
- 2°
If the deviation is more than the maximum, replace the inner compression spring.Text in Illustration *1
Deviation
Using a spring tester, measure the tension of the valve spring when it is compressed to the specified installation length.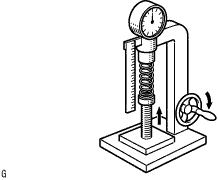
- Standard installed tension:
- 235.6 to 260.4 N (24 to 27 kgf, 53.0 to 58.5 lbf) at 36.9 mm (1.45 in.)