2011-2013 Land Cruiser · Service Manual Vehicle Interior

REMOVAL

Removal / installation · Vehicles built Sep 2011 – Dec 2011


1. REMOVE UPPER RADIATOR SUPPORT SEAL

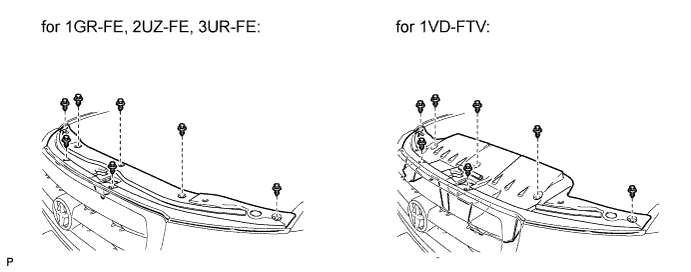
  1. Remove the 7 clips and radiator support seal.

    B180890E02


2. RECOVER REFRIGERANT FROM REFRIGERATION SYSTEM
  1. Start the engine.

  1. Turn the A/C switch on.

  1. Operate the cooler compressor while the engine speed is approximately 1000 rpm for 5 to 6 minutes to circulate the refrigerant and collect the compressor oil remaining in each component into the cooler compressor.

  1. Stop the engine.

  1. Recover the refrigerant from the A/C system using a refrigerant recovery unit.


3. REMOVE FRONT FENDER APRON SEAL LH

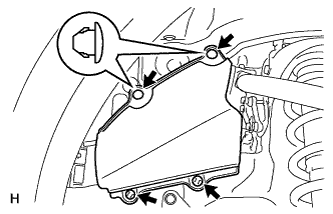
E156500
  1. Remove the 4 clips and seal.


4. REMOVE FAN & GENERATOR V BELT

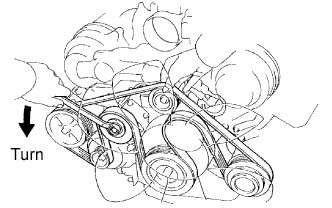
  1. B000809E02
    Loosen the belt tension by turning the belt tensioner counterclockwise, and then remove the fan and generator V belt.

    HINT:
    The pulley bolt for the belt tensioner has left-hand thread.


5. DISCONNECT NO. 1 COOLER REFRIGERANT DISCHARGE HOSE

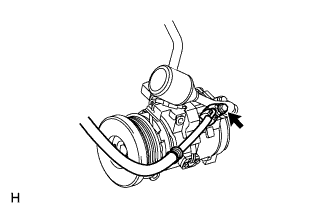
  1. E154182
    Remove the bolt and disconnect the discharge hose from the cooler compressor.

  1. Remove the O-ring from the discharge hose.

    NOTICE:
    Seal the openings of the disconnected parts using vinyl tape to prevent moisture and foreign matter from entering them.


6. DISCONNECT SUCTION HOSE SUB-ASSEMBLY

  1. E154183
    Remove the 2 bolts and disconnect the suction hose from the cooler compressor.

  1. Remove the O-ring from the suction hose.

    NOTICE:
    Seal the openings of the disconnected parts using vinyl tape to prevent moisture and foreign matter from entering them.


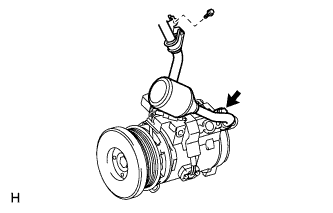
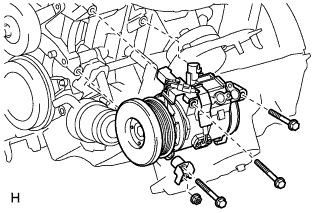
7. REMOVE COOLER COMPRESSOR ASSEMBLY

  1. E154184
    Disconnect the connector.

  1. Remove the 3 bolts, nut, cooler compressor and No. 1 compressor stay.

← COMPONENTS (Sep 2011 – Dec 2011)DISASSEMBLY (Sep 2011 – Dec 2011) →