Home › Vehicle Interior › HEATING / AIR CONDITIONING › COMPRESSOR (for 1VD-FTV)REMOVAL
Removal / installation · Vehicles built from Jan 2012
Versions by build date: Sep 2011 – Dec 2011 from Jan 2012
1.
RECOVER REFRIGERANT FROM REFRIGERATION SYSTEM
Start the engine.
Turn the A/C switch on.
Operate the cooler compressor while the engine speed is approximately 1000 rpm for 5 to 6 minutes to circulate the refrigerant and collect the compressor oil remaining in each component into the cooler compressor.
Stop the engine.
Recover the refrigerant from the A/C system using a refrigerant recovery unit.
2.
REMOVE RADIATOR ASSEMBLY
(Click here )
3.
REMOVE INTERCOOLER ASSEMBLY
(Click here )
4.
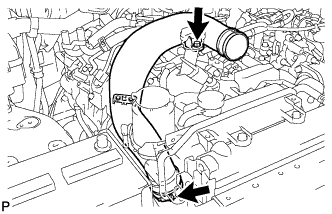
REMOVE NO. 2 AIR CLEANER PIPE SUB-ASSEMBLY
Loosen the hose clamp. Remove the bolt and No. 1 air cleaner pipe.
5.
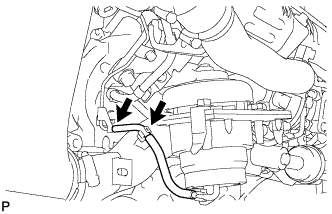
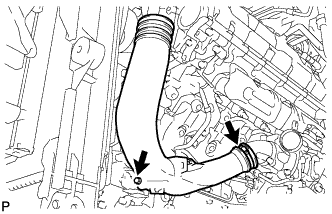
REMOVE NO. 2 INTAKE AIR CONNECTOR PIPE
w/ Intercooler: Disconnect the vacuum hose.
Loosen the hose clamp, and remove the bolt and No. 2 intake air connector pipe.
6.
DISCONNECT NO. 1 COOLER REFRIGERANT DISCHARGE HOSE
Remove the bolt and disconnect the discharge hose from the cooler compressor. Remove the O-ring from the discharge hose.
NOTICE:
Seal the openings of the disconnected parts using vinyl tape to prevent moisture and foreign matter from entering them.
7.
DISCONNECT SUCTION HOSE SUB-ASSEMBLY
Remove the bolt and disconnect the suction hose from the cooler compressor. Remove the O-ring from the suction hose.
NOTICE:
Seal the openings of the disconnected parts using vinyl tape to prevent moisture and foreign matter from entering them.
8.
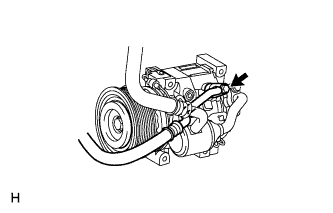
REMOVE COOLER COMPRESSOR ASSEMBLY
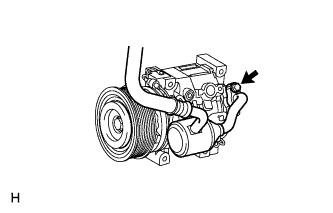
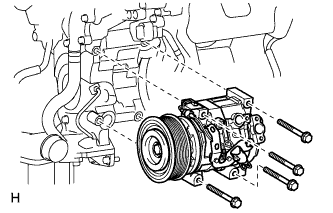
Disconnect the connector. Remove the 4 bolts.
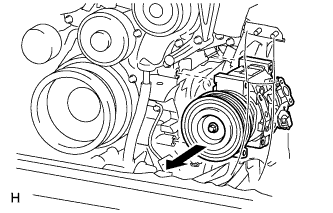
Remove the cooler compressor as shown in the illustration.