INSTALLATION
Removal / installation · Vehicles built from Jan 2012
Versions by build date: Sep 2011 – Dec 2011 from Jan 2012
| 1. INSTALL FRONT PROPELLER SHAFT ASSEMBLY |

- NOTICE:
- Refer to the components illustration for the installation direction of the propeller shaft.
Align the matchmarks on the propeller shaft flange and differential.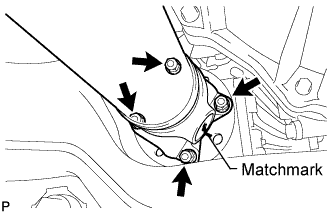

Connect the propeller shaft with the 4 washers and 4 nuts.
- Torque:
- 88 N*m{ 900 kgf*cm , 65 ft.*lbf }
Align the matchmarks on the propeller shaft flange and transfer flange.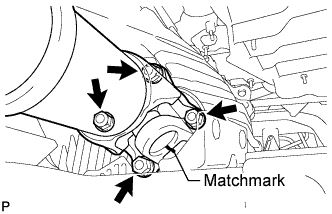
Install the propeller shaft with the 4 washers and 4 nuts.
- Torque:
- 88 N*m{ 900 kgf*cm , 65 ft.*lbf }
| 2. INSTALL PROPELLER SHAFT HEAT INSULATOR |
Install the insulator with the 2 bolts.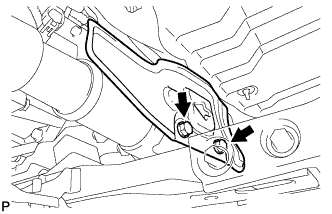
- Torque:
- 16 N*m{ 160 kgf*cm , 12 ft.*lbf }
| 3. INSTALL NO. 2 ENGINE UNDER COVER |
Install the No. 2 engine under cover with the 2 bolts.
- Torque:
- 29 N*m{ 296 kgf*cm , 21 ft.*lbf }
| 4. INSTALL NO. 1 ENGINE UNDER COVER SUB-ASSEMBLY |
Install the No. 1 engine under cover sub-assembly with the 10 bolts.
- Torque:
- 29 N*m{ 296 kgf*cm , 21 ft.*lbf }
| 5. INSTALL FRONT FENDER SPLASH SHIELD SUB-ASSEMBLY LH |
Push in the clip to install the front fender splash shield sub-assembly LH.
Install the 3 bolts and screw.
| 6. INSTALL FRONT FENDER SPLASH SHIELD SUB-ASSEMBLY RH |
Push in the clip to install the front fender splash shield sub-assembly RH.
Install the 3 bolts and 2 screws.