REMOVAL
Removal / installation · Vehicles built Sep 2011 – Dec 2011
Versions by build date: Sep 2011 – Dec 2011 from Jan 2012
| 1.
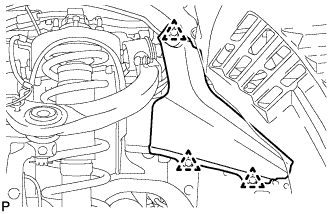
REMOVE FRONT FENDER APRON SEAL FRONT RH
|
 |
- Using a clip remover, remove the 3 clips and fender apron seal.
| 2.
REMOVE FRONT FENDER APRON SEAL REAR RH
|
|
- Using a clip remover, remove the 4 clips and fender apron seal.
| 3.
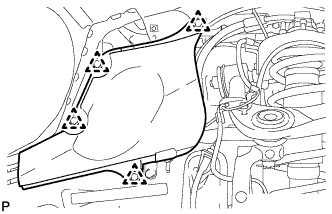
REMOVE FRONT FENDER SPLASH SHIELD SUB-ASSEMBLY LH
|
|
Remove the 3 bolts and screw.
Turn the clip indicated by the arrow in the illustration to remove the fender splash shield.
| 4.
REMOVE FRONT FENDER SPLASH SHIELD SUB-ASSEMBLY RH
|
|
- HINT:
- Use the same procedures described for the LH side.
| 5.
REMOVE NO. 1 ENGINE UNDER COVER SUB-ASSEMBLY
|
|
- Remove the 10 bolts and under cover.
| 6.
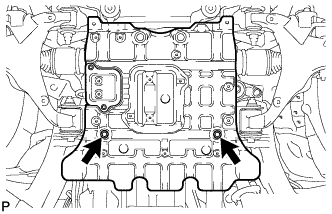
REMOVE NO. 2 ENGINE UNDER COVER
|
|
- Remove the 2 bolts and under cover.
| 7.
REMOVE UPPER RADIATOR SUPPORT SEAL
|
|
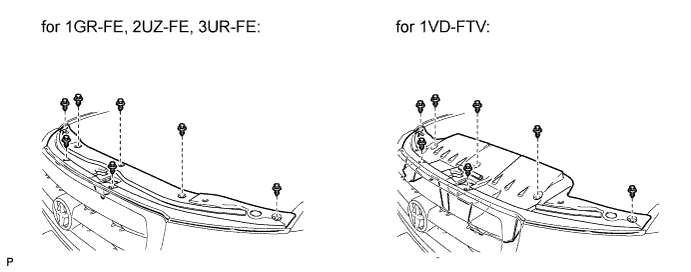
Remove the 7 clips and radiator support seal.

| 8.
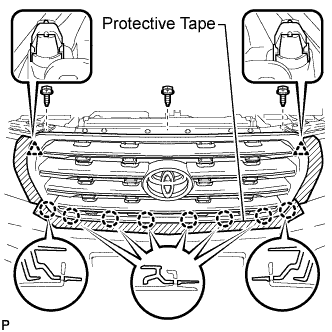
REMOVE RADIATOR GRILLE ASSEMBLY
|
|
Put protective tape around the radiator grille.
Remove the 3 screws.
Detach the 2 clips and 8 claws, and remove the radiator grille.
| 9.
REMOVE HEADLIGHT ASSEMBLY RH |
|
for Standard: (Click here)for HID Headlight: (Click here)
- HINT:
- Use the same procedures described for LH side.
| 10.
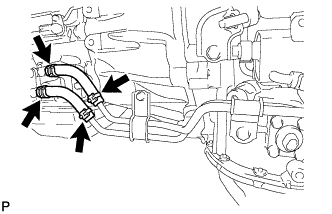
DISCONNECT TRANSMISSION OIL COOLER HOSE |
|
Disconnect the 2 transmission oil cooler hoses.
| 11.
DISCONNECT INLET NO. 1 OIL COOLER HOSE AND OUTLET NO. 1 OIL COOLER HOSE |
|
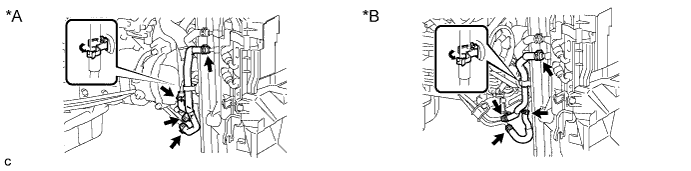
Text in Illustration
*A
|
for 1VD-FTV
|
*B
|
for 3UR-FE
|
Detach the claw to open the flexible hose clamp.
Disconnect the inlet and outlet oil cooler hoses.
| 12.
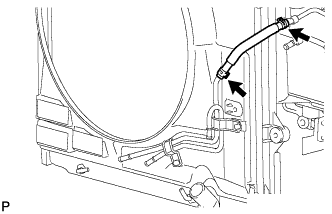
DISCONNECT INLET NO. 2 OIL COOLER HOSE AND INLET NO. 3 OIL COOLER HOSE |
|
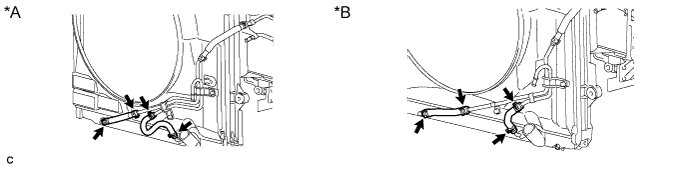
Text in Illustration
*A
|
for 1VD-FTV
|
*B
|
for 3UR-FE
|
Disconnect the 2 inlet oil cooler hoses.
| 13.
DISCONNECT INLET NO. 4 OIL COOLER HOSE |
|
| 14.
REMOVE OIL COOLER TUBE |
|
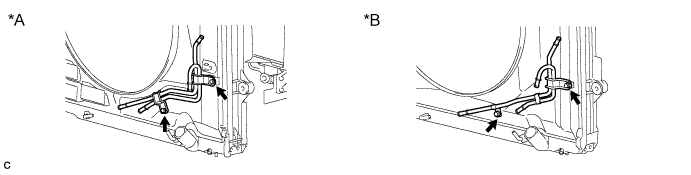
Text in Illustration
*A
|
for 1VD-FTV
|
*B
|
for 3UR-FE
|
Remove the 2 bolts and oil cooler tube.
| 15.
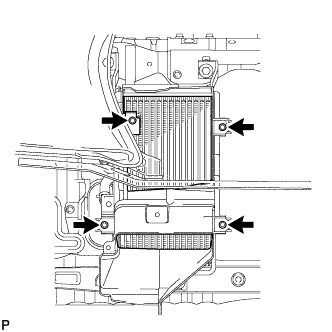
REMOVE TRANSMISSION OIL COOLER AIR DUCT |
|
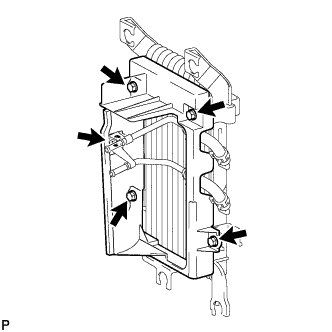
Remove the 4 bolts and transmission oil cooler air duct.
| 16.
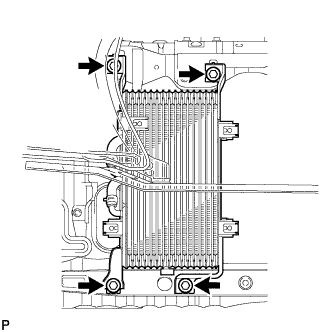
REMOVE OIL COOLER ASSEMBLY |
|
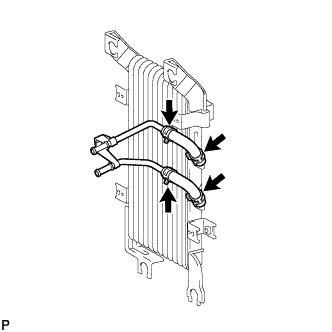
Remove the 4 bolts and oil cooler.
- Remove the 5 bolts and rear transmission oil cooler air duct.
- Disconnect the oil cooler inlet hose and outlet hose and remove the tube.