REASSEMBLY
Removal / installation · Vehicles built from Sep 2011
| 1. INSTALL WIRING AIR CONDITIONING HARNESS SUB-ASSEMBLY |
| 2. INSTALL REAR EVAPORATOR TEMPERATURE SENSOR |

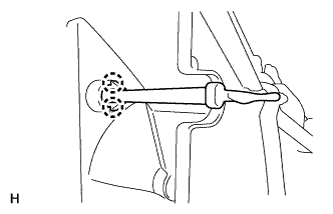  |
Attach the 2 claws to install the sensor.
| 3. INSTALL EVAPORATOR SUB-ASSEMBLY |
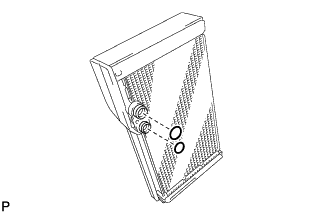 |
Sufficiently apply compressor oil to 2 new O-rings and the fitting surface of the hose joint.
- Compressor oil:
- ND-OIL 8 or equivalent
Install the 2 O-rings to the evaporator.
Install the evaporator.
Install the rear cooling unit case LH with the 12 screws.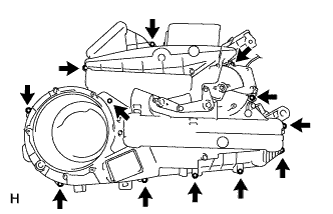
| 4. INSTALL BLOWER MOTOR CONTROLLER |
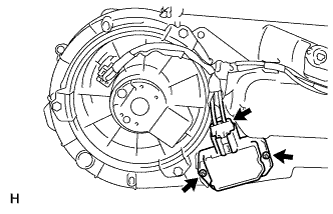 |
Install the blower motor controller with the 2 screws.
Connect the connector.
| 5. INSTALL REAR BLOWER MOTOR |
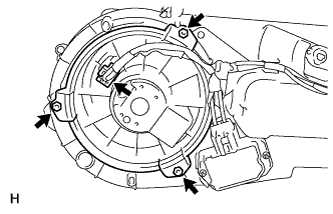 |
Install the blower motor with the 3 screws.
Connect the connector.
| 6. INSTALL HEATER RADIATOR UNIT SUB-ASSEMBLY |
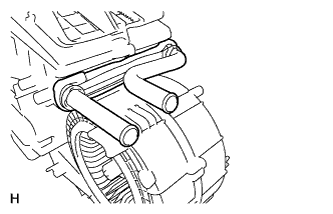 |
Install the radiator unit to the rear cooling unit.
Install the heater clamp with the screw and attach the claw.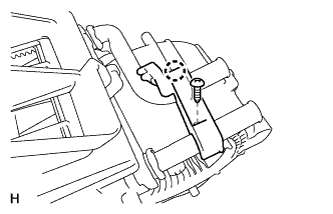
| 7. INSTALL REAR COOLING UNIT EXPANSION VALVE |
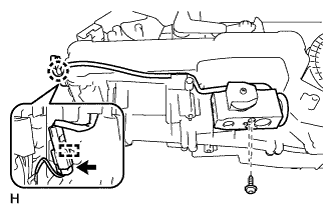 |
Using a 4 mm hexagon wrench, install the expansion valve with the 2 hexagon bolts.
- Torque:
- 3.5 N*m{ 36 kgf*cm , 31 in.*lbf }
Attach the clamp.
Connect the connector.
| 8. INSTALL AIR CONDITIONER ACCESSORY ASSEMBLY |
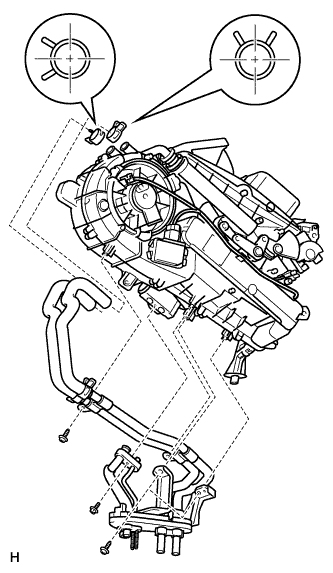 |
Sufficiently apply compressor oil to 2 new O-rings and the fitting surface of the hose joint.
- Compressor oil:
- ND-OIL 8 or equivalent
Install the 2 O-rings to the air conditioner accessory assembly.
Install the air conditioner accessory assembly.
Using pliers, grip the claws of the clips and slide the 2 clips.
Install the bolt and 4 screws.
- Torque:
- 5.4 N*m{ 55 kgf*cm , 48 in.*lbf }
Install new packing as shown in the illustration.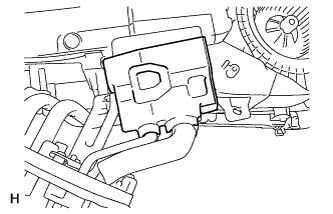
| 9. INSTALL REAR MODE DAMPER SERVO SUB-ASSEMBLY |
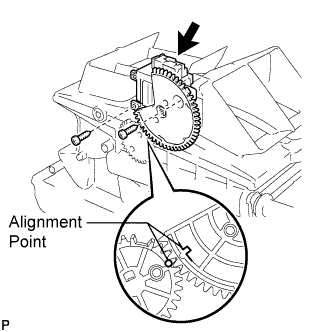 |
Align the damper servo as shown in the illustration, and install it with the 2 screws.
Connect the connector.
Install the plate cover with the 2 screws.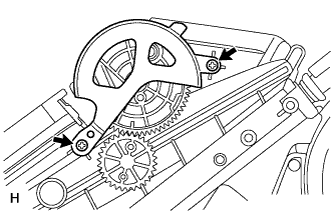
| 10. INSTALL NO. 2 AIR MIX DAMPER SERVO SUB-ASSEMBLY |
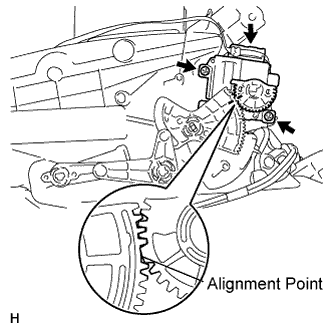 |
Align the damper servo as shown in the illustration, and install it with the 2 screws.
Connect the connector.
| 11. INSTALL REAR AIR MIX DAMPER SERVO SUB-ASSEMBLY |
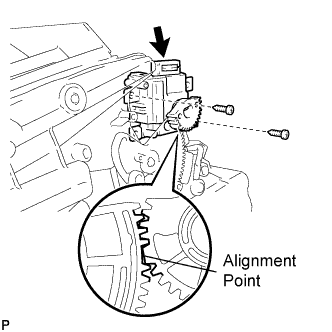 |
Align the damper servo as shown in the illustration, and install it with the 2 screws.
Connect the connector.
| 12. INSTALL DRAIN COOLER HOSE |
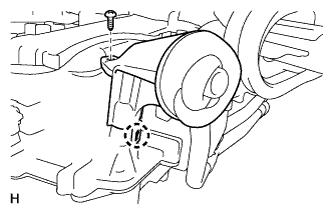 |
Attach the claw to install the drain hose.
Install the screw.
| 13. INSTALL REAR SIDE NO. 3 AIR DUCT |
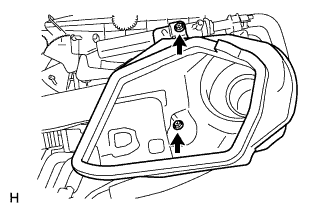 |
Install the duct with the 2 screws.
- Torque:
- 5.4 N*m{ 55 kgf*cm , 48 in.*lbf }
| 14. INSTALL REAR SIDE NO. 2 AIR DUCT |
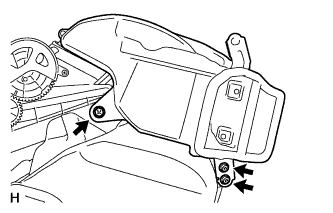 |
Install the duct with the 3 screws.
- Torque:
- 5.4 N*m{ 55 kgf*cm , 48 in.*lbf }