Removal / installation · Vehicles built Sep 2011 – Dec 2011
Versions by build date: Sep 2011 – Dec 2011from Jan 2012
1.
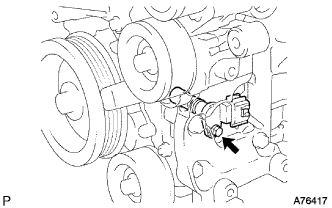
INSTALL CRANKSHAFT POSITION SENSOR
Apply a light coat of engine oil to the O-ring of the sensor.
NOTICE:
When reusing the sensor, inspect the O-ring.
If the O-ring has scratches or cuts, replace the sensor.
Install the sensor with the bolt.
Torque:
9.0 N*m{
92 kgf*cm
, 80 in.*lbf
}
Connect the sensor connector.
2.
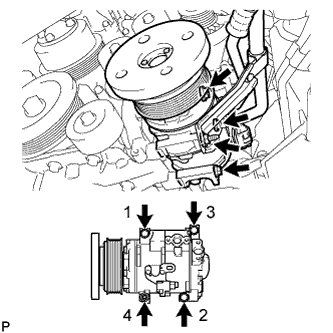
CONNECT COOLER COMPRESSOR ASSEMBLY
Fix the cooler compressor in place with the stud bolt.
Torque:
10 N*m{
102 kgf*cm
, 7 ft.*lbf
}
Install the cooler compressor with the nut and 3 bolts in several steps in the sequence shown in the illustration.
Torque:
24 N*m{
250 kgf*cm
, 18 ft.*lbf
}
Connect the cooler compressor connector.
3.
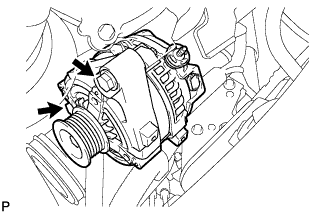
INSTALL GENERATOR ASSEMBLY
Install the generator with the 2 bolts.
Torque:
43 N*m{
438 kgf*cm
, 32 ft.*lbf
}
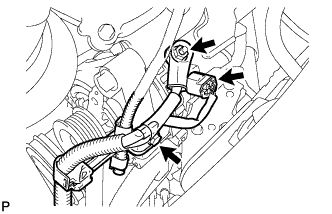
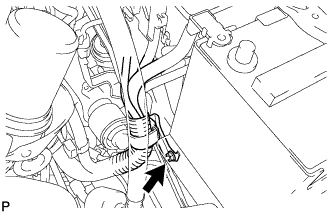
Connect the wire harness clamp bracket with the bolt.
Torque:
8.0 N*m{
82 kgf*cm
, 71 in.*lbf
}
Install the wire harness clamp to the bracket.
Connect the generator wire with the nut.
Torque:
9.8 N*m{
100 kgf*cm
, 87 in.*lbf
}
Install the terminal cap.
Connect the generator connector.
Connect the wire harness clamp bracket with the nut.
Torque:
8.0 N*m{
82 kgf*cm
, 71 in.*lbf
}
4.
INSTALL FAN & GENERATOR V BELT
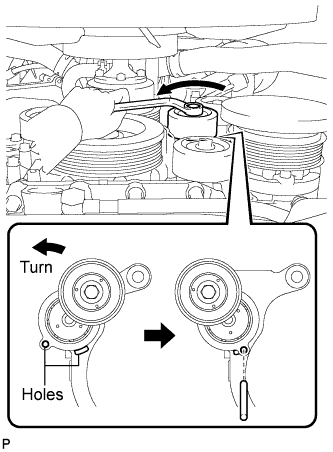
While turning the belt tensioner counterclockwise, align the holes, and then insert a bar of φ6 mm (0.236 in.) into the holes to fix the belt tensioner in place.
Install the fan and generator V belt.
HINT:
If it is hard to install the fan and generator V belt, perform the following procedures.
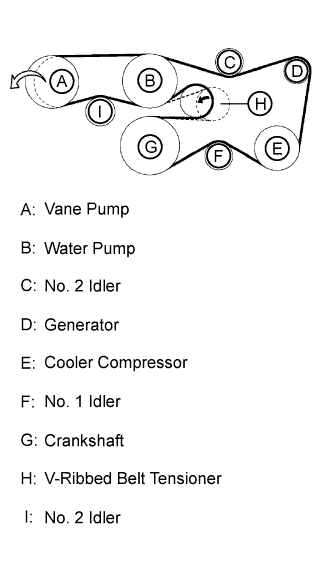
Put the fan and generator V belt on all parts except the vane pump, as shown in the illustration.
While releasing the belt tension by turning the belt tensioner counterclockwise, put the fan and generator V belt on the vane pump.
While turning the belt tensioner counterclockwise, remove the bar.
5.
INSTALL NO. 1 ENGINE UNDER COVER SUB-ASSEMBLY
Install the engine under cover with the 10 bolts.
Torque:
29 N*m{
296 kgf*cm
, 21 ft.*lbf
}
6.
INSTALL FRONT FENDER APRON SEAL LH
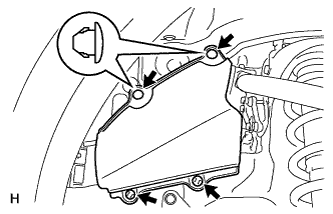
Install the seal with the 4 clips.
7.
INSTALL FRONT FENDER SPLASH SHIELD SUB-ASSEMBLY RH
HINT:
Use the same procedures described for the LH side.
8.
INSTALL FRONT FENDER SPLASH SHIELD SUB-ASSEMBLY LH
Remove the 3 bolts and screw.
Turn the clip indicated by the arrow in the illustration to remove the fender splash shield.
9.
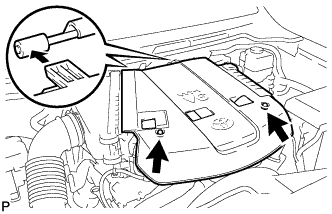
INSTALL V-BANK COVER
Install the V-bank cover with the 2 cap nuts.
Torque:
7.5 N*m{
76 kgf*cm
, 66 in.*lbf
}
10.
CONNECT CABLE TO NEGATIVE BATTERY TERMINAL
NOTICE:
When disconnecting the cable, some systems need to be initialized after the cable is reconnected (Click here).