INSTALLATION
Removal / installation · Vehicles built from Jan 2012
| 1. INSTALL REAR CRANKSHAFT OIL SEAL |

Apply MP grease to the lip of a new rear crankshaft oil seal.
- NOTICE:
- Do not allow foreign matter to contact the lip of the oil seal.
- Do not allow MP grease to contact the dust seal.
- Do not allow foreign matter to contact the lip of the oil seal.
Using SST and a hammer, tap in the rear crankshaft oil seal until its surface is flush with the rear oil seal retainer edge.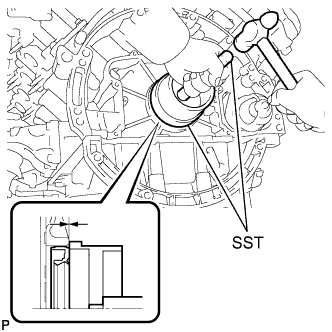

- SST
- 09223-15030
09950-70010 (09951-07150)
- NOTICE:
- Keep the lip free from foreign matter.
- Do not tap the rear crankshaft oil seal at an angle.
- Keep the lip free from foreign matter.
| 2. INSTALL DRIVE PLATE AND RING GEAR SUB-ASSEMBLY |
Using SST, hold the crankshaft.
- SST
- 09213-70011
(09213-70020)
09330-00021
Install the crankshaft angle sensor rotor.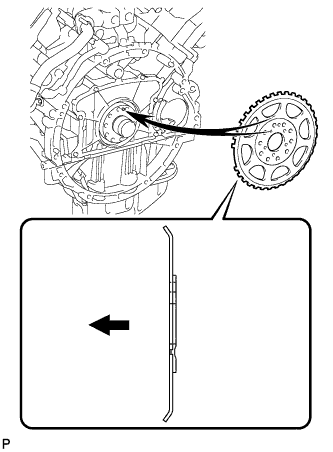
Text in Illustration 
Engine Side
- HINT:
- Align the pin hole of the crankshaft angle sensor rotor with the pin of the crankshaft.
- As the crankshaft angle sensor rotor is not reversible, be sure to install it so that it is facing in the direction shown in the illustration.
- Align the pin hole of the crankshaft angle sensor rotor with the pin of the crankshaft.
Install the drive plate and ring gear and the rear drive plate spacer to the crankshaft.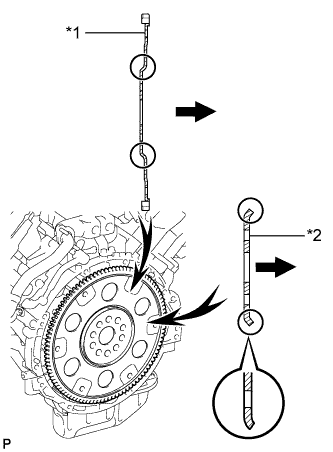
Text in Illustration *1
Drive Plate and Ring Gear
*2
Rear Drive Plate Spacer
Transmission Side
- HINT:
- As the rear drive plate spacer and the drive plate and ring gear are not reversible, be sure to install them so that they are facing in the directions shown in the illustration.
Install the drive plate and ring gear and bolts.
- HINT:
- The bolts are tightened in 2 progressive steps.
Clean the bolts and bolt holes.
Apply adhesive to 2 or 3 threads at the end of each of the 10 bolts.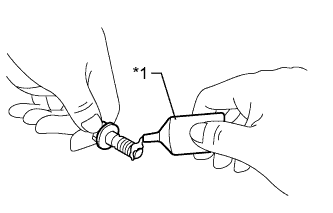
- Adhesive:
- Toyota Genuine Adhesive 1324, Three Bond 1324 or equivalent
Text in Illustration *1
Adhesive
Step 1: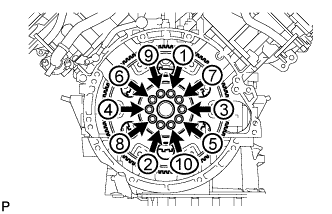
Uniformly install and tighten the 10 new bolts in several steps in the sequence shown in the illustration.- Torque:
- 30 N*m{ 301 kgf*cm , 22 ft.*lbf }
Mark the top of each drive plate installation bolt with paint.
Step 2:
Tighten the drive plate installation bolts 90°.Check that the painted marks are now at a 90° angle to the top.
- NOTICE:
- Do not start the engine for at least an hour after installing the drive plate.
| 3. INSTALL AUTOMATIC TRANSMISSION ASSEMBLY |